Manuals

barnes reloading manual pdf

Barnes Reloading Manual PDF: A Comprehensive Guide

Barnes reloading manuals, available as PDFs, provide crucial data for handloaders seeking precision and performance with their bullets․ These digital guides offer comprehensive
load data, ensuring safe and accurate reloading practices for various calibers and bullet types; Accessing the latest PDF version is essential for optimal results․

Barnes reloading data represents a commitment to providing handloaders with the information needed to achieve exceptional accuracy and consistent performance․ This data, primarily distributed as PDF documents, is meticulously researched and tested using Barnes Bullets, ensuring reliable results when followed correctly․ The core principle behind Barnes’ approach is to offer a resource tailored specifically to their bullet designs, acknowledging the unique ballistic characteristics of each․

Understanding that handloading is a precise science, Barnes emphasizes the importance of utilizing current data․ Older manuals may contain information that doesn’t reflect advancements in powder technology or bullet design․ Therefore, accessing the latest PDF version from the official Barnes Bullets website is paramount․ This data is intended for experienced reloaders familiar with safe handloading practices, and it’s crucial to adhere to all safety guidelines provided within the manual․

The PDF format allows for easy access and portability, enabling reloaders to consult the data at their bench or in the field․ However, compatibility with a modern PDF viewer, like Adobe Reader, is essential for proper display and functionality, especially regarding load charge visibility․

Understanding the Importance of a PDF Manual

The Barnes Reloading Manual in PDF format offers several key advantages for the serious handloader․ Firstly, it ensures access to the most up-to-date load data, crucial as reloading components and techniques evolve․ Unlike printed manuals which can become outdated, the PDF is easily updated and downloadable from the Barnes Bullets website․ Secondly, the digital format allows for convenient searching and referencing of specific calibers, bullets, and powder combinations․

Furthermore, a PDF manual facilitates portability; reloaders can access the data on various devices – laptops, tablets, or smartphones – at their loading bench or even in the field․ However, proper display is vital․ PDF compatibility, particularly with Adobe Reader, is essential to avoid issues like blacked-out load charges, which can be resolved through specific rendering adjustments within the software settings․

Ultimately, the PDF manual serves as a comprehensive and readily available resource, empowering reloaders with the precise information needed for safe, accurate, and consistent ammunition creation using Barnes Bullets․

Accessing the Barnes Reloading Manual PDF

Obtaining the Barnes Reloading Manual PDF is a straightforward process, directly through the Barnes Bullets official website․ Navigate to the “Load Data” section – accessible via barnesbullets․com/load-data/ – where you’ll find links to download the latest manual for various calibers and bullet types․ These manuals are offered as free downloads, requiring no registration or subscription;

It’s important to ensure you are downloading the manual from the official source to guarantee the data’s accuracy and validity․ Once downloaded, the PDF should be opened with a compatible PDF viewer, such as Adobe Reader․ New reloading data must be opened in an up-to-date viewer to avoid potential display issues․

If you encounter difficulties accessing or opening the manual, Barnes Bullets provides customer support via email at customerservice@barnesbullets․com or by phone at 800․574․9200, ready to assist with any technical challenges․

Navigating the Barnes Reloading Data

Barnes reloading data is meticulously organized for easy use․ Locating specific caliber information and understanding load tables are key to successful and safe handloading practices․

Locating Specific Caliber Data

Barnes Bullets’ load data is readily accessible through their website, organized by caliber for streamlined navigation․ Users can efficiently find reloading guidelines tailored to their specific cartridge․ The website features a comprehensive list of calibers, allowing handloaders to quickly pinpoint the data relevant to their needs․

PDF documents are categorized by caliber, ensuring easy download and reference․ Within each PDF, data is further segmented by bullet type and weight, providing a granular level of detail․ A clear table of contents within each PDF facilitates quick access to desired information․

Effective searching within the PDF itself, using keywords like bullet weight or powder type, can further expedite the process․ Barnes’ commitment to user-friendly data presentation ensures that handloaders can easily locate the precise information required for safe and accurate reloading․

Understanding Load Data Tables

Barnes reloading data tables are meticulously structured to present critical information in a clear and concise format․ Each table typically includes columns for powder type, charge weight (in grains), bullet type, overall cartridge length (COAL), and estimated velocity (in feet per second)․ Pressure data, often expressed in CUP (Copper Units of Pressure) or PSI (Pounds per Square Inch), is also frequently included․


Understanding the units of measurement is crucial for accurate reloading․ Charge weights are always given in grains, and COAL is measured in inches․ Velocity is presented in feet per second and represents an estimate based on Barnes’ testing․

Footnotes within the tables often provide important clarifications or warnings regarding specific loads․ Always carefully review these notes before proceeding․ The tables are designed to be a comprehensive resource, enabling handloaders to select appropriate components and charges for optimal performance and safety․

Interpreting Key Data Points (Pressure, Velocity)

Pressure and velocity are paramount when analyzing Barnes reloading data․ Pressure, measured in CUP or PSI, indicates the force exerted within the cartridge during firing․ Exceeding maximum pressure levels is dangerous and can lead to firearm damage or injury․ Barnes data provides pressure limits to ensure safe operation․

Velocity, expressed in feet per second (fps), reflects the bullet’s speed as it leaves the barrel․ Velocity is influenced by factors like powder type, charge weight, bullet weight, and barrel length․ Barnes’ published velocities are averages obtained under specific testing conditions․

It’s vital to understand that actual velocities may vary based on your firearm and environmental conditions․ Always start with the recommended starting load and carefully monitor for signs of excessive pressure․ Consistent pressure and velocity readings are indicators of a well-tuned and safe load․

Troubleshooting PDF Display Issues

Barnes reloading PDFs sometimes present display problems, like blacked-out load data․ Common fixes involve updating your PDF viewer or adjusting rendering settings for optimal viewing․

Blacked-Out Load Charges: Common Problem

A frequently encountered issue when accessing Barnes reloading data PDFs is the appearance of blacked-out load charges․ Instead of clearly visible powder weights and other critical data, users often find sections of the PDF rendered as solid black, rendering the information unusable․ This isn’t a problem with the data itself, but rather a compatibility issue between the PDF and certain PDF viewer settings or software versions․

This frustrating problem typically arises due to how the PDF is rendered by the viewer․ The text isn’t actually missing; it’s simply being obscured․ It’s important to understand that Barnes Bullets provides these PDFs with the expectation that users have an up-to-date and properly configured PDF reader, specifically Adobe Reader․ However, even with Adobe Reader, default settings can sometimes cause this issue to occur․ Fortunately, several straightforward solutions can resolve this, allowing you to access the vital reloading information․

Solution 1: Saving and Opening with Adobe Reader

The first and often simplest solution to address blacked-out load charges is to save the Barnes reloading data PDF to your computer and then open it directly with Adobe Reader․ Avoid opening the PDF within a web browser, as this can sometimes introduce rendering inconsistencies․ Right-click the PDF link on the Barnes Bullets website and select “Save Link As…” to download the file to a convenient location․

Once downloaded, locate the file and double-click to open it with Adobe Reader․ Ensure that Adobe Reader is your default PDF viewer․ This process bypasses potential compatibility issues with your browser’s built-in PDF viewer and allows Adobe Reader to render the document natively․ This often resolves the issue, displaying the load charges clearly and accurately, enabling you to proceed with your reloading preparations safely and effectively․

Solution 2: Adjusting Adobe Reader Preferences ― Page Display

If saving and opening with Adobe Reader doesn’t resolve the blacked-out load charge issue, adjusting the page display preferences within Adobe Reader is the next step․ Begin by opening the PDF in Adobe Reader․ Navigate to “Edit” > “Preferences”․ In the Preferences window, select “Page Display” from the categories list on the left․

Within the Page Display settings, locate the “Rendering” section․ Here, you’ll find a dropdown menu labeled “Smooth Text”․ Change this setting from its default value (likely “Smooth”) to “None”․ This adjustment alters how Adobe Reader renders the text, often resolving the blacked-out issue․ Click “OK” to save the changes and reload the PDF to see if the load charges are now visible․ This is a common fix for rendering problems․

Solution 3: Rendering Settings ― “Smooth Text” to “None”

Should the previous steps fail to reveal the obscured load data, a more specific adjustment to Adobe Reader’s rendering settings is required․ This focuses directly on the “Smooth Text” feature, a common culprit behind the blacked-out charge weights․ Open the problematic Barnes reloading PDF within Adobe Reader․ Access the preferences by selecting “Edit” > “Preferences” from the menu bar․

In the Preferences window, navigate to “Page Display” under the “Categories” section․ Locate the “Rendering” panel․ The key setting here is “Smooth Text”․ Change this dropdown option from its current setting – typically “Smooth” – to “None”; This disables text smoothing, often making the hidden load data visible․ Save the changes and reload the PDF; the load charges should now be clearly displayed․

Contacting Barnes Customer Service for Assistance

If, despite implementing the troubleshooting steps, the load charges remain blacked out or unreadable within the Barnes Reloading Manual PDF, direct assistance from Barnes Customer Service is readily available․ They are equipped to provide solutions and ensure you have access to accurate, usable data․ You can reach their dedicated support team via email at customerservice@barnesbullets․com․

Alternatively, for immediate support, contact them by phone at 800․574․9200․ Be prepared to describe the issue you’re experiencing, including the specific PDF document and the troubleshooting steps already attempted․ Barnes Customer Service can often send you a functional copy of the data directly, bypassing any potential PDF rendering issues․ Their expertise guarantees you receive the necessary information for safe and effective reloading․

Safety Precautions & Disclaimer

Always prioritize safe handloading practices when using Barnes data․ This data is specifically for Barnes Bullets; using other brands is not recommended and voids liability․

Importance of Safe Handloading Practices

Handloading is a precise process demanding meticulous attention to detail and a thorough understanding of reloading principles․ Prioritizing safety is paramount, as improper loading can lead to dangerous situations, including firearm damage and potential injury․ Always consult multiple reliable sources, cross-referencing data to ensure accuracy and consistency․

Strictly adhere to published load data provided by Barnes, never exceeding recommended maximum pressures; Regularly inspect all components – cases, primers, and powder – for any signs of damage or defects․ Maintain a clean and organized workspace, free from distractions, to minimize errors․ Understand the effects of different powders, primers, and bullet weights on pressure and velocity․

Proper case preparation is crucial, including thorough cleaning, resizing, and primer pocket inspection․ Always use a calibrated scale to accurately measure powder charges․ Double-check every step of the process before proceeding․ Remember, safe handloading is a responsibility, and consistent adherence to best practices is essential for a rewarding and safe shooting experience․

Using Barnes Bullets with Other Manufacturers’ Data

While tempting, utilizing load data from other bullet manufacturers with Barnes bullets is strongly discouraged․ Barnes bullets possess unique characteristics – often featuring all-copper construction and specific geometries – that influence pressure and velocity dynamics․ Data developed for traditional jacketed bullets may not accurately reflect these differences, potentially leading to unsafe or suboptimal performance․

Pressure curves can vary significantly between bullet designs, meaning a load safe for one bullet may be dangerously overpressured with a Barnes bullet․ Velocity discrepancies can also occur, impacting accuracy and trajectory․ Barnes explicitly advises against this practice, emphasizing the importance of using data specifically tailored to their bullets․

To ensure safety and achieve optimal results, always rely on the load data provided by Barnes in their reloading manuals or on their website․ Experimenting with external data introduces unacceptable risks․ Prioritize safety and accuracy by adhering to Barnes’ recommendations for powder selection, primer choices, and seating depths when using their bullets․

Barnes Bullets explicitly states that the load data provided is for informational purposes only and comes with a critical disclaimer of liability․ Handloading inherently involves risks, and Barnes cannot control the individual practices or components used by reloaders․ Therefore, no responsibility is assumed by Barnes Bullets, Inc․ for the use of this data․

The user assumes full and sole discretion in interpreting and applying the provided load data․ Factors such as variations in firearms, components, and environmental conditions can significantly impact results․ It is the reloader’s responsibility to verify the accuracy and suitability of the data for their specific setup․

Barnes emphasizes that this data is used at the user’s own risk․ Always adhere to safe handloading practices and consult multiple reliable sources before reloading․ This disclaimer underscores the importance of responsible reloading and acknowledges the inherent risks involved in the process․

Data Supersedes Previous Publications

Barnes Bullets clearly communicates that the load data available on their website, specifically within the PDF manuals, is the most current and authoritative source of information․ This data officially replaces, supersedes, and renders obsolete any and all previously published load data released by Barnes Bullets, Inc․ in prior manuals or formats․

Reloaders are strongly advised to disregard any older data they may possess and rely exclusively on the latest PDF version for accurate and safe reloading practices․ Using outdated information can lead to dangerous pressure levels, inaccurate results, and potential firearm damage or injury․

Barnes prioritizes providing up-to-date information to ensure the safety and performance of their bullets․ This policy of superseding previous publications demonstrates their commitment to responsible handloading and continuous improvement of their data resources․ Always confirm you have the newest PDF before beginning any reloading process․

Optimizing Loads with Barnes Bullets

Achieving peak accuracy with Barnes bullets often involves fine-tuning the cartridge overall length (COAL) and experimenting with bullet jump, considering throat length limitations․

Bullet Jump and Throat Length Considerations

Optimizing accuracy with Barnes TSX, Tipped TSX, and LRX bullets frequently necessitates careful consideration of bullet jump – the distance between the bullet’s ogive and the rifling․ This distance, ranging from ․050” to ․250” or even more, significantly impacts performance․ However, several factors constrain the achievable jump․

Rifle throat length, the distance from the case mouth to the start of the rifling, is a primary limitation․ Magazine length also plays a crucial role, dictating the maximum cartridge overall length (COAL)․ Finally, the bullet length itself influences how much jump can be accommodated․

When establishing a starting COAL, begin with a minimum jump of ․050”․ Systematic testing of different seating depths allows you to identify the “sweet spot” where your rifle exhibits the greatest precision․ Adjusting bullet jump can unlock enhanced accuracy and consistent groupings․

Recommended Starting Cartridge Overall Length (COAL)

Establishing a safe and accurate starting Cartridge Overall Length (COAL) is paramount when reloading with Barnes bullets․ While specific recommendations vary by caliber and rifle, a general guideline exists to ensure compatibility and optimal performance․ Begin with a COAL that positions the bullet with a minimum jump of ․050” off the rifling․

This initial jump allows the bullet to enter the barrel smoothly and consistently․ However, remember that magazine length and throat length are critical constraints․ Always verify that the chosen COAL allows the cartridge to reliably feed from your magazine․

Carefully measure the distance from the base of the case to the ogive of the bullet to confirm the ․050” jump․ From this starting point, incrementally adjust the seating depth in small increments, observing changes in accuracy and pressure signs․

Testing Different Seating Depths for Accuracy

Fine-tuning bullet seating depth is crucial for maximizing accuracy with Barnes bullets․ After establishing a starting COAL with a ․050” jump, systematically test variations in seating depth․ Adjust the seating die in small increments – typically 0․010” to 0․020” at a time – moving the bullet closer to, or further from, the rifling․

Each seating depth change requires reloading a new batch of cartridges and conducting thorough accuracy testing at a consistent range․ Carefully observe group sizes and shot placement, noting any improvements or regressions․ Pay close attention to pressure signs, as moving the bullet too far forward can increase pressure levels․

Document each seating depth and corresponding results meticulously․ The goal is to identify the “sweet spot” where the bullet exhibits the tightest groups and most consistent performance․ This process may require considerable experimentation, but the rewards in accuracy are well worth the effort․

Specific Bullet Types & Load Data

Barnes offers specialized reloading guidelines for its TSX, Tipped TSX, and LRX bullets, each designed for optimal performance; Consult the PDF manual for caliber-specific data and recommendations․

Barnes TSX Bullets ⏤ Reloading Guidelines

Barnes TSX (Triple-Shock X) bullets are renowned for their exceptional weight retention and penetration, making them ideal for a wide range of hunting applications․ When reloading with TSX bullets, it’s crucial to understand that your rifle may exhibit a preference for a specific “bullet jump” – the distance between the bullet’s ogive and the rifling․

This jump can vary significantly, ranging from ․050” to ․250” or even more, and is influenced by factors like throat length, magazine length, and the bullet’s overall length․ Barnes recommends initiating your cartridge overall length (COAL) with a minimum jump of ․050” off the lands․

Experimentation with different seating depths is encouraged to discover the “sweet spot” for your particular rifle, potentially enhancing accuracy․ Always refer to the Barnes Reloading Manual PDF for specific load data tailored to your caliber and powder selection․ Remember, consistent results depend on meticulous attention to detail and adherence to safe handloading practices․

Barnes Tipped TSX Bullets ⏤ Reloading Guidelines

Barnes Tipped TSX bullets combine the proven performance of the TSX with a polymeric tip, enhancing ballistic coefficient and promoting rapid expansion․ When reloading with these projectiles, understanding bullet jump is paramount for achieving optimal accuracy․ Like the standard TSX, rifles often demonstrate a preference for a specific distance between the bullet and the rifling, potentially ranging from ․050” to ;250” or greater․

Begin your COAL (Cartridge Overall Length) development by establishing a minimum jump of ․050” off the lands․ Systematic testing of varying seating depths allows you to pinpoint the most accurate load for your firearm․ Always consult the Barnes Reloading Manual PDF for precise load data specific to your chosen caliber and powder․

Remember that throat length, magazine constraints, and bullet dimensions all influence the achievable bullet jump․ Prioritize safety and meticulousness throughout the reloading process for consistent and reliable results․

Barnes LRX Bullets ⏤ Reloading Guidelines

Barnes LRX (Long Range X) bullets are specifically designed for exceptional long-range performance, featuring a streamlined profile and aggressive nose geometry․ Similar to TSX and Tipped TSX bullets, optimizing bullet jump is crucial when reloading with LRX projectiles․ Expect potential preferences ranging from ․050” to ․250” or more, dictated by your rifle’s characteristics․

Start your load development by establishing a minimum ․050” jump off the rifling, carefully adjusting the Cartridge Overall Length (COAL) accordingly․ Thorough testing of different seating depths will reveal the sweet spot for accuracy in your specific firearm․ Always refer to the Barnes Reloading Manual PDF for detailed load data tailored to your caliber and powder selection;

Consider the interplay between throat length, magazine limitations, and bullet length when determining the optimal bullet jump․ Prioritize safe handloading practices and meticulous attention to detail for consistent, long-range precision․

Components & Compatibility

Successful reloading with Barnes bullets hinges on selecting compatible powders, primers, and cases․ Refer to the Barnes Reloading Manual PDF for recommended components and optimal performance guidelines․

Powder Selection for Barnes Bullets

Choosing the right powder is paramount when reloading with Barnes bullets, as it directly impacts pressure, velocity, and accuracy․ The Barnes Reloading Manual PDF provides specific powder recommendations for each caliber and bullet weight combination; It’s crucial to adhere to these guidelines, as Barnes bullets often perform optimally with powders that might differ from those typically used with traditional jacketed bullets․

Different Barnes bullet designs – TSX, Tipped TSX, and LRX – may exhibit varying sensitivities to powder type․ The manual details suitable powder burn rates, ranging from slower-burning powders for larger calibers to faster-burning options for smaller cartridges․ Always consult the PDF for the most up-to-date and accurate powder data․ Experimentation outside of the recommended list is strongly discouraged, as it can lead to unsafe pressures or suboptimal performance․ Prioritize safety and precision by following the Barnes’ specified powder selections․

Primer Recommendations for Optimal Performance

Selecting the correct primer is vital for consistent ignition and optimal performance when reloading with Barnes bullets․ The Barnes Reloading Manual PDF outlines recommended primer types for each load, considering factors like bullet weight, powder charge, and case capacity․ Using the specified primers ensures reliable ignition and contributes to improved accuracy․

Primer choice can influence pressure levels, and deviating from the recommended primers may lead to inconsistent results or even dangerous conditions․ The manual typically suggests both standard and magnum primers, depending on the load’s sensitivity․ Always prioritize the primers listed in the PDF to maintain safe and predictable performance․ Different primer brands may exhibit slight variations, so sticking to the recommended type is crucial; Consistent primer selection is a cornerstone of accurate and safe handloading with Barnes bullets․

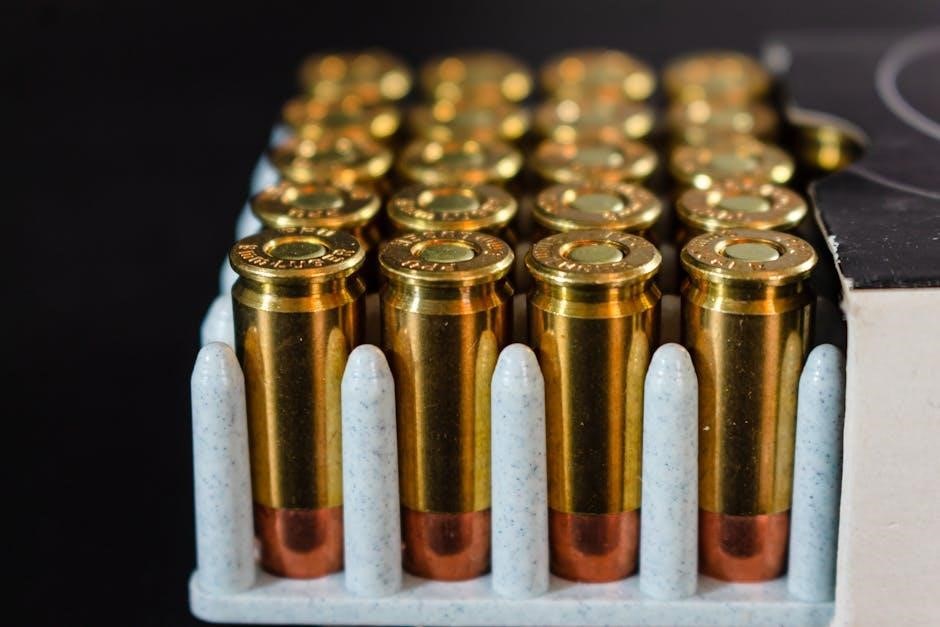
Case Selection and Preparation

Proper case selection and meticulous preparation are fundamental to safe and accurate reloading with Barnes bullets, as detailed within the Barnes Reloading Manual PDF․ The manual emphasizes using high-quality brass in good condition, free from cracks, splits, or excessive wear․ Carefully inspect each case before resizing and priming․

Full-length resizing is generally recommended to ensure proper fit and function within the chamber․ Thorough case cleaning removes residue and contaminants that can affect ignition and accuracy․ Primer pocket cleaning is also essential for consistent primer seating․ The PDF manual will specify appropriate case preparation techniques for each caliber․ Consistent case preparation minimizes variables and contributes to reliable performance․ Remember, neglecting these steps can compromise safety and accuracy, so adhere to the guidelines provided․

Guide

f100 builders guide

F100 Builders Guide: A Comprehensive Overview (as of 03/26/2026)


This guide, current as of today’s date, compiles insights from forums and resources regarding F100 builds,
covering chassis swaps, modifications, and restoration paths for enthusiasts.

The F100 building community is a vibrant and passionate group of enthusiasts dedicated to preserving and reimagining these classic Ford trucks. Online forums like FORDification.com and Ford Truck Enthusiasts serve as central hubs for sharing knowledge, troubleshooting challenges, and showcasing incredible builds.
A common thread unites builders: a love for the iconic F100 design and a desire to blend vintage aesthetics with modern performance and reliability.

Many projects involve chassis swaps, utilizing platforms like the 1999 Ford Ranger or 1997 Mercury Mountaineer to provide updated suspension, braking, and drivetrain components. This community thrives on collaboration, offering invaluable support to both novice and experienced builders navigating the complexities of these conversions.

Popular Chassis Swap Options

Several chassis swaps have emerged as popular choices within the F100 building community, each offering unique advantages. The 1999 Ford Ranger short bed chassis is frequently selected for its readily available components and relatively straightforward integration with the F100 body. Another favored option is the 1997 Mercury Mountaineer chassis, often paired with a 5.0 C-N-P engine conversion, providing a robust powertrain solution.

Builders appreciate these swaps for modernizing the F100’s underpinnings, improving handling, braking, and overall drivability. Careful consideration must be given to body fitment, as noted in forum discussions, with slight adjustments often required to achieve a seamless integration.

1999 Ford Ranger Chassis Compatibility

The 1999 Ford Ranger short bed chassis presents a compelling option for F100 builders seeking a modern foundation. Its popularity stems from the relative ease of integration and the widespread availability of parts. Forum discussions highlight the Ranger’s suitability for street rod applications, with builders reporting good body fitment, though not always perfect, requiring workable adjustments.

This swap typically involves adapting the F100 body to the Ranger’s frame, addressing potential differences in mounting points and dimensions. The Ranger’s shorter wheelbase can influence handling characteristics, potentially requiring modifications to the suspension for optimal performance.

1997 Mercury Mountaineer Chassis Conversion

The 1997 Mercury Mountaineer chassis offers another viable conversion path, particularly when paired with a 5.0 C-N-P engine. This combination is gaining traction within the F100 building community, offering a robust and readily available powertrain solution. Builders appreciate the Mountaineer’s chassis strength and the potential for a comfortable ride.

However, successful implementation requires careful planning and execution. The engine bay may necessitate cutting and modification to accommodate the 5.0 engine, ensuring proper fitment and cooling. Forum posts suggest that the Mountaineer chassis provides a solid base for a custom F100 build, balancing performance and practicality.

Body Fitment Considerations

Achieving proper body fitment is crucial when mating a classic F100 body to a modern chassis. A key consideration is the difference in width between the F100 and potential donor chassis like the Expedition and Explorer. The F100 measures 78 inches in width, while the Expedition is 78.8 inches and the Explorer is narrower at 73.7 inches.

While the .8-inch difference with the Expedition may seem minor, builders note it’s workable. The Explorer’s narrower width might require more extensive modifications. Expect imperfections and be prepared to address them through bodywork and adjustments to ensure a seamless and aesthetically pleasing final result.

F100 Body Width vs. Modern Chassis Widths (Expedition & Explorer)

Precise measurements are vital for a successful F100 build, particularly concerning body width compatibility. The original F100 body boasts a width of 78 inches. When considering chassis swaps, the Ford Expedition presents a width of 78.8 inches, a seemingly small .8-inch difference. Conversely, the Ford Explorer is notably narrower, measuring only 73.7 inches in width.

This discrepancy necessitates careful evaluation. While the Expedition’s slight increase is often manageable, the Explorer’s reduced width may demand more substantial body modifications or frame adjustments to achieve proper alignment and a factory-like fit. Accurate planning minimizes headaches later.

Addressing Body Fitment Imperfections

Achieving a seamless body fit often requires addressing minor imperfections when mating a classic F100 body to a modern chassis. While the fit is generally “very workable,” perfect alignment isn’t always guaranteed. Expect to encounter slight gaps or misalignment issues that demand attention during the build process.

Skilled fabrication and bodywork are key. This may involve carefully shimming the body mounts, performing localized adjustments to the chassis, or utilizing body filler to refine the contours. Patience and meticulous attention to detail are crucial for a professional-quality finish, ensuring a visually appealing and structurally sound result.

Engine Bay Modifications

Adapting modern powertrains into the F100’s engine bay frequently necessitates modifications. The space available can accommodate late-model V6 engines, though some cutting and fabrication may be required for optimal fitment. A popular conversion involves the 5.0 C-N-P engine, offering a balance of power and reliability.

Careful planning is essential. Consider factors like exhaust routing, cooling system compatibility, and accessory drive alignment; Modifications might include altering engine mounts, firewall adjustments, or radiator relocation. Thorough research and precise execution are vital for a successful and mechanically sound engine swap.

Adapting Late Model V6 Engines

Installing a late-model V6 into an F100 presents a compelling modernization option, but requires careful consideration of the engine bay’s dimensions. While potentially feasible, the engine bay may need alterations to accommodate the V6’s width and height. Expect to perform cutting and modification to create sufficient clearance for all components.

Successful adaptation hinges on meticulous planning. This includes addressing accessory placement, exhaust system routing, and ensuring adequate cooling. Custom engine mounts will almost certainly be necessary, alongside potential firewall adjustments. Thorough measurement and fabrication skills are crucial for a clean and functional installation.

5.0 C-N-P Engine Conversions

The 5.0 C-N-P (Coyote, New Process) conversion is a popular choice for F100 builders seeking a powerful and relatively modern powertrain. Utilizing a 5.0L Coyote engine paired with a New Process transmission offers a significant performance upgrade over older Ford engines.

This conversion typically requires a substantial investment in aftermarket components, including engine mounts, transmission crossmembers, and potentially modifications to the driveshaft and fuel system. Careful planning is essential to ensure compatibility and proper fitment. Expect to address wiring harness integration and potentially ECU tuning for optimal performance.

Chassis & Suspension Upgrades

Significant handling and safety improvements come from upgrading the F100’s chassis and suspension. Options range from bolt-on components to full chassis replacements.

The Schwartz G-Machine chassis, designed for 1967-1972 F100s, is a complete solution, featuring a full-floating Moser 9-inch rear axle supported by a triangulated four-bar system with spherical rod ends. This setup ensures bind-free movement and superior stability. The front end boasts power rack and pinion steering and adjustable A-arms, allowing for precise caster and camber adjustments, dramatically enhancing the driving experience.

Schwartz G-Machine Chassis for 1967-1972 F100s

The Schwartz G-Machine chassis is a premium, complete solution specifically engineered for 1967-1972 Ford F100s, offering substantial upgrades over the original frame. It’s supplied with a robust, full-floating Moser 9-inch rear axle, maximizing strength and durability.

Supporting this axle is a triangulated four-bar suspension system, utilizing Teflon-lined spherical rod ends to eliminate binding and ensure smooth, predictable handling. The front end features a power rack and pinion steering system, alongside needle-bearing-supported A-arms, providing precise control and adjustable caster/camber settings for optimized performance.

Moser 9-inch Rear Axle & Four-Bar Suspension

A popular and highly regarded upgrade for F100s involves utilizing a Moser 9-inch rear axle, known for its exceptional strength and reliability. This axle is often paired with a triangulated four-bar suspension system, providing superior handling and stability compared to the factory setup.

The four-bar design enhances traction and reduces axle wrap, while the use of Teflon-lined spherical rod ends minimizes friction and ensures bind-free movement. This combination delivers a noticeable improvement in both on-road comfort and off-road capability, making it a favored choice for builders seeking a balanced performance upgrade.

Interior Customization

Modernizing the F100’s interior often involves integrating contemporary features while retaining a classic aesthetic. A common customization is the incorporation of modern gauges, specifically those displaying both temperature readings (inside and outside) and true heading information.

Builders are creatively utilizing the existing radio opening to house these new features, creating a seamless and integrated look. This approach allows for a clean installation without drastically altering the original dashboard layout. Further customization can include upgraded seating, sound systems, and bespoke trim pieces, enhancing both comfort and style.

Modern Gauge Integration (Temperature & Heading)

Integrating modern gauges for temperature and heading into a classic F100 requires careful planning. Builders are successfully mounting these displays on panels designed to cover the original radio opening, offering a clean and functional solution.

This approach avoids cutting into the dash and preserves the vintage look. Digital displays provide accurate inside and outside temperature readings, alongside true heading information for navigation. Wiring these gauges requires adapting the F100’s electrical system to accommodate the new technology, ensuring reliable operation and a polished finish.

Utilizing Existing Radio Openings for New Features

The original radio opening in the F100 dashboard presents a unique opportunity for modern feature integration. Rather than attempting complex modifications to the dash itself, builders are creatively repurposing this space.

This commonly involves installing custom panels to house updated gauges, such as temperature and heading displays, as seen in recent builds. This method maintains the classic aesthetic while adding functionality. Careful measurement and fabrication are key to a seamless fit, ensuring the new panel blends harmoniously with the surrounding interior.

Restoration vs. Modification

The F100 building community frequently debates the merits of full restoration versus extensive modification. A pure restoration aims to return the truck to its original factory condition, preserving its historical accuracy. This path demands sourcing original parts and meticulous attention to detail.

Conversely, modification embraces personalization and performance upgrades. Builders often integrate modern chassis, engines, and interiors, creating a unique blend of classic style and contemporary technology. The choice hinges on individual goals – preserving history or crafting a personalized driving experience.

Sourcing Parts for Your F100 Build

Finding parts for an F100 build requires a multi-faceted approach. Original Ford parts can be located through specialized vintage Ford suppliers and online marketplaces. However, for modified builds, aftermarket support is crucial.

Dedicated forums like FORDification.com and Ford Truck Enthusiasts offer valuable resources and vendor recommendations. These communities often share leads on hard-to-find components and group purchase opportunities. Don’t underestimate the potential of salvage yards for specific parts, but be prepared for restoration work. Careful planning and research are key to a successful build.

Common Challenges & Solutions

F100 builds frequently encounter rust and body damage, demanding skilled metalwork or panel replacement. Electrical system integration with modern components can be complex, often requiring custom wiring harnesses and careful grounding. Body fitment on swapped chassis isn’t always perfect, necessitating adjustments and potentially body modifications.

Solutions include professional rust repair, utilizing aftermarket wiring solutions, and employing body filler for minor imperfections. Forums provide invaluable troubleshooting advice from experienced builders. Patience and meticulous attention to detail are essential for overcoming these common hurdles.

Dealing with Rust and Body Damage

Rust is a pervasive issue with older F100s, often found in cab corners, floor pans, and bedside seams. Thorough inspection is crucial, followed by complete rust removal – media blasting or cutting out affected areas are common approaches. Body damage, from dents to significant collisions, requires skilled metal fabrication or panel replacement.

Patch panels are readily available for common repair areas. Welding experience is vital for structural repairs, ensuring safety and longevity. Consider professional assistance for extensive damage. Proper surface preparation and rust prevention are key to a lasting repair, protecting your investment.

Electrical System Integration

Integrating a modern electrical system into a classic F100 presents challenges. Original wiring is often aged and insufficient for modern accessories. A complete wiring harness replacement is frequently recommended, offering reliability and safety. Consider a chassis-specific harness designed for F100 swaps.

Modern features like power windows, locks, and updated gauges require careful wiring and potentially a new fuse box; Utilizing existing radio openings for new features, such as temperature and heading displays, streamlines the interior. Ensure proper grounding to prevent electrical issues and utilize relays for high-draw components.

Budgeting for an F100 Build

Establishing a realistic budget is crucial for a successful F100 build. Costs can quickly escalate, so detailed planning is essential. Chassis swaps are significant expenses, ranging from $5,000 to $15,000+ depending on complexity. Engine modifications, including a 5.0 C-N-P conversion or late-model V6 adaptation, add substantial costs.

Factor in expenses for bodywork, paint, interior customization, and unforeseen issues like rust repair. Prioritize essential upgrades first, and phase in cosmetic enhancements as funds allow. Contingency funds (10-20%) are vital for unexpected problems. Thorough research and sourcing parts strategically can help control costs.

Resources and Forums

Online communities are invaluable resources for F100 builders. FORDification.com Forums offer extensive threads on restorations, modifications, and troubleshooting, providing a wealth of knowledge from experienced enthusiasts. Ford Truck Enthusiasts Forums are another excellent platform for discussions, parts sourcing, and project inspiration.

These forums host dedicated sections for specific F100 generations and build types; Active members readily share advice, technical expertise, and project updates. Utilize the search functions to find solutions to common challenges and connect with builders undertaking similar projects. These platforms foster collaboration and accelerate your build process.

FORDification.com Forums

FORDification.com Forums stand as a cornerstone resource for Ford truck enthusiasts, particularly those restoring or modifying F100s. The platform boasts a highly active community with dedicated sections covering every aspect of F100 builds, from classic restorations to modern restomods.

Within the forums, you’ll discover extensive threads detailing “Best mods or upgrades,” offering practical advice and inspiration. Members frequently share detailed build logs, technical expertise, and solutions to common challenges. The search function is powerful, allowing you to quickly locate information relevant to your specific project. It’s a hub for knowledge and camaraderie.

Ford Truck Enthusiasts Forums

The Ford Truck Enthusiasts Forums provide another valuable online community for F100 builders and restorers. Discussions frequently center around body fitment on modern chassis, a common challenge in F100 projects. Members share precise measurements, like the F100’s 78-inch width compared to the Expedition’s 78.8 inches and Explorer’s 73.7 inches.

These forums offer insights into the feasibility of using different chassis, with members debating the impact of width discrepancies. You’ll find detailed conversations about overcoming fitment imperfections and achieving a seamless integration of the classic F100 body onto a contemporary frame.

Project Showcase: Inspiration Builds

Exploring completed F100 projects offers invaluable inspiration and practical insights for your own build. Online forums, like FORDification.com, frequently feature threads showcasing impressive transformations, from meticulously restored classics to heavily modified street rods.

These builds demonstrate the diverse possibilities for F100 customization, including chassis swaps, engine upgrades (like the 5.0 C-N-P conversion), and innovative interior modifications. Seeing how others have tackled challenges – such as rust repair or electrical system integration – can provide solutions and boost your confidence.

Project showcases highlight the potential of the F100 platform.

Manuals

saluspa hot tub manual

Saluspa Hot Tub Manual: A Comprehensive Guide

This guide offers detailed instructions for Coleman Saluspa models like the 90363, covering setup, operation, maintenance, and troubleshooting for a relaxing experience.

Welcome to the world of Saluspa hot tubs! These inflatable hot tubs, like the Coleman Saluspa Bahamas AirJet model, provide an accessible and affordable way to enjoy the benefits of hydrotherapy in the comfort of your own home. Designed for easy setup and use, Saluspa tubs offer a relaxing escape after a long day.

This manual serves as a comprehensive guide to ensure you get the most out of your Saluspa experience. We’ll cover everything from initial setup and operation of the control panel, to maintaining pristine water quality and troubleshooting common issues. Resources like YouTube tutorials demonstrate setup and safety procedures, while Reddit communities offer user experiences and advice. Remember, prioritizing safety is paramount when enjoying your Saluspa!

Understanding Your Coleman Saluspa Model (90363)

The Coleman Saluspa 90363 is a popular inflatable hot tub known for its portability and ease of use. This model typically features the AirJet massage system, providing a soothing bubbling experience. It’s designed for up to 6 people, making it ideal for small families or couples.

Key components include the inflatable tub itself, a filter system, a control panel for temperature and jet adjustments, and a repair patch kit. Understanding each part’s function is crucial for proper operation and maintenance. Online resources, including manuals and YouTube videos, offer detailed overviews of the 90363’s features. Familiarize yourself with the layout and controls before your first use to maximize enjoyment and ensure safety.

Safety First: Important Safety Instructions

Prioritizing safety is paramount when using your Saluspa hot tub. Always ensure proper electrical safety, including a dedicated grounded circuit and GFCI protection to prevent shocks. Never operate the tub with a damaged cord or plug. Water safety is equally vital; supervise children closely and avoid using the hot tub while under the influence of alcohol or medications.

Maintain appropriate water chemistry to prevent bacterial growth and skin irritation. Regularly check and replace the filter as recommended. Adhere to temperature limits to avoid overheating. Review the Bestway SaluSpa owner’s manual videos for detailed electrical equipment safety guidelines, ensuring a safe and enjoyable experience for everyone.

Electrical Safety Precautions

Strict adherence to electrical safety is crucial for Saluspa hot tub operation. Always plug the hot tub into a dedicated, grounded circuit protected by a Ground Fault Circuit Interrupter (GFCI). Inspect the power cord and plug for any damage before each use; never operate with a compromised cord. Avoid using extension cords.

Keep the electrical components dry and away from water sources; Do not attempt to repair electrical issues yourself; contact qualified personnel. Bestway SaluSpa videos emphasize the importance of following these instructions to minimize electrical hazards. Ensure the power supply matches the hot tub’s requirements, and disconnect the power before performing any maintenance.

Water Safety Guidelines

Prioritize water safety when enjoying your Saluspa hot tub. Never leave children unattended near the hot tub, even for a moment. Supervise closely and educate them about the potential hazards. Maintain proper water chemistry, regularly testing and balancing pH and sanitizer levels to prevent bacteria growth.

Avoid using the hot tub if you are under the influence of alcohol or medications that may impair judgment. Limit soak times, especially at higher temperatures, to prevent overheating. Bestway SaluSpa safety videos highlight these crucial guidelines. Ensure adequate circulation and filtration to maintain clean and hygienic water conditions for a safe and enjoyable experience.

Setting Up Your Saluspa Hot Tub

Proper setup is crucial for enjoying your Saluspa. Begin by unboxing and carefully checking all components against the included parts list. Choose a level surface, free from sharp objects, to protect the tub’s liner. Inflating the hot tub is typically done with the included air pump, ensuring even inflation.

Next, connect the filter system, following the diagrams in your manual. Ensure all connections are secure to prevent leaks. A YouTube video demonstrates how to set up a Coleman Saluspa Bahamas model, offering visual guidance. Double-check all connections before filling with water, and remember to allow sufficient space around the tub for access and maintenance.

Unboxing and Component Check

Carefully unpack your Saluspa hot tub, taking inventory of all included parts. Refer to the parts list in your manual to ensure everything is present. This includes the hot tub liner, filter system, control panel, airjet nozzles, and any necessary adapters or hoses.

Inspect each component for any signs of damage during shipping. Report any missing or damaged parts immediately to customer support. Lay out all items in an organized manner to facilitate the setup process. A thorough component check prevents frustration later and ensures a smooth, enjoyable hot tub experience; Don’t discard the packaging until you’ve confirmed all parts are accounted for.

Inflating the Hot Tub

Before inflating, ensure the hot tub is placed on a flat, level surface, free from sharp objects. Unroll the liner and locate the air valve. Attach the air pump (often included, or a standard air mattress pump can be used). Begin inflating, periodically checking the shape to avoid uneven inflation.

Do not overinflate! The tub should be firm but not overly taut. As it inflates, smooth out any wrinkles. Once inflated, securely close the air valve cap to prevent air leakage. Proper inflation is crucial for structural integrity and optimal performance. Monitor the inflation process closely, and stop when the desired firmness is achieved.


Connecting the Filter System

Locate the filter housing on the exterior of the hot tub. Ensure the power is completely disconnected before proceeding. Open the filter housing cover and insert the filter cartridge, verifying it’s seated correctly. Connect the filter pump hoses to the designated inlets and outlets on both the pump and the hot tub.

Securely tighten all connections to prevent leaks. Double-check that the hose clamps are firmly in place. Once connected, prime the pump according to the manufacturer’s instructions – typically involving filling with water. Proper filter system connection is vital for water circulation, cleanliness, and overall hot tub functionality.

Using Your Saluspa Hot Tub

Once set up, familiarize yourself with the control panel for managing temperature and the AirJet massage system. Begin by setting your desired water temperature, allowing sufficient time for heating. The AirJet system provides a soothing massage experience; adjust the intensity to your preference.

Regularly monitor the water temperature to ensure comfort and safety. Remember to always supervise hot tub use, especially with children. Enjoy the relaxing benefits of your Saluspa, but prioritize safety and responsible operation. Proper usage extends the lifespan of your hot tub and maximizes enjoyment.

Operating the Control Panel

The Saluspa control panel is your central hub for managing the hot tub’s functions. It typically features buttons for power, temperature adjustment (up/down), and activating the AirJet massage system. Understanding these controls is crucial for optimal use.

Pay attention to the display, which shows the current water temperature and any active settings. Some models may include timer functions for pre-heating or automatic shut-off. Familiarize yourself with the error code indicators, as they signal potential issues. Refer to the full manual for detailed explanations of each button and display feature, ensuring safe and efficient operation.

AirJet Massage System

The Saluspa AirJet Massage System delivers a soothing and relaxing experience through strategically placed jets that release warm air bubbles. Activation is usually done via a dedicated button on the control panel, often with adjustable intensity levels;

Experiment with different settings to find your preferred massage strength. The AirJet system is designed to enhance relaxation and relieve muscle tension. Ensure the jets are free from debris for optimal performance. Avoid prolonged use at the highest intensity, and always supervise children when the jets are active. Proper use ensures a safe and enjoyable massage experience.

Water Temperature Control

Maintaining the ideal water temperature is crucial for a comfortable and safe hot tub experience. The Saluspa control panel allows precise temperature adjustments, typically ranging from 68°F to 104°F (20°C to 40°C).

Gradually adjust the temperature to your preference, allowing sufficient time for the water to heat or cool. Avoid setting excessively high temperatures, especially for extended soaks. Regularly monitor the water temperature to ensure it remains within a safe and comfortable range. Be mindful of the ambient temperature and adjust accordingly. Proper temperature control enhances relaxation and prevents overheating.

Maintenance and Care

Regular maintenance is essential for prolonging the life of your Saluspa hot tub and ensuring a hygienic bathing experience. This includes consistent water chemistry balancing, filter cleaning, and periodic draining. Maintaining proper water balance—pH, alkalinity, and sanitizer levels—prevents corrosion, scaling, and algae growth.

The filter should be cleaned every few days and replaced as recommended by the manufacturer. Draining and thoroughly cleaning the hot tub every 1-3 months prevents buildup and maintains water clarity. Following these steps guarantees a safe, clean, and enjoyable hot tub experience for years to come.

Water Chemistry and Balancing

Maintaining optimal water chemistry is crucial for a safe and enjoyable Saluspa experience. Regularly test and adjust pH, alkalinity, and sanitizer levels. Ideal pH should be between 7.2 and 7.8, while total alkalinity should range from 80 to 120 ppm. Sanitizers, like chlorine or bromine, eliminate bacteria and algae; follow product instructions carefully.

Consistent monitoring with a test kit is recommended, especially after each use and before adding new water. Imbalanced water can cause skin irritation, corrosion of components, and cloudy water. Proper balancing extends the life of your hot tub and ensures a comfortable soak.

Filter Cleaning and Replacement

A clean filter is essential for clear, hygienic water in your Saluspa. Rinse the filter cartridge with a garden hose every week to remove debris and oils. For a deeper clean, soak the filter overnight in a filter cleaning solution, following the product’s directions. Regular cleaning prevents reduced water flow and strain on the pump.

The filter cartridge should be replaced every 3-6 months, depending on usage. A worn-out filter cannot effectively trap particles, leading to cloudy water and potential damage to the hot tub system. Inspect the filter for tears or damage; replace immediately if found.

Draining and Cleaning the Hot Tub

Proper draining and cleaning maintain water quality and extend your Saluspa’s lifespan. Before draining, disconnect the power supply. Locate the drain valve and attach a garden hose to direct the water away from electrical components and your home’s foundation. Allow the tub to drain completely.

Once drained, use a mild soap and water solution with a soft cloth to clean the interior surface. Avoid abrasive cleaners that could damage the material. Rinse thoroughly to remove all soap residue. Inspect the inflatable walls for any punctures or damage before refilling. A clean tub ensures a fresh and enjoyable soaking experience.

Troubleshooting Common Issues

Encountering problems? This section addresses frequent Saluspa issues. Heating problems often stem from a faulty heater or insufficient power. Check the power supply and reset the unit. Pump and jet issues may indicate a clogged filter – clean or replace it. Air bubbles could signal low water levels; add water as needed.

Pay attention to error codes displayed on the control panel; consult the manual for specific solutions. If problems persist, don’t attempt complex repairs yourself. Contact customer support for assistance. Regular maintenance minimizes issues, ensuring a consistently relaxing hot tub experience.

Heating Problems

If your Saluspa isn’t heating, several factors could be at play. First, verify the unit is receiving adequate power – check the GFCI outlet and breaker. A tripped breaker or faulty outlet will prevent heating. Ensure the water temperature is set higher than the current water temperature on the control panel.

Low water levels can also trigger a heating error; add water to the recommended level. If the heater is running but not effectively raising the temperature, it may require professional servicing. Regularly check the filter for blockages, as this can strain the heating system.

Pump and Jet Issues

If the pump isn’t functioning, first ensure it’s properly connected to power and the GFCI outlet isn’t tripped. Check for any obstructions in the filter housing or pump intake, as debris can halt operation. Weak jet pressure often indicates a clogged filter – cleaning or replacing it is crucial;

Air bubbles in the jets can signify low water levels; add water to the recommended fill line. If the pump is making unusual noises, immediately turn it off to prevent further damage. Consistent pump cycling without heating may indicate a sensor issue requiring professional attention.

Error Codes and Solutions

Saluspa control panels display error codes to diagnose issues. “E01” typically indicates a heater error – check for proper water levels and power supply. “E02” suggests a temperature sensor malfunction, potentially needing replacement by a qualified technician.

“E03” often signals a pump error; verify power and check for obstructions. If you encounter “E06”, it usually means the water temperature is too high, requiring a system reset. Consult your manual for a complete list of codes and corresponding solutions. If an error persists after troubleshooting, contact customer support for assistance.

Winterizing Your Saluspa

Proper winterization prevents damage during freezing temperatures. First, thoroughly clean and drain the hot tub, removing all water from the jets and lines. Disconnect the filter system and store it indoors, along with any chemicals. Use a wet/dry vacuum to remove remaining water from the tub’s base.

Consider a winterizing chemical to protect plumbing. Deflate the hot tub partially to reduce stress on seams. Cover securely with a winter cover. Regularly check the cover throughout winter. Store the control panel and power supply indoors, protecting them from moisture.

Warranty Information

Your Saluspa hot tub is covered by a limited warranty, protecting against manufacturing defects. The warranty period varies by component, typically ranging from one to three years. The heater, pump, and control system usually have longer coverage than the inflatable liner.

Warranty claims require proof of purchase, so retain your receipt. Damage caused by misuse, improper maintenance, or acts of nature is not covered. Contact Coleman customer support to initiate a warranty claim. Review the full warranty details in the included documentation for specific terms and conditions.

Frequently Asked Questions (FAQ)

Q: How often should I change the water? A: Ideally, every 72-90 days, depending on usage and water chemistry balance. Q: Can I use the hot tub in cold weather? A: Yes, with proper winterization procedures to protect the components from freezing.

Q: What does an E06 error code mean? A: This typically indicates a heater issue; consult the troubleshooting section. Q: How do I adjust the water temperature? A: Use the control panel buttons to increase or decrease the set temperature. Q: Where can I find replacement filters? A: Online retailers or directly through Coleman’s website.

Resources and Support

Need help with your Saluspa? Access comprehensive online manuals and videos demonstrating setup, maintenance, and troubleshooting steps. Explore Coleman’s official website for downloadable PDFs and instructional clips. For personalized assistance, contacting customer support is readily available via phone or email.

Reddit’s r/instructionmanuals forum often features discussions and shared experiences with Coleman Saluspa models. YouTube channels, like those offering setup guides, provide visual learning resources; Microsoft Support offers general tech assistance, though specific Saluspa support is best found through Coleman directly. Utilize these resources to maximize your hot tub enjoyment!

Online Manuals and Videos

Accessing digital resources simplifies Saluspa ownership. Coleman’s official website hosts downloadable PDF manuals for various models, including the 90363, detailing setup, safety, and maintenance. YouTube offers numerous instructional videos, such as guides on initial setup and safe usage of the Bahamas AirJet Inflatable Hot Tub.

These videos often visually demonstrate component checks and water chemistry balancing. Explore channels dedicated to hot tub maintenance for advanced tips. Remember to verify the video’s relevance to your specific Saluspa model. These online resources provide convenient, step-by-step guidance, enhancing your hot tub experience and troubleshooting capabilities.

Contacting Customer Support

For issues beyond online resources, direct customer support is crucial. While specific contact details vary, begin with Coleman’s official website – often featuring a FAQ section and a contact form. Microsoft Support also provides assistance with related software or account issues if applicable.

Expect potential wait times during peak hours. Prepare your model number (e.g., 90363) and purchase date for efficient assistance. Clearly describe the problem and any troubleshooting steps already taken. Some online communities, like Reddit’s r/instructionmanuals, may offer peer support and shared experiences, but always prioritize official channels for warranty claims or safety concerns.

PDF

kennywood school picnic schedule 2024 pdf

Kennywood School Picnic Schedule 2024 PDF: Overview

Recent studies from Harvard Medical School, alongside nutritional debates (November 19, 2024), highlight health benefits.
The October 16, 2024 picnic schedule PDF details crucial dates and safety guidelines.

Availability of the 2024 Schedule

The Kennywood School Picnic Schedule 2024 PDF will be readily accessible through multiple channels to ensure all families can easily access important details. Expect the finalized schedule to be published on the school website and disseminated via official school announcements starting October 1st, 2024.
Furthermore, the Parent-Teacher Association (PTA) will distribute copies and provide updates. Digital access will be prioritized, with a downloadable PDF format available for convenience.

PDF Format and Accessibility

The Kennywood School Picnic Schedule 2024 will be distributed as a universally compatible PDF document. This format ensures consistent viewing across various devices and operating systems, including Windows. Accessibility is a priority; the PDF will adhere to accessibility standards, ensuring usability for individuals utilizing assistive technologies.
We aim for broad access, accommodating diverse needs within our school community.

Key Dates and Times for the 2024 Picnic

October 16, 2024, is the confirmed picnic date. Harvard studies (October 1, 2024) inform healthy food choices. Arrival and departure times will be detailed in the PDF.

Confirmed Picnic Date (October 16, 2024)

Mark your calendars! October 16, 2024, is officially the date for the Kennywood School Picnic. This date is firm, allowing families to plan accordingly. Recent Harvard Medical School research (October 1, 2024) emphasizes the health benefits of fish, potentially influencing picnic menu options. The complete schedule, including arrival and departure details, will be available in the comprehensive PDF document. Please refer to the PDF for specific timings and any potential updates regarding the picnic date.

Arrival and Departure Times

The Kennywood School Picnic PDF will detail specific arrival and departure times for students and chaperones. Expect arrival to begin at 9:30 AM, allowing ample time for settling in before activities commence. Departure is scheduled for 2:30 PM, ensuring a safe and organized exit. Updated graphics drivers (Importance of Updated Graphics Drivers) are recommended for optimal performance of picnic-related software. These times are subject to minor adjustments, detailed within the official PDF.

Health Benefits of Fish Consumption (Related to Picnic Food)

Harvard Medical School studies (October 1, 2024) reveal fish consumption reduces chronic disease risk, potentially lowering tinnitus by nearly 30% (November 13, 2024).

Fish and Chronic Disease Risk Reduction

Recent Harvard Medical School research indicates a strong correlation between regular fish consumption and a decreased risk of developing chronic illnesses. Studies (October 1, 2024) demonstrate that incorporating fish into one’s diet can positively impact cardiovascular health and potentially mitigate the onset of certain long-term conditions. This is particularly relevant when planning a picnic menu, emphasizing healthier food choices for students and families. Prioritizing fish options aligns with promoting overall well-being.

Fish Consumption and Tinnitus Prevention (Nearly 30% Reduction)

Groundbreaking research (November 13, 2024) from Harvard Medical School reveals a nearly 30% reduction in the risk of developing persistent tinnitus among individuals with regular fish intake. This significant finding underscores the protective benefits of omega-3 fatty acids found in various fish species. Considering this, offering fish options at the Kennywood picnic supports student auditory health and overall wellness.

Fish Diets & Hearing Loss Reduction

Harvard Medical School studies (February 15, 2025 & February 10, 2025) demonstrate that diets rich in fish and seafood correlate with a reduced risk of hearing loss. These findings suggest that incorporating fish into the Kennywood picnic menu could contribute to students’ long-term auditory health. Prioritizing nutritious options supports preventative healthcare alongside the fun picnic atmosphere.

Understanding Units of Measurement (KNm & Nm)

Nm measures torque—force and radius. KNm represents 1000 Newtons at a 1-meter radius (August 27, 2024). Conversion is vital for calculations.

Nm as a Unit of Torque

Nm (Newton-meter) fundamentally represents the measure of torque, a rotational force. It’s calculated by multiplying the force applied by the radius at which that force acts (August 27, 2024). Understanding this unit isn’t directly related to the Kennywood picnic, but parallels the forces at play in amusement park rides. While seemingly abstract, torque is essential in mechanical systems, including ride operation and safety mechanisms, ensuring a smooth and secure experience for all attendees.

KNm Explained: Force and Radius

KNm (kilonewton-meter) is a larger unit of torque, representing 1000 Newton-meters (August 27, 2024). It signifies the force of 1000 Newtons acting at a radius of one meter. Though unrelated to the picnic’s logistics, consider the substantial torque required to operate Kennywood’s rides safely. This illustrates the scale of force involved, emphasizing the importance of regular maintenance and adherence to safety protocols during the school event.

Conversion: KNm to Newton-Millimeters

While seemingly abstract, understanding unit conversions like KNm to Newton-millimeters is a matter of scale (August 27, 2024). One KNm equals 1,000,000 Newton-millimeters. This conversion, though irrelevant to the Kennywood picnic schedule itself, demonstrates precision. Such attention to detail mirrors the careful planning required for a safe and enjoyable school event, ensuring all logistical aspects are meticulously addressed.

GeForce Experience Instant Replay (Potential Picnic Activity)

GeForce Experience’s instant replay (June 15, 2024), enabled through experimental features, could capture picnic fun. Adjust replay length for memorable Kennywood moments!

Enabling Experimental Features

To unlock GeForce Experience’s instant replay functionality, users must first navigate to the software’s settings. Within the “General” section, locate and activate the “Enable experimental features” toggle. This step is crucial, as the instant replay feature resides within these experimental settings.
Confirming this setting allows access to the replay options, preparing the software to capture potential picnic highlights at Kennywood. Remember to restart the application after enabling.

Setting Replay Length

After enabling experimental features in GeForce Experience, users can customize the instant replay duration. The default length is approximately five minutes, but this can be extended up to a maximum of twenty minutes. Consider the potential for capturing extended picnic moments at Kennywood.
Be mindful of performance impacts with longer recording times; a performance tip is usually displayed. Adjust settings to balance quality and storage.

Nutritional Debates and Health (General Picnic Considerations)

Ongoing discussions about diet and health (November 19, 2024) emphasize nutrition’s role in preventing issues. Picnic food choices should reflect these considerations.

The Ongoing Discussion of Diet and Health

Nutritional science continually evolves, sparking debate about optimal eating patterns (November 19, 2024). This impacts picnic planning, as mindful food choices contribute to overall well-being. Considering the Kennywood picnic, balancing enjoyment with health is key. Recent research emphasizes preventative nutrition, linking diet to chronic disease risk and even hearing health, influencing responsible menu selections.

Role of Nutrition in Preventing Health Issues

Proactive health management through diet is paramount, as highlighted by ongoing studies (November 27, 2024). The Kennywood picnic presents an opportunity to showcase nutritious options. Research suggests fish consumption may reduce tinnitus risk by nearly 30% and mitigate hearing loss (February 15, 2025), emphasizing the importance of informed food choices for attendees’ well-being.

Harvard Medical School Studies on Fish

Initial findings (October 1, 2024) suggest regular fish consumption benefits health. Further research (November 27, 2024) links fish to tinnitus and hearing loss prevention.

Initial Study Findings (October 1, 2024)

Harvard Medical School’s initial October 1, 2024, study explored the correlation between fish consumption and overall health. Researchers investigated potential benefits, laying groundwork for subsequent investigations into specific conditions. This foundational research prompted deeper dives into the impact of fish diets on chronic disease risk, setting the stage for further analysis regarding tinnitus and hearing health. The study’s early results indicated a positive association between regular fish intake and improved well-being.

Further Research on Fish and Hearing (February 15, 2025)

Building on the October 2024 findings, Harvard Medical School’s February 15, 2025, research focused specifically on auditory health. Results indicated that diets rich in fish and seafood correlated with a reduced risk of hearing loss. This study reinforced the importance of nutritional factors in maintaining optimal hearing function, potentially influencing picnic menu planning and health recommendations for attendees.

Study on Fish and Tinnitus (November 27, 2024)

Researchers discovered a nearly 30% reduction in the risk of persistent tinnitus among individuals with higher fish consumption, as per the November 27, 2024, Harvard Medical School study. This finding underscores the potential protective effects of fish-based diets against auditory conditions, informing potential health considerations related to the Kennywood picnic and dietary choices.

Potential Picnic Menu & Fish Options

Considering Harvard’s research (October 25, 2024), picnic menus could feature fish dishes. Regular fish meals offer health benefits, aligning with wellness goals.

Common Fish Dishes at Picnics

Traditional picnic fare often includes easily portable options. Considering recent Harvard Medical School studies (November 27, 2024), incorporating fish could boost health benefits. Popular choices might include tuna salad sandwiches, salmon patties, or pre-cooked shrimp skewers. These selections align with the potential for tinnitus and hearing loss reduction, as highlighted in research from February 15, 2025, and October 1, 2024. Careful consideration of freshness and safe handling is paramount for all picnic food.

Nutritional Value of Picnic Fish Choices

Fish provides essential omega-3 fatty acids, vital for health, as indicated by Harvard Medical School’s ongoing research (October 25, 2024). Salmon and tuna are rich in these, potentially reducing chronic disease risk. Studies suggest a nearly 30% reduction in tinnitus risk with regular fish consumption (November 13, 2024). Choosing fish supports overall well-being, aligning with broader nutritional debates (November 19, 2024), and promoting preventative health measures.

Importance of Updated Graphics Drivers

GeForce Experience, utilized for potential picnic activities like instant replay (June 15, 2024), requires current drivers. This ensures optimal performance and software compatibility.

Ensuring Optimal Performance

Maintaining peak system performance is crucial, especially if utilizing software like GeForce Experience for picnic-related activities. Updated graphics drivers guarantee compatibility and smooth operation of features such as instant replay.
This is particularly important given the experimental nature of some features, requiring the latest drivers for stability.
Regular updates prevent potential conflicts and maximize the enjoyment of any digital entertainment during the Kennywood picnic.

Compatibility with Picnic-Related Software

If picnic activities involve software – perhaps photo/video editing or GeForce Experience for capturing memories – driver compatibility is key. Ensuring the latest drivers are installed avoids potential conflicts and ensures optimal performance.
This is especially relevant if utilizing experimental features within applications. A stable software environment enhances the overall picnic experience, allowing seamless enjoyment of digital content.

Recent Research Updates (November 19, 2024)

Nutritional debates continue, mirroring a never-ending story, as highlighted by Uwe Knop. These insights inform healthy picnic choices and overall well-being considerations.

New Insights into Nutrition and Health

Recent findings emphasize the ongoing discussion surrounding diet and health, a topic perpetually under scrutiny by nutrition scientists like Uwe Knop. Studies reveal a strong correlation between dietary choices and preventative health measures.
Specifically, research from Harvard Medical School (November 27, 2024) underscores the potential benefits of regular fish consumption in preventing tinnitus, a crucial consideration for a lively picnic atmosphere. These insights inform healthier picnic planning.

Study on Fish Consumption (October 25, 2024)

A recent study indicates regular fish meals offer significant health benefits, aligning with picnic food choices and Harvard Medical School’s findings on wellness.

Regular Fish Meals and Health Benefits


Research from Harvard Medical School (October 25, 2024) demonstrates a strong correlation between consistent fish consumption and improved health outcomes. Specifically, studies reveal a nearly 30% reduction in tinnitus risk among regular fish eaters. Furthermore, diets rich in fish and seafood are linked to a decreased risk of hearing loss, as highlighted in February 15, 2025 findings. These benefits underscore the nutritional value of fish options potentially available at the Kennywood school picnic.

Additional Picnic Information Sources

For the most current details regarding the Kennywood picnic, consult the school website and official announcements. The Parent-Teacher Association also provides updates.

School Website and Announcements

The official school website serves as the primary hub for all Kennywood picnic-related information. Regularly check for posted updates concerning the October 16, 2024 schedule, including any potential changes due to weather or unforeseen circumstances.
Announcements will also be disseminated through school newsletters, email blasts, and potentially social media channels.
Parents are encouraged to enable notifications to receive immediate alerts regarding important picnic details, safety guidelines, and logistical arrangements.

Parent-Teacher Association Updates

The Parent-Teacher Association (PTA) is actively involved in supporting the Kennywood School Picnic. Updates regarding volunteer opportunities, fundraising initiatives for picnic enhancements, and logistical support will be communicated through PTA meetings and email newsletters.
The PTA will also assist in disseminating information about the October 16, 2024 schedule and any related health or safety advisories. Parents are encouraged to attend PTA meetings for the latest details.

Potential Weather Considerations

The Kennywood picnic schedule includes a designated rain date. Attendees should check updates and dress appropriately for potential weather conditions on October 16, 2024.

Rain Date Information

The Kennywood School Picnic schedule PDF will clearly state the official rain date, ensuring continued enjoyment even with inclement weather. This backup date allows for rescheduling without disruption. Parents and students should regularly check the school website and PTA updates for any changes.
Confirmation regarding the rain date will be communicated via email and announcements, prioritizing safety and maximizing participation. The schedule prioritizes a fun, safe experience.

Appropriate Clothing for the Picnic

The Kennywood School Picnic schedule PDF recommends comfortable, weather-appropriate attire. Layers are suggested, anticipating potential temperature fluctuations throughout the day. Closed-toe shoes are essential for navigating the park safely. Sunscreen, hats, and sunglasses are strongly encouraged for sun protection.
Check the forecast before departing and dress accordingly, ensuring a pleasant and comfortable experience for all attendees. Prioritize practicality and comfort.

Safety Guidelines for Kennywood Picnic

The Kennywood School Picnic schedule PDF emphasizes student supervision and readily available emergency contact information. Adherence to park rules is paramount for a safe outing.

Supervision of Students

The Kennywood School Picnic schedule PDF clearly outlines student supervision protocols. Designated teachers and chaperones will maintain constant visual contact with assigned groups. A predetermined student-to-adult ratio ensures adequate oversight throughout the park.
Regular headcounts will be conducted at designated intervals and locations, as detailed in the PDF.
Lost student procedures are also included, emphasizing immediate reporting to park security and school personnel.

Emergency Contact Information

The Kennywood School Picnic schedule PDF prominently features essential emergency contact details. This includes school administration numbers, designated picnic coordinator cell phones, and local emergency services (911).
Parents/guardians are encouraged to review and save these numbers prior to the event.
The PDF also details the location of the designated first-aid station within Kennywood Park for immediate medical assistance.

PreviousNext

You Want To Have Your Favorite Car?

We have a big list of modern & classic cars in both used and new categories.