Canada

costco stuffed chicken breast cooking instructions

Costco Stuffed Chicken Breast Cooking Instructions: A Comprehensive Guide

Discover a detailed exploration of preparing Costco’s convenient‚ pre-stuffed chicken breasts‚ offering guidance for a flavorful and safely cooked meal every time!

Overview of Costco Stuffed Chicken Breasts

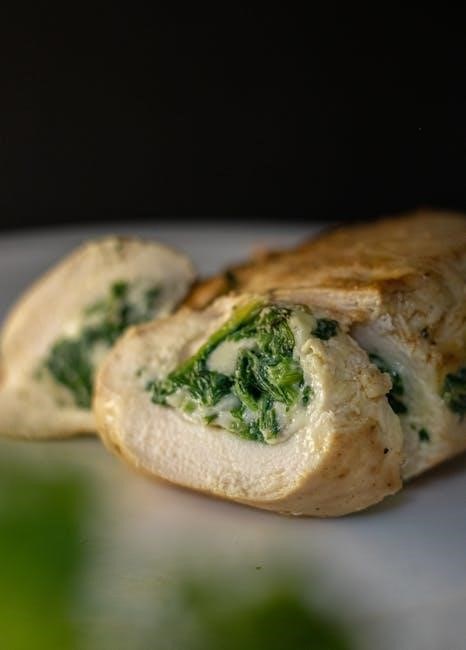
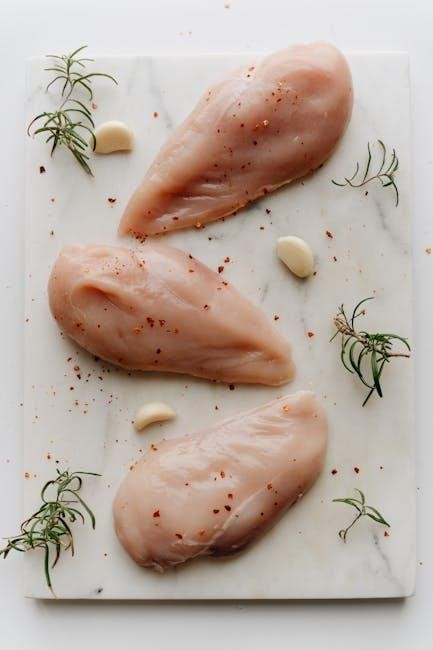
Costco’s stuffed chicken breasts represent a convenient and flavorful meal option‚ particularly appealing for busy individuals or smaller households. These pre-seasoned‚ pre-stuffed breasts typically feature a broccoli and cheese filling‚ though variations may exist. They arrive frozen‚ individually wrapped‚ and ready for cooking – eliminating the prep work of stuffing chicken yourself!

A significant benefit is their long freezer life; they can be stored for up to ten months from the date of purchase‚ providing a reliable staple for quick dinners or lunches. While not everyone’s favorite‚ their convenience is undeniable. They pair well with various sides‚ including rice‚ quinoa‚ salads‚ noodles‚ or potatoes‚ offering versatility in meal planning.

Where to Find Them at Costco

Locating Costco’s stuffed chicken breasts is straightforward – head directly to the freezer section. These aren’t typically found with the fresh poultry; they reside amongst the other frozen entrees and meal solutions. Keep an eye out for the packaging featuring the broccoli and cheese stuffed chicken‚ as it can sometimes blend in with other frozen items.

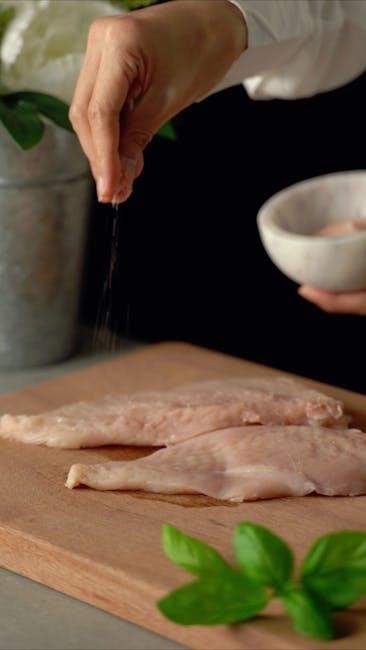
It’s important to remember these are raw chicken breasts‚ requiring thorough cooking before consumption. Microwaving is not a recommended cooking method. The product is sold in boxes containing individually wrapped breasts‚ making it easy to cook only what you need‚ which is ideal for single-person households or those who frequently cook for one.

Storage and Best Before Date

Maintaining the quality of your Costco stuffed chicken breasts hinges on proper storage. These should be kept frozen continuously to ensure safety and flavor. According to available information‚ these chicken breasts boast a substantial best-before date – approximately ten months from the date of purchase. This extended timeframe offers flexibility for meal planning.

However‚ it’s crucial to adhere to proper freezer practices. Ensure the packaging remains sealed tightly to prevent freezer burn. While the best-before date indicates quality‚ always inspect the chicken for any off-odors or discoloration before cooking. Proper freezing preserves the convenience and taste of this quick meal option.

Nutritional Information

Understanding the nutritional profile of Costco’s stuffed chicken breasts is key for informed meal choices. Each individual breast contains approximately 290 calories‚ providing a substantial protein source. The breakdown includes 12 grams of fat‚ contributing to satiety‚ and 20 grams of carbohydrates for energy.

Further details reveal 1 gram of dietary fiber‚ 1 gram of sugar‚ and a significant 24 grams of protein‚ essential for muscle maintenance. It’s important to note the sodium content‚ which measures 500 milligrams per serving. This information allows for mindful integration into a balanced diet‚ considering individual dietary needs and preferences.

Cooking Methods

Explore diverse techniques for preparing these convenient chicken breasts‚ including baking for consistent results and utilizing an air fryer for a quicker cooking process!

Baking Instructions: The Standard Approach

Baking provides a reliable method for cooking Costco stuffed chicken breasts‚ ensuring they are cooked through while maintaining moisture. Begin by preheating your oven to 375°F (190°C) – this temperature is crucial for even cooking.

Place the frozen‚ uncooked stuffed chicken breasts in a lightly greased baking dish. A glass or ceramic dish works well. For optimal browning‚ consider flipping the breasts every ten minutes during the cooking process.

Bake for approximately 25 to 30 minutes‚ or until the internal temperature reaches 160°F (71°C). Some sources suggest a starting point of 375°F for 35 minutes‚ adjusting as needed. Remember‚ these are raw‚ so thorough cooking is essential for food safety.

Oven Temperature and Preparation

Achieving perfectly cooked Costco stuffed chicken breasts begins with proper oven temperature and preparation. Preheat your oven to 375°F (190°C); this consistent heat ensures even cooking throughout the chicken. Alternatively‚ some recipes recommend 350°F (175°C) for a 30-minute bake‚ requiring flipping every ten minutes for browning.

Before baking‚ remove the frozen chicken breasts from their packaging. Place them in a lightly greased baking dish – a spray of cooking oil or a thin layer of butter works effectively. Using a baking dish prevents sticking and facilitates even heat distribution.

Ensure the breasts aren’t overcrowded in the dish‚ allowing for proper air circulation. This contributes to a more evenly cooked and flavorful result.

Baking Time and Internal Temperature

Generally‚ bake the Costco stuffed chicken breasts for 25 to 30 minutes at 375°F (190°C). However‚ baking time can vary based on your oven and the thickness of the breasts. A crucial step is verifying doneness with a meat thermometer.

The USDA recommends cooking chicken to an internal temperature of 160°F (71°C). Insert the thermometer into the thickest part of the chicken‚ avoiding contact with the stuffing. If the temperature hasn’t reached 160°F‚ continue baking in 5-minute increments until it does.


Some suggest starting with 375°F for 35 minutes as a baseline‚ then checking the internal temperature. Allowing the chicken to rest for a few minutes after baking helps retain moisture and ensures even temperature distribution.

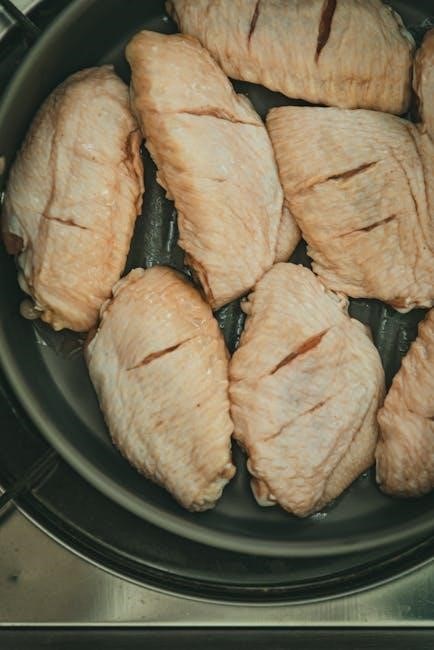
Air Fryer Instructions: A Faster Alternative

For a quicker cooking method‚ the air fryer provides a fantastic alternative to baking Costco’s stuffed chicken breasts. Preheat your air fryer to 375°F (190°C). Place the frozen chicken breast in the air fryer basket‚ ensuring it’s not overcrowded – cook in batches if necessary.

Air fry for approximately 20-25 minutes‚ flipping halfway through to ensure even cooking and browning. As with baking‚ using a meat thermometer is essential. The internal temperature should reach 160°F (71°C).

The air fryer’s circulating heat results in a crispy exterior and juicy interior. Monitor closely during the last few minutes to prevent overcooking and maintain optimal texture.

Cooking from Frozen: Is it Possible?

Yes‚ you can absolutely cook Costco stuffed chicken breasts directly from frozen! However‚ it’s crucial to understand that cooking time will be significantly longer. Do not microwave; oven baking or air frying are the recommended methods for frozen preparation.

When baking from frozen‚ preheat your oven to 375°F (190°C) and place the chicken in a greased baking dish. Expect a baking time of 35-40 minutes‚ or until the internal temperature reaches a safe 160°F (71°C).

For the air fryer‚ increase cooking time to around 25-30 minutes at 375°F (190°C)‚ flipping halfway through. Always verify doneness with a meat thermometer to guarantee the chicken is thoroughly cooked.

Serving Suggestions

Elevate your meal with delightful pairings! Enjoy these stuffed chicken breasts alongside rice‚ quinoa‚ a fresh salad‚ noodles‚ or perfectly roasted potatoes.

Recommended Side Dishes

Complement the savory flavors of the Costco stuffed chicken breast with a variety of delicious side dishes. For a simple yet satisfying meal‚ consider fluffy rice or quinoa‚ which readily absorb any pan juices. A vibrant salad provides a refreshing contrast‚ offering crisp textures and bright flavors.

Alternatively‚ noodles – whether buttered egg noodles or a more elaborate pasta dish – make a comforting accompaniment. Roasted potatoes‚ seasoned with herbs and spices‚ add a hearty element. Steamed or roasted vegetables like broccoli‚ green beans‚ or asparagus also pair wonderfully‚ contributing essential nutrients and a pop of color to your plate. Don’t underestimate the power of a simple side salad with a light vinaigrette!

Flavor Pairings

Enhance the taste of your Costco stuffed chicken breast by considering complementary flavor profiles. The broccoli and cheese filling lends itself well to creamy sauces‚ such as a simple Alfredo or a tangy cheese sauce. A touch of garlic powder or paprika during baking can elevate the savory notes.

For a brighter contrast‚ lemon wedges served alongside offer a zesty kick. Consider a side of cranberry sauce for a sweet and tart counterpoint‚ especially during the holidays. Herbs like parsley or chives‚ sprinkled over the finished dish‚ add freshness. A sprinkle of red pepper flakes can introduce a subtle heat. Ultimately‚ the possibilities are endless – experiment to discover your perfect pairing!

Safety Considerations

Prioritize food safety by ensuring thorough cooking to 160°F (71°C)‚ handling raw chicken carefully‚ and properly reheating any leftovers for optimal health!

Ensuring Chicken is Cooked Through

Achieving a safe internal temperature is paramount when cooking these raw‚ stuffed chicken breasts. The USDA recommends cooking chicken to a minimum internal temperature of 160°F (71°C) to eliminate harmful bacteria.

Using a meat thermometer is the most reliable way to verify doneness. Insert the thermometer into the thickest part of the chicken‚ avoiding contact with the stuffing.

Baking times can vary depending on your oven‚ so checking the temperature is crucial. As a starting point‚ consider 375°F for 35 minutes‚ but always confirm with a thermometer. Some sources suggest 350°F for 30 minutes‚ flipping every 10 minutes.

Remember‚ visual cues like color are not always accurate indicators of doneness. Always prioritize temperature for a safe and enjoyable meal!

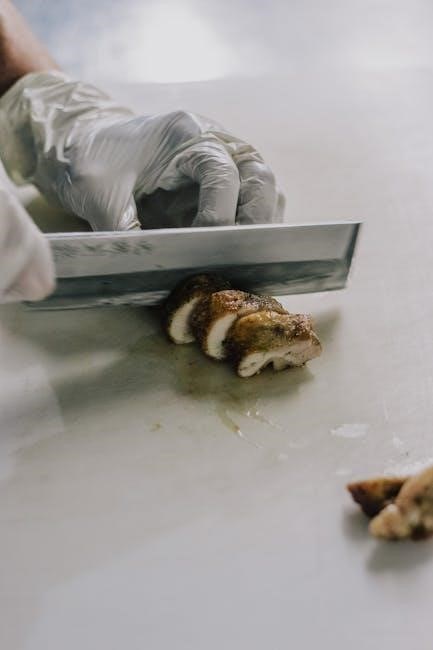
Proper Handling of Raw Chicken

Raw chicken harbors bacteria‚ so diligent handling is essential to prevent cross-contamination. Keep the chicken refrigerated until ready to cook‚ and always thaw it in the refrigerator – never at room temperature.

When unpacking the individually wrapped breasts‚ avoid touching other surfaces. Use dedicated cutting boards and utensils for raw chicken‚ and thoroughly wash them with hot‚ soapy water after use.

Sanitize countertops and sinks that have come into contact with the raw chicken or its packaging. Wash your hands thoroughly with soap and water for at least 20 seconds after handling.

Avoid washing the chicken before cooking‚ as this can spread bacteria around your kitchen. Proper cooking will eliminate any harmful bacteria present.

Reheating Leftovers

To safely reheat leftover Costco stuffed chicken breast‚ ensure it reaches an internal temperature of 165°F (74°C). The best method is in the oven or air fryer to maintain moisture and texture. Avoid microwaving if possible‚ as it can lead to uneven heating and dryness.

If using the oven‚ preheat to 350°F (175°C) and place the chicken in a baking dish with a little broth or sauce to prevent drying out. Reheat for approximately 15-20 minutes‚ or until thoroughly warmed.

Alternatively‚ an air fryer at 350°F (175°C) for 8-12 minutes can yield excellent results. Always use a food thermometer to confirm the internal temperature before consuming. Properly stored leftovers are generally safe to eat for 3-4 days.

Troubleshooting

Address common issues like dryness or undercooked chicken with adjustments to baking time‚ temperature‚ and ensuring a safe internal temperature of 160°F.

Chicken is Dry

Experiencing dry chicken breasts is a common concern when cooking these convenient Costco options. Several factors can contribute to this issue‚ but thankfully‚ there are solutions! Overbaking is the primary culprit; closely monitor the cooking time and rely on an internal temperature check rather than solely on the suggested timeframes.

Consider lowering the oven temperature slightly – perhaps to 350°F – and extending the cooking time a bit. This gentler approach can help retain moisture. Ensuring the chicken isn’t directly exposed to excessive heat‚ like placing it on a rack within the baking dish‚ can also help.

Furthermore‚ brining the chicken briefly before cooking‚ though adding a step‚ can significantly improve moisture retention. If dryness persists‚ try basting the chicken with its own juices or a little broth during the last 10-15 minutes of baking. Remember‚ a little attention can make a big difference!

Chicken is Not Cooked Through

Ensuring the chicken reaches a safe internal temperature is paramount. These are raw chicken breasts‚ requiring thorough cooking to eliminate harmful bacteria. If‚ after the recommended baking or air frying time‚ the chicken isn’t cooked through‚ do not consume it.

The USDA recommends an internal temperature of 165°F (74°C). Use a reliable meat thermometer inserted into the thickest part of the chicken‚ avoiding contact with the stuffing‚ to verify. If it’s undercooked‚ continue cooking in 5-10 minute increments‚ rechecking the temperature each time.

Remember‚ cooking times can vary based on oven calibration and the thickness of the chicken breast. A longer cooking time at a slightly lower temperature is preferable to undercooked chicken. Prioritize safety – it’s always better to err on the side of caution and fully cook the chicken!

Uncategorized

salton vita pro dehydrator manual

Welcome to the Salton Vita Pro Dehydrator Manual, your guide to efficient food dehydration. This manual helps you unlock the full potential of your Salton Vita Pro, ensuring optimal performance and safety. Discover how to prepare healthy snacks, preserve foods, and explore creative recipes with ease.

Overview of the Salton Vita Pro Dehydrator

The Salton Vita Pro Dehydrator is a versatile kitchen appliance designed for efficient food dehydration. It features 5 collapsible trays, a fruit roll-up tray, and an herb tray, making it ideal for drying fruits, vegetables, herbs, and even flowers. The vented lid ensures even airflow for consistent results. Perfect for health-conscious individuals, this dehydrator helps preserve nutrients and create healthy snacks. Its compact design and user-friendly interface make it a great choice for both beginners and experienced users.

Importance of Reading the Manual

Reading the Salton Vita Pro Dehydrator manual is essential for understanding its features, proper usage, and safety guidelines. It provides step-by-step instructions for assembly, operation, and maintenance, ensuring optimal performance. The manual also includes troubleshooting tips and warranty information. By following the guidelines, you can avoid common mistakes, extend the appliance’s lifespan, and maximize its efficiency. It’s a valuable resource for both beginners and experienced users, helping you make the most of your dehydrator.

Key Features of the Salton Vita Pro Dehydrator

The Salton Vita Pro Dehydrator is designed for efficient food preservation, featuring 5 collapsible trays, a fruit roll-up tray, and an herb tray. It includes a vented lid for optimal airflow and even drying. The dehydrator offers precise temperature control, ensuring perfect results for various foods. Its compact design and easy-to-use interface make it ideal for home use. These features allow users to create healthy snacks, preserve herbs, and dry meats effortlessly, making it a versatile kitchen appliance for food enthusiasts.

Understanding the Manual Content

The Salton Vita Pro Dehydrator Manual provides detailed instructions for setup, operation, and maintenance. It includes safety guidelines, troubleshooting tips, and recipes to enhance your dehydration experience.

Structure and Organization of the Manual

The Salton Vita Pro Dehydrator Manual is structured logically, starting with safety guidelines and moving through setup, operation, and maintenance. It includes detailed sections on troubleshooting, accessories, and recipes. Each chapter is clearly labeled, making it easy to navigate. The manual also features visual guides and diagrams to assist with assembly and usage. This organized approach ensures users can quickly find the information they need to operate the dehydrator effectively and safely.

Essential Sections to Focus On

The Salton Vita Pro Dehydrator Manual contains key sections that are crucial for optimal use. Focus on the safety guidelines, operating instructions, and maintenance tips to ensure longevity. The troubleshooting guide helps resolve common issues, while the accessories and recipes sections enhance functionality. Pay attention to these areas for a seamless experience with your dehydrator.

Visual Guides and Diagrams

The manual includes detailed visual guides and diagrams to simplify assembly, operation, and troubleshooting. These visuals illustrate tray arrangements, temperature settings, and drying processes, ensuring clarity for users. Diagrams also highlight key components, such as the vented lid and collapsible trays, making it easier to understand and utilize the dehydrator’s features effectively. These visual aids complement the written instructions, providing a comprehensive understanding of the Salton Vita Pro’s functionality and maintenance.

Safety Guidelines and Precautions

Ensure safe operation by following guidelines: keep children away, avoid overheating, and unplug when not in use. Proper handling prevents accidents and extends the dehydrator’s lifespan.

General Safety Tips for Dehydrator Use

Always prioritize safety when using your Salton Vita Pro Dehydrator. Keep children away from the appliance, as it generates heat and moving parts. Ensure the dehydrator is placed on a stable, heat-resistant surface. Avoid overheating by not covering the vent or blocking airflow. Never leave the device unattended during operation. Unplug it when not in use or before cleaning. Proper handling and adherence to these guidelines will prevent accidents and ensure safe, efficient food dehydration.

Specific Safety Instructions for the Salton Vita Pro

For the Salton Vita Pro Dehydrator, ensure the vented lid is always in place to maintain proper airflow. Avoid exceeding the recommended 5-tray capacity to prevent uneven drying. Keep flammable materials away from the appliance, as it generates heat. Never submerge the base or electrical components in water. Use oven mitts when handling hot trays. Regularly inspect cords and plugs for damage. Follow the manual’s cleaning instructions to avoid damage to the unit. Always unplug before cleaning or performing maintenance.

Precautions for Cleaning and Maintenance

When cleaning the Salton Vita Pro Dehydrator (model DH1454), avoid using abrasive cleaners or submerging electrical components in water. Wipe the exterior with a damp cloth and dry thoroughly. For trays, wash with mild soap and rinse well. Regularly clean the vented lid to ensure proper airflow. Avoid using harsh chemicals, as they may damage surfaces. Always unplug the dehydrator before cleaning and ensure all parts are dry before reuse to prevent damage or electrical issues.

Operating Instructions

Set the temperature and timer according to the food type. Place food evenly on trays, ensuring proper airflow. Monitor drying progress and adjust settings as needed for optimal results.

Step-by-Step Setup and Assembly

Begin by carefully unboxing the Salton Vita Pro Dehydrator and its components, including the trays and vented lid. Wash all parts with warm, soapy water before first use. Assemble the dehydrator by aligning the trays evenly and securing the lid. Place the unit on a stable, heat-resistant surface. Plug in the power cord and ensure all connections are secure. Refer to the manual for specific assembly diagrams. Once assembled, set the initial temperature and timer settings according to your recipe requirements.

How to Choose the Right Settings

Selecting the correct settings on your Salton Vita Pro Dehydrator ensures optimal drying results. Use the control panel to set the temperature between 35°C to 70°C, depending on the food type. For fruits and vegetables, start with lower temperatures (35-50°C), while meats and jerky require higher settings (60-70°C). Set the timer according to the food’s thickness and moisture content. Refer to the manual for specific guidelines. Adjust settings mid-cycle if needed to achieve desired dryness levels.

Monitoring and Adjusting the Drying Process

Regularly monitor the drying process to ensure optimal results. Check the food’s texture and dryness by removing a sample tray. Refer to the manual for guidelines on desired consistency. If food is still too moist, extend the drying time or increase the temperature slightly. Conversely, if food is overdried, reduce the time or temperature. Rotate trays for even drying and avoid overcrowding. Clean the vent regularly to maintain proper airflow. Adjust settings as needed to achieve the best outcome.

Maintenance and Troubleshooting

Regular maintenance ensures your Salton Vita Pro Dehydrator operates efficiently. Clean trays and components after each use, and check for blockages in air vents. Troubleshoot common issues like uneven drying by adjusting settings or replacing worn parts. Refer to the manual for solutions to extend the lifespan of your appliance.

Regular Cleaning and Care Tips

Regular cleaning is essential for maintaining your Salton Vita Pro Dehydrator’s performance and hygiene. After each use, wash the trays and components with mild detergent and warm water. Dry thoroughly to prevent moisture buildup. Check and clean the air vents regularly to ensure proper airflow. Avoid using abrasive cleaners or scourers, as they may damage surfaces. For tough residue, soak parts before cleaning. Regular maintenance ensures optimal drying results and extends the lifespan of your dehydrator.

Common Issues and Solutions

Common issues with the Salton Vita Pro Dehydrator include uneven drying, noise during operation, or malfunctioning parts. For uneven drying, ensure food is spread evenly and trays are not overcrowded; If noise occurs, check for misaligned parts or debris. Malfunctioning components may require replacement. Refer to the troubleshooting section for detailed solutions. Regular maintenance and proper assembly can prevent many issues, ensuring smooth operation and consistent results.

When to Contact Customer Support

Contact Salton customer support if you encounter issues not resolved by troubleshooting or manual guidance. This includes defective parts, warranty claims, or complex malfunctions. Before reaching out, ensure you have your model number, purchase details, and a clear description of the issue. Visit the official Salton website or call their support hotline for assistance. Timely support ensures your dehydrator operates efficiently and extends its lifespan.

Accessories and Additional Features

The Salton Vita Pro Dehydrator comes with 5 collapsible trays, a fruit roll-up tray, and an herb tray. A vented lid ensures efficient drying and even airflow.

Overview of Included Accessories

The Salton Vita Pro Dehydrator includes essential accessories to enhance your dehydration experience. It comes with 5 collapsible trays for versatile food arrangements, a fruit roll-up tray for making healthy snacks, and a herb tray for drying herbs efficiently. Additionally, the vented lid ensures proper airflow, promoting even drying. These accessories are designed to maximize functionality and versatility, making it easy to prepare a variety of dehydrated foods.

Optional Trays and Attachments

Expand your dehydration possibilities with optional trays and attachments for the Salton Vita Pro. Additional collapsible trays allow for more food to be dried simultaneously, while specialized trays for meats, flowers, or specific food types enhance versatility. These accessories can be purchased separately to customize your dehydrator setup. Visit the official Salton website or authorized retailers to explore available options and upgrade your dehydration experience with ease.

Upgrading or Replacing Parts

Upgrading or replacing parts on your Salton Vita Pro Dehydrator is straightforward. Genuine Salton parts, such as additional trays or replacement lids, can be purchased from authorized retailers or the official Salton website. Always ensure compatibility by referencing the model number (DH1454) in the manual. Regularly check for wear and tear on components like seals or heating elements. Replacing these promptly ensures optimal performance and safety. Consult the manual for guidance on proper installation and maintenance of upgraded or replaced parts.

Recipes and Usage Ideas

Discover the versatility of your Salton Vita Pro Dehydrator with creative recipes for dried fruits, vegetables, herbs, and jerky. Perfect for healthy snacks and meal prep.

Popular Foods to Dehydrate

Fruits like strawberries, bananas, and apples are ideal for snacking. Vegetables such as kale, carrots, and zucchini make crispy chips. Herbs like basil and rosemary retain flavor when dried. Meat jerky, especially beef or turkey, is a favorite. Bread can be dried for croutons, and flowers for decorative arrangements. The Salton Vita Pro’s accessories, like the fruit roll-up tray, simplify processing these foods, ensuring even drying and preserving nutrients for delicious, healthy results.

Healthy Snack Recipes

Create nutritious snacks with the Salton Vita Pro. Dehydrate sliced fruits like strawberries or apples for sweet, chewy treats. Kale chips seasoned with herbs are a crispy alternative to junk food. Mix herbs like basil and rosemary for aromatic blends. Beef or turkey jerky is a protein-packed option. Use the fruit roll-up tray for homemade fruit leather. These recipes are easy, healthy, and perfect for on-the-go meals, leveraging the dehydrator’s efficiency to retain nutrients and flavors.

Creative Ways to Use Dehydrated Foods

Dehydrated foods offer endless possibilities for culinary creativity. Use dried herbs to enhance soups and marinades, or rehydrate them for fresh flavors. Dehydrated vegetables add crunch to salads or serve as crispy snacks. Create homemade potpourni with dried flowers and herbs. Even dehydrated meats like jerky can be repurposed into sauces or stir-fries. Experiment with dehydrated fruits in baked goods or as toppings for yogurt and oatmeal. The Salton Vita Pro makes preserving and innovating with food effortless and fun.

Comparison with Other Dehydrator Models

The Salton Vita Pro stands out with its 5 collapsible trays, fruit roll-up tray, and herb tray, offering versatility and efficiency compared to other models.

Salton Vita Pro vs. Other Brands

The Salton Vita Pro Dehydrator excels with its 5 collapsible trays, fruit roll-up tray, and herb tray, offering unmatched versatility. Compared to other brands, it provides an economical entry into food dehydration while maintaining efficiency. Its compact design and user-friendly interface make it ideal for both beginners and experienced users. The inclusion of specialized trays for fruits and herbs sets it apart, ensuring diverse dehydration options. This model strikes a balance between affordability and performance, making it a standout choice in its category.

Unique Selling Points of the Salton Vita Pro

The Salton Vita Pro Dehydrator stands out with its 5 collapsible trays, fruit roll-up tray, and herb tray, offering versatility for various dehydration needs. Its compact design and user-friendly interface make it ideal for both beginners and experienced users. The vented lid ensures efficient airflow for even drying. Additionally, its economical price point and included accessories provide exceptional value, making it a top choice for those seeking a balance between affordability and performance in food dehydration;

Customer Feedback and Reviews

Customers praise the Salton Vita Pro Dehydrator for its affordability and ease of use. Many highlight its 5 collapsible trays and included accessories as standout features. Users appreciate the vented lid for efficient drying and the compact design. While some note noise during operation, overall satisfaction is high. The manual’s clear instructions and versatile settings are frequently commended. This dehydrator is a favorite among hobbyists and home cooks seeking a reliable, budget-friendly option for preserving foods and creating healthy snacks.

Downloading and Accessing the Manual

Access the Salton Vita Pro Dehydrator manual via official sources or direct links provided. Ensure authenticity by downloading from trusted websites or Salton’s official support page.

Official Sources for the Manual

The Salton Vita Pro Dehydrator manual can be downloaded from Salton’s official website or trusted appliance support pages. Visit the Salton website and navigate to the support section. Enter your model number, Salton Vita Pro DH1454, to access the PDF manual directly. Ensure you download from verified sources to avoid unauthorized versions. Additionally, check authorized retailers or the manufacturer’s customer service portal for secure access to the manual.

How to Download the Manual

To download the Salton Vita Pro Dehydrator manual, visit the official Salton website and navigate to the support section. Enter your model number, Salton Vita Pro DH1454, in the search bar to locate the manual. Click the download link to access the PDF version. Ensure your device has a PDF reader installed to view the file. For convenience, save the manual to your device or print it for easy reference. Always download from trusted sources to avoid unauthorized versions.

Alternative Resources if the Manual is Unavailable

If the Salton Vita Pro Dehydrator manual is unavailable, visit the official Salton website or authorized retailers for assistance. Check customer support pages or contact their service team directly. Additionally, community forums or third-party databases may host PDF versions. Ensure any downloaded files are from trusted sources to maintain security and accuracy. These resources can provide guidance until you obtain the official manual.

Common Questions and Solutions

Frequently asked questions about the Salton Vita Pro Dehydrator include troubleshooting common issues like uneven drying or noise. Solutions often involve adjusting settings or cleaning the unit properly.

Frequently Asked Questions

Users often ask about Salton Vita Pro Dehydrator operation, troubleshooting, and maintenance. Common questions include how to prevent uneven drying, reduce noise, and clean the unit effectively. Solutions involve adjusting temperature settings, ensuring proper tray alignment, and following the manual’s cleaning guidelines. Additionally, users inquire about compatible accessories and optimal food preparation methods for best results. These FAQs help users maximize their dehydrator’s performance and address common concerns efficiently.

Troubleshooting Common Problems

Common issues with the Salton Vita Pro Dehydrator include uneven drying, excessive noise, or the unit not turning on. For uneven drying, ensure consistent food thickness and proper air circulation. If noisy, check for misaligned trays or debris. If the dehydrator doesn’t start, verify power connection and outlet functionality. Refer to the manual for reset procedures or contact support if issues persist. Regular cleaning and maintenance can prevent many of these problems, ensuring smooth operation.


Optimizing Dehydrator Performance

To optimize your Salton Vita Pro Dehydrator performance, ensure proper food preparation and even layering on trays. Use the vented lid for consistent air circulation and avoid overcrowding. Regularly clean the unit to maintain efficiency. For best results, monitor temperature and time settings, adjusting as needed to prevent over-drying. Utilize the included trays (fruit roll-up and herb) for specific tasks. Proper maintenance and adherence to manual guidelines will enhance drying results and extend the dehydrator’s lifespan.

Thank you for reading the Salton Vita Pro Dehydrator Manual. With these insights, you’re ready to create healthy snacks and preserve foods effortlessly. Happy dehydrating!

Final Tips for Using the Salton Vita Pro

For optimal results, explore various temperature and timing settings to suit your needs. Use the included trays wisely, and clean the dehydrator regularly for longevity. Always follow safety guidelines to avoid accidents. Experiment with different foods and recipes to maximize your dehydrating experience. Refer to the manual for troubleshooting and maintenance tips to keep your Salton Vita Pro in top condition. Happy dehydrating!

Encouragement to Explore Dehydrating

Embrace the world of dehydration with the Salton Vita Pro and discover a healthier, tastier way to preserve food. From crispy fruits to savory jerky, unlock endless possibilities for snacks and meals. Experiment with herbs, vegetables, and even flowers for creative uses. Dehydrating is eco-friendly, reducing food waste and saving money. With the Vita Pro, you can enjoy nutritious, homemade treats year-round. Start your dehydration journey today and explore a world of flavors and convenience!

Importance of Following the Manual

Following the Salton Vita Pro Dehydrator Manual is crucial for safe and effective operation. It provides essential safety guidelines, step-by-step instructions, and troubleshooting tips to ensure optimal performance. Adhering to the manual prevents accidents, extends the appliance’s lifespan, and guarantees consistent results. By understanding proper usage, you can preserve nutrients, achieve desired textures, and explore creative recipes confidently. Referencing the manual ensures a seamless experience, helping you make the most of your dehydrator while maintaining safety and efficiency.

PreviousNext

You Want To Have Your Favorite Car?

We have a big list of modern & classic cars in both used and new categories.