
Welcome to the Singer Simple Sewing Machine Manual! This comprehensive guide is designed to help you navigate the features, setup, and operation of your machine with ease.
Whether you’re a seasoned sewer or a beginner, this manual will provide clear instructions to ensure you get the most out of your Singer Simple Sewing Machine.
Reading this manual carefully will help you understand the machine’s capabilities, troubleshoot common issues, and maintain its performance for years to come.
Let’s dive in and explore the world of sewing with Singer!
1.1 Overview of the Manual
This manual provides a detailed guide to the Singer Simple Sewing Machine, covering its features, setup, and operation. It includes step-by-step instructions for basic sewing techniques, maintenance tips, and troubleshooting solutions. Designed for both beginners and experienced users, the manual ensures you maximize your machine’s potential and enjoy a seamless sewing experience.
1.2 Importance of Reading the Manual
Reading the manual is essential for understanding your Singer Simple Sewing Machine’s features, proper setup, and safe operation. It provides troubleshooting tips, maintenance guidance, and step-by-step instructions for optimal performance. By following the manual, you ensure safety, maximize efficiency, and extend the machine’s lifespan, making your sewing experience enjoyable and productive.

Key Features of the Singer Simple Sewing Machine
The Singer Simple Sewing Machine offers essential features for effortless sewing, including a 1-step buttonhole, free arm, and variable stitch settings for versatility. It comes with standard presser feet and is designed for both beginners and experienced sewers, making it perfect for various projects.
2.1 Basic Sewing Functions
The Singer Simple Sewing Machine provides essential functions for everyday sewing, including straight stitching, reverse stitching, and adjustable stitch length. These features allow for versatility in handling different fabrics and sewing tasks, ensuring smooth and precise results for both beginners and experienced users. The machine is designed to make basic sewing tasks efficient and straightforward.
2.2 1-Step Buttonhole Feature
The Singer Simple Sewing Machine includes a convenient 1-step buttonhole feature, allowing you to create professional-looking buttonholes effortlessly. Simply select the buttonhole setting, place your fabric, and let the machine guide you through the process. This feature ensures consistent results and saves time, making it ideal for garments, home decor, and other sewing projects.
2.3 Free Arm Convenience
The Singer Simple Sewing Machine offers a free arm design, providing easy access for sewing cylindrical or hard-to-reach areas like sleeves and pant hems. This feature enhances versatility and makes handling complex projects simpler. Additionally, the free arm stores essential accessories, keeping them within easy reach for a more organized and efficient sewing experience.
2.4 Variable Stitch Length and Width
The Singer Simple Sewing Machine allows you to adjust both stitch length and width, offering flexibility for various fabrics and projects. This feature ensures precise control, whether sewing delicate fabrics with shorter stitches or heavier materials with longer ones, enhancing stitch quality and adaptability for different sewing needs.

Setting Up the Singer Simple Sewing Machine
Setting up your Singer Simple Sewing Machine involves unpacking, connecting to power, threading, and bobbin installation. Follow these steps to ensure safety and proper machine performance.
3.1 Unpacking and Initial Setup
Carefully unpack your Singer Simple Sewing Machine and inspect for damage. Remove the protective cover and stored accessories. Locate the removable storage compartment to access the free arm for sewing tubular projects. Wipe off any excess oil with a soft cloth before use. Sew a test stitch on scrap fabric to ensure proper setup and functionality.
3.2 Connecting to a Power Source
Plug the machine into a polarized outlet using the provided cord. Ensure the plug’s wider blade aligns with the outlet’s slot. If it doesn’t fit, do not modify it—contact a licensed electrician. Always unplug the machine when not in use for safety. This ensures proper operation and prevents electrical hazards.
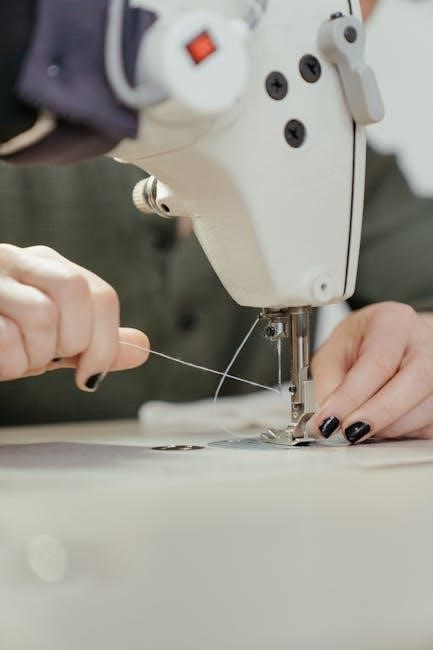
3.3 Threading the Machine
Turn off the power before threading. Pull 6-8 inches of thread from the spool and guide it through the machine’s tension discs. Use the automatic needle threader to thread the needle. Gently pull excess thread to secure it. Ensure the thread is seated properly in the tension guides for consistent stitching. Always keep the machine threaded correctly for optimal performance.
3.4 Bobbin Installation
Turn off the machine before installing the bobbin. Use only Singer Class 15 transparent bobbins. Insert the bobbin into the bobbin case, ensuring it sits securely. Pull thread through the case’s slot and gently tug to seat it. Close the bobbin case and ensure the machine is threaded correctly for proper stitch formation and sewing performance.
Basic Sewing Techniques
Master the fundamentals of sewing with the Singer Simple Sewing Machine. Learn straight stitching, decorative stitching, stretch stitching, buttonhole creation, and sewing buttons for versatile sewing projects.
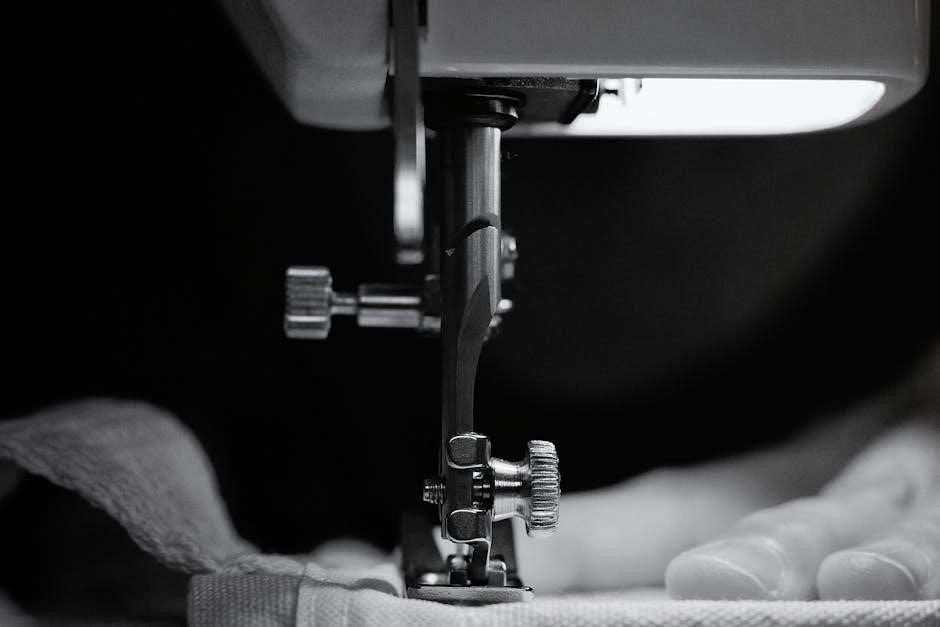
4.1 Sewing a Straight Stitch
The straight stitch is ideal for sewing seams and topstitching. Use a shorter stitch length for lightweight fabrics and longer for heavier materials. Gently hold thread tails to guide fabric smoothly under the presser foot. This stitch provides a strong, consistent seam, perfect for basic sewing projects.
4.2 Sewing a Decorative Stitch
A decorative stitch adds flair to your projects. Use a stabilizer to prevent puckering and reduce upper tension by 1-2 numbers to avoid thread visibility. Ideal for embellishing fabrics, decorative stitching is versatile and enhances creativity. Visit www.singerco.com for additional stitch ideas to expand your sewing possibilities.
4.3 Sewing a Stretch Stitch
A stretch stitch is ideal for knit fabrics, allowing seams to stretch with the fabric. Adjust stitch settings for optimal results. Use a stabilizer to support the fabric and reduce upper tension slightly. Test on scrap fabric first. This stitch ensures flexibility and durability, perfect for garments that require movement. Visit www.singerco.com for additional stretch stitch options.
4.4 Creating a Buttonhole
The Singer Simple Sewing Machine features a 1-step buttonhole, making it easy to create professional-looking buttonholes. Place fabric under the needle, select the buttonhole setting on the Stitch Selector Dial, and sew. Use a stabilizer to prevent fabric puckering. Slightly reduce upper tension for cleaner stitches. Test on scrap fabric before sewing on your project for best results.
4.5 Sewing a Button
To sew a button, use the Button Sewing Foot for easy attachment. Center the button on the fabric, aligning it under the needle. Select the appropriate stitch and sew around the button securely. The machine will automatically sew a tight stitch around the edges. Test on scrap fabric first to ensure proper settings and alignment for the best results.

Maintenance and Troubleshooting
Regularly clean and lubricate your Singer Simple Sewing Machine to maintain optimal performance. Refer to specific sections for troubleshooting common issues and adjusting settings for smooth operation;
5.1 Cleaning the Machine
Regular cleaning is essential for maintaining your Singer Simple Sewing Machine. Turn off the power and unplug it before cleaning. Use a soft, dry cloth to wipe the exterior and remove any dust or debris. For internal cleaning, remove the removable storage compartment and gently brush away lint from the needle plate and bobbin area. Avoid using harsh chemicals or liquids, as they may damage the machine. Cleaning ensures smooth operation and prevents thread jams or tension issues. Always refer to the manual for specific cleaning instructions tailored to your machine. Regular maintenance will extend its lifespan and performance. Keep your Singer Simple Sewing Machine in pristine condition for years of reliable service.
5.2 Adjusting Thread Tension
Proper thread tension is crucial for even stitching. Turn the upper tension dial to adjust the thread tightness. For decorative or stretch stitches, slightly loosen the tension to prevent thread visibility. Always test settings on scrap fabric before sewing your project. Avoid over-tightening, as it may cause fabric puckering or machine jamming. Ensure balanced tension for optimal results.
5.3 Changing the Needle
Regularly replace the needle to maintain stitch quality. Turn off the machine and loosen the needle clamp screw. Remove the old needle and insert a new one with the flat side facing the back. Tighten the screw securely. Use SINGER-branded needles for optimal performance. Change the needle after every 4 projects or 16 hours of use to prevent wear-related issues.
5.4 Common Issues and Solutions

If the machine sews in reverse, check the reverse lever. For uneven stitches, adjust thread tension or clean the machine. If fabric doesn’t move, ensure the presser foot is down. Lubricate parts if noisy. Refer to the troubleshooting guide for more solutions to keep your Singer Simple Sewing Machine performing optimally.

Accessories and Optional Attachments
The Singer Simple Sewing Machine comes with standard presser feet and optional attachments for specialized tasks. Explore additional accessories like the button sewing foot for enhanced functionality and convenience.
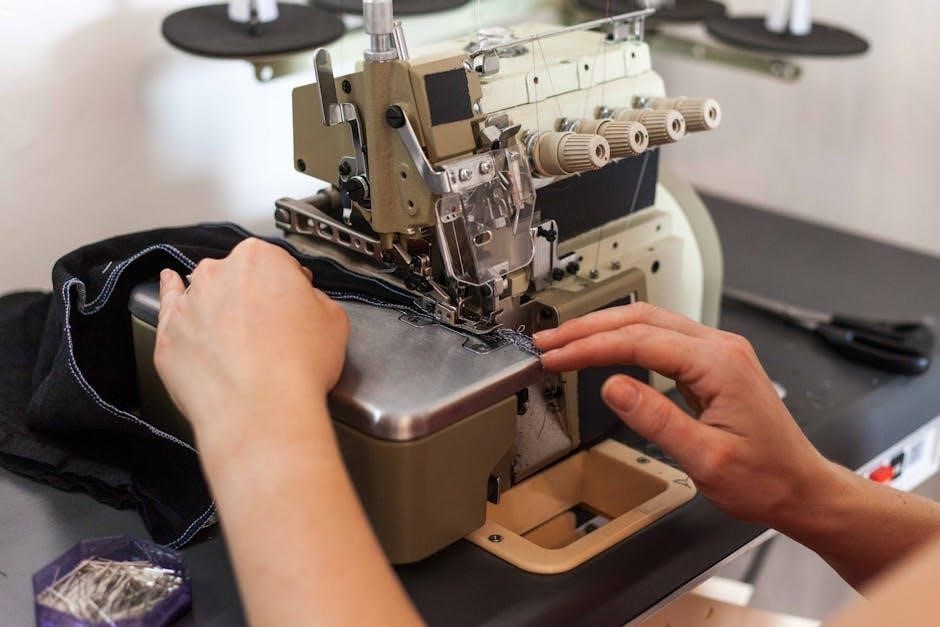
6.1 Standard Presser Feet
The Singer Simple Sewing Machine includes standard presser feet for various sewing tasks. These feet are designed to handle different fabrics and stitches, ensuring smooth operation. Use the all-purpose foot for general sewing, the buttonhole foot for creating buttonholes, and the zipper foot for sewing zippers and heavy fabrics. Additional feet may be stored in the removable compartment for easy access.
6.2 Optional Accessories
Optional accessories for the Singer Simple Sewing Machine enhance your sewing experience. These include specialized presser feet like the button sewing foot, quilting guides, and additional storage compartments; Explore Singer’s official website for a full list of compatible accessories tailored to your specific sewing needs and projects.
6.3 Using the Button Sewing Foot
The Singer Simple Sewing Machine’s Button Sewing Foot simplifies attaching buttons. Found in the removable storage compartment, it easily attaches by sliding the pin into the shank groove. Center the button under the foot, lower the presser foot, and sew. This accessory ensures secure, professional button attachment with minimal effort.

Safety Instructions
Always turn off the machine before threading, changing needles, or making adjustments. Use the foot control to regulate sewing speed and keep loose clothing tied back while sewing.
Avoid sewing near children or flammable materials. Ensure the machine is placed on a stable surface and unplugged when not in use for safety.
7.1 General Safety Precautions
Always keep the machine out of children’s reach and avoid sewing near flammable materials. Ensure the sewing area is well-lit and free from clutter. Use the foot control to regulate sewing speed and maintain control. Avoid wearing loose clothing or jewelry that could get caught in moving parts. Keep long hair tied back while sewing. Unplug the machine when not in use or during maintenance. Never touch electrical components with wet hands to prevent shock. Regularly inspect and maintain the machine to ensure safe operation. Follow all safety guidelines provided in the manual to minimize risks and ensure a safe sewing experience. By adhering to these precautions, you can enjoy a safe and productive time with your Singer Simple Sewing Machine.
7.2 Electrical Safety
Always use the machine with a polarized plug and ensure it fits correctly in the outlet. Never modify the plug or use adapters that could compromise safety. Avoid overloading circuits and keep the power cord away from heat sources or sharp objects. Unplug the machine when not in use or before cleaning. Ensure the machine is turned off before threading or changing the needle. Keep the sewing area dry and avoid sewing in humid environments. Use the foot control responsibly and store the machine in a dry, cool place when not in use. Proper electrical safety ensures reliable performance and protects against hazards.
7.3 Handling the Machine
Always lift and place the machine gently to avoid damage. Turn off the power before handling internal parts like the bobbin or needle. Use the foot control responsibly to maintain sewing speed. Store the machine in a dry, cool place when not in use. Regularly clean dust and lint from the machine to ensure smooth operation. Proper handling extends the machine’s lifespan and ensures optimal performance.
Singer’s Green Initiative
Singer is committed to reducing its environmental footprint by offering digital manuals exclusively online, minimizing paper usage and waste. This initiative supports eco-friendly practices while maintaining accessibility for users.
8.1 Digital Manuals and Downloads
Singer offers free digital manuals and downloads, reducing paper waste and promoting sustainability. Users can easily access guides, stitch charts, and updates online, ensuring they always have the latest information for their machine. This initiative supports Singer’s commitment to environmental responsibility while maintaining convenience and accessibility for customers worldwide.
8.2 Environmental Benefits
Singer’s shift to digital manuals reduces paper waste, aligning with their Green Initiative. This eco-friendly approach minimizes environmental impact while promoting sustainable practices. Energy-efficient production and recyclable packaging further support their commitment to preserving the planet. By adopting digital solutions, Singer encourages users to contribute to a greener future through responsible resource management and reduced carbon footprint.
The Singer Simple Sewing Machine Manual provides a comprehensive guide to mastering your machine, ensuring creative and efficient sewing experiences. Happy sewing!
9.1 Final Tips for Using the Singer Simple Sewing Machine
Always clean and oil your machine regularly to maintain performance. Use compatible needles and threads for optimal results. Experiment with stitches on scrap fabric before sewing projects. Keep accessories organized for easy access. Practice patience and consistency to refine your sewing skills. Happy creating with your Singer Simple Sewing Machine!