PDF

naya nutrition pdf

Naya Nutrition PDF offers a comprehensive guide to holistic wellness, focusing on balanced eating, meal planning, and sustainable lifestyle changes for optimal health and well-being.

Overview of the Naya Nutrition Guide

The Naya Nutrition Guide is a comprehensive resource designed to empower individuals with practical knowledge for making informed dietary choices. It emphasizes the importance of understanding macronutrients and micronutrients, offering insights into how these elements contribute to overall health. The guide also explores the role of diet in preventing chronic diseases, providing evidence-based strategies for maintaining long-term wellness. By focusing on sustainable lifestyle changes, it helps readers adopt healthier habits without compromising on flavor or variety. The guide is structured to be accessible, making it suitable for both beginners and those familiar with nutrition concepts. Its holistic approach ensures that readers gain a deeper understanding of how nutrition impacts physical and mental well-being, equipping them with tools to create balanced and nourishing meal plans tailored to their needs.


Importance of Nutrition in Modern Lifestyles

Nutrition plays a pivotal role in modern lifestyles, serving as the foundation for energy, productivity, and overall well-being. With increasing demands of fast-paced lives, a balanced diet helps combat stress and prevents chronic diseases. Healthy eating habits support mental clarity and focus, essential for professional and personal success. Additionally, proper nutrition strengthens the immune system, reducing the risk of illnesses. It also promotes better sleep quality, which is crucial for physical and mental recovery. In today’s world, where convenience often leads to poor dietary choices, prioritizing nutrition becomes vital. By making informed food decisions, individuals can enhance their quality of life, ensuring they thrive in both personal and professional realms. Thus, nutrition is not just about sustenance; it is a cornerstone of a healthy, productive, and fulfilling modern lifestyle.

The Core Principles of Naya Nutrition

Naya Nutrition emphasizes balance, variety, and mindful eating, focusing on whole foods to nurture both body and mind for sustainable health and vitality in modern lifestyles.

Understanding Macronutrients and Micronutrients

Macronutrients, including carbohydrates, proteins, and fats, are essential for energy and bodily functions. Carbohydrates fuel the brain and muscles, while proteins build and repair tissues. Fats support hormone production and absorption of vitamins. Micronutrients, such as vitamins and minerals, are vital for immune function, metabolism, and overall health. Naya Nutrition PDF highlights the importance of balancing these nutrients to ensure optimal wellness. A deficiency in micronutrients like vitamin D or iron can lead to health issues, while excessive intake of macronutrients may result in weight gain or metabolic imbalances. Understanding their roles helps individuals make informed dietary choices, aligning with Naya Nutrition’s emphasis on holistic and sustainable eating practices for long-term well-being.

Role of Diet in Preventing Chronic Diseases

Diet plays a crucial role in preventing chronic diseases, such as heart disease, diabetes, and obesity. A balanced intake of macronutrients and micronutrients helps maintain healthy bodily functions and reduces disease risk. For instance, antioxidants and fiber in whole foods combat inflammation, while omega-3 fatty acids support heart health. Avoiding processed foods, excessive sugars, and unhealthy fats minimizes the likelihood of developing these conditions. Naya Nutrition PDF emphasizes the importance of mindful eating and sustainable habits to foster long-term wellness. By prioritizing nutrient-dense meals, individuals can significantly lower their risk of chronic illnesses and improve overall health outcomes. This approach aligns with the guide’s focus on empowering individuals to make informed dietary choices for a healthier lifestyle.

Diet Plans and Strategies

Naya Nutrition PDF provides personalized diet plans and actionable strategies, focusing on balanced meals, portion control, and mindful eating to promote sustainable weight management and overall health.

Meal Planning for Weight Management

Meal planning is a cornerstone of effective weight management, offering structure and accountability. By designing balanced meals, individuals can avoid impulsive choices and maintain portion control. Naya Nutrition PDF emphasizes the importance of macronutrient balance, ensuring meals are rich in proteins, healthy fats, and complex carbohydrates. It also highlights the role of hydration and mindful eating practices. Practical strategies include creating weekly grocery lists, prepping meals in advance, and incorporating versatile recipes. The guide suggests avoiding processed foods and focusing on whole, nutrient-dense ingredients. Additionally, it provides tips for dining out and managing cravings. By adhering to a well-structured meal plan, individuals can achieve sustainable weight loss while nourishing their bodies. This approach fosters long-term habits, making weight management a natural part of a healthy lifestyle.

Impact of Meal Timing on Metabolism

Meal timing plays a significant role in optimizing metabolism and overall health. Naya Nutrition PDF highlights how scheduling meals strategically can enhance metabolic function, improve energy levels, and support weight management. Eating nutrient-dense meals during active hours aligns with circadian rhythms, promoting efficient calorie burning. Skipping meals or inconsistent eating patterns can disrupt metabolic balance, leading to energy crashes and poor digestion. The guide suggests spacing meals evenly and incorporating protein-rich breakfasts to kickstart metabolism. Additionally, it emphasizes the importance of a balanced dinner and avoiding heavy meals close to bedtime. By synchronizing eating habits with natural biological cycles, individuals can maximize metabolic efficiency and maintain a healthy, active lifestyle. This approach not only boosts energy but also supports long-term wellness goals.

Health Benefits of Naya Nutrition

Naya Nutrition promotes enhanced energy levels, improved digestion, and boosted immunity through balanced eating. It supports weight management, reduces chronic disease risks, and fosters overall well-being naturally.

Improving Mental Health Through Nutrition

Naya Nutrition emphasizes the profound impact of diet on mental well-being. A balanced intake of omega-3 fatty acids, antioxidants, and essential vitamins supports brain health, reducing symptoms of anxiety and depression. By incorporating nutrient-rich foods like whole grains, lean proteins, and leafy greens, individuals can enhance cognitive function and stabilize mood. Proper hydration and limiting processed sugars also play a crucial role in maintaining mental clarity and emotional balance. The guide advocates for mindful eating habits, fostering a positive relationship with food to alleviate stress and promote resilience. Naya Nutrition provides practical strategies to tailor diets for mental health, empowering individuals to adopt sustainable, holistic approaches to their well-being.

Enhancing Physical Performance and Recovery

Naya Nutrition PDF highlights the critical role of nutrition in optimizing physical performance and accelerating recovery. By focusing on balanced macronutrient intake, including lean proteins, complex carbohydrates, and healthy fats, individuals can fuel their bodies for peak performance. Proper hydration and electrolyte balance are also emphasized to maintain energy levels and prevent fatigue. The guide underscores the importance of post-workout nutrition, suggesting timing and food choices that promote muscle repair and growth. Additionally, it addresses the role of antioxidants and anti-inflammatory foods in reducing muscle soreness and enhancing overall recovery. Naya Nutrition provides tailored strategies to support athletes and active individuals, ensuring they achieve their fitness goals while maintaining long-term health and vitality. Its holistic approach empowers individuals to perform at their best and recover efficiently, making it a valuable resource for anyone seeking to improve physical performance.

Practical Tips for Implementing Naya Nutrition

Naya Nutrition PDF provides actionable strategies for integrating healthy habits, such as meal prepping, mindful eating, and hydration, to simplify your wellness journey and achieve lasting results.

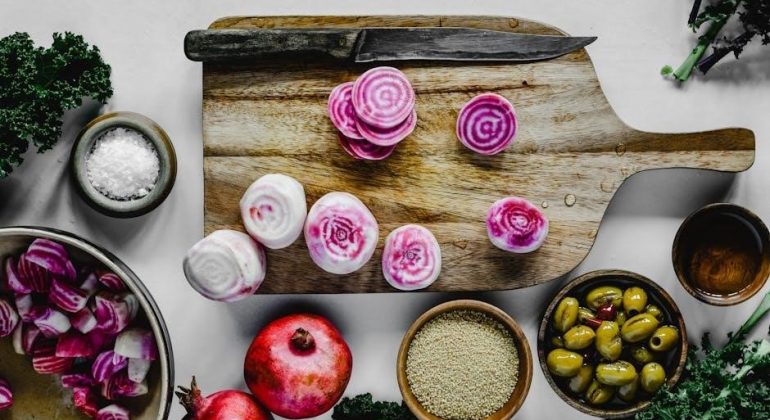
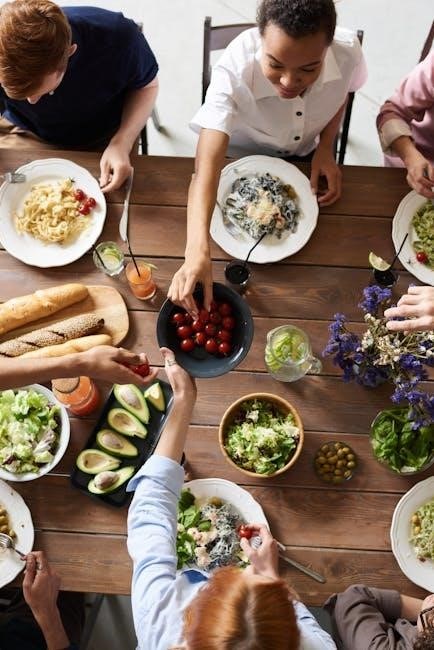
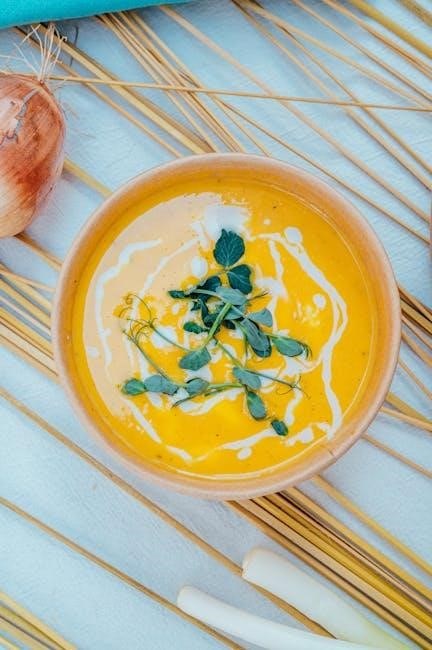
Healthy Recipe Ideas for Everyday Meals

Naya Nutrition PDF provides innovative and easy-to-follow recipes that cater to diverse dietary needs, ensuring flavorful and nutritious meals. From hearty breakfast options like overnight oats to vibrant salads and lean protein dishes, the guide emphasizes whole, unprocessed ingredients. Simple snacks, such as homemade energy balls or fresh fruit smoothies, are perfect for busy days. For dinner, recipes like grilled vegetables with quinoa or baked fish with herbs offer balanced and satisfying options. The PDF also includes tips for meal prepping, allowing you to save time while maintaining healthy eating habits. These recipes are designed to be adaptable, making it easy to incorporate them into your daily routine for long-term wellness.

Staying Motivated on Your Nutrition Journey

Staying motivated on your nutrition journey requires a combination of mindset shifts, practical strategies, and consistent effort. Setting realistic goals and celebrating small victories helps maintain momentum. Tracking progress through journals or apps can provide visual reminders of your achievements. Surrounding yourself with a supportive community or accountability partner also fosters motivation. Incorporating variety in your meals and routines prevents boredom, keeping your journey enjoyable. Reminding yourself of the long-term benefits, such as improved health and energy, helps stay focused. Naya Nutrition PDF emphasizes the importance of self-compassion, encouraging persistence even during setbacks. By embracing nutrition as a lifestyle rather than a temporary fix, you cultivate sustainable habits that lead to lasting success. Motivation flourishes when you connect with your “why” and make nourishing choices a priority.

Naya Nutrition PDF empowers individuals to embrace a balanced, sustainable approach to health, offering practical tools and insights for a transformative nutrition journey.

Final Thoughts on Naya Nutrition

Naya Nutrition PDF serves as a comprehensive guide, emphasizing balanced eating and sustainable lifestyle changes. It educates individuals on the importance of nutrient-rich diets, offering practical strategies for meal planning and mindful eating. By focusing on holistic wellness, Naya Nutrition encourages readers to adopt habits that promote long-term health and vitality. The guide’s approach is adaptable to various lifestyles, making it accessible for everyone seeking to improve their well-being. With its emphasis on education and empowerment, Naya Nutrition equips individuals with the tools needed to make informed dietary choices, fostering a deeper understanding of nutrition’s role in overall health. This resource is invaluable for those aiming to embark on a transformative journey toward healthier living.

Future Trends in Nutrition and Wellness

Emerging trends in nutrition highlight a growing emphasis on personalized diets, gut health, and sustainable eating. Plant-based and alternative protein sources are gaining traction, while AI-driven meal planning tools are becoming more popular. Mental health is increasingly linked to nutrition, with a focus on mood-enhancing foods. Functional foods and nutraceuticals are expected to rise in demand, offering targeted health benefits. Additionally, there is a shift toward reducing food waste and adopting eco-friendly dietary practices. These trends reflect a broader movement toward holistic wellness, where nutrition plays a central role in preventing chronic diseases and enhancing overall quality of life. As research evolves, Naya Nutrition PDF and similar guides will likely incorporate these innovations, helping individuals adapt to a rapidly changing nutritional landscape.

Manuals

white’s bullseye trx pinpointer manual

The Whites Bullseye TRX pinpointer is a cutting-edge, water-resistant device designed for precise metal detection. Built by Whites Electronics, it combines advanced features like ground balancing and VLF technology for deeper target detection. Perfect for professionals and hobbyists alike, it offers unmatched sensitivity and ease of use, making it an essential tool for metal detecting enthusiasts.

Key Features

The Whites Bullseye TRX pinpointer boasts a waterproof design, ground-balancing VLF technology, high sensitivity for small targets, selectable beeper/vibrator modes, an LED light for visibility, and dual battery operation for extended use.

2.1 Design and Technology

The Whites Bullseye TRX pinpointer features a sleek, ergonomic design with a durable, weatherproof housing, ensuring reliability in various environments. Inside, it utilizes a Very Low Frequency (VLF) circuit, which enhances detection accuracy and depth. The device incorporates miniaturized components to maintain its compact size while delivering exceptional performance. Its ground-balancing capability allows it to adapt to different soil conditions, minimizing interference and improving target identification. The TRX also includes an LED light for low-light conditions and a lanyard loop for secure handling. These technological advancements make the Bullseye TRX a versatile and efficient tool for metal detecting, capable of detecting both ferrous and non-ferrous metals with precision. Its design emphasizes user comfort and operational efficiency, making it a favorite among both professionals and hobbyists in the field.


How to Use

Turn on the Bullseye TRX, adjust sensitivity, and ground balance for optimal performance. Use the LED light and audio signals to locate targets accurately. Ideal for both professionals and hobbyists.

3.1 Setup and Initialization

To begin using the Whites Bullseye TRX pinpointer, start by inserting the batteries and turning on the device. The TRX features a simple power button that activates the unit. Once powered on, the device is ready for use. For optimal performance, adjust the sensitivity settings according to the environment and target type. The TRX also includes ground balancing capability, which ensures accurate detection by tuning the device to the soil conditions. Use the LED light for visibility in low-light conditions and rely on the audio signals to pinpoint targets. The TRX is designed for ease of use, with intuitive controls that allow users to quickly adapt to various detecting scenarios. Follow these steps to initialize and start detecting with confidence.

3.2 Operating Modes and Techniques

The Whites Bullseye TRX pinpointer operates in a standard detection mode, optimized for precision and accuracy. To maximize effectiveness, use the device in a sweeping motion, moving it slowly and steadily over the target area. The TRX also features adjustable sensitivity settings, allowing users to fine-tune the device for specific conditions, such as mineral-rich soil or small targets. For deeper targets, utilize the ground-balancing feature to enhance detection depth. Techniques like pinpointing involve holding the TRX near the ground and relying on audio or vibration signals to locate the target’s center. Always maintain the device close to the ground for optimal results. By combining these operating modes and techniques, users can efficiently locate and identify targets with precision and confidence, making the TRX an indispensable tool for metal detecting enthusiasts. Regular practice with these methods will improve your detection skills and overall experience.

Technical Specifications

The Whites Bullseye TRX pinpointer is equipped with a water-resistant design, ensuring reliability in various environments. It operates using two AA batteries, providing extended runtime for uninterrupted use. The device features a VLF (Very Low Frequency) circuit, enabling precise ground balancing and enhanced sensitivity for deeper target detection. Its adjustable sensitivity settings allow customization for different soil types and target sizes. The TRX also includes a selectable beeper and vibrator, along with an LED light for low-light conditions. Weighing in at a compact design, it is lightweight and easy to maneuver. The pinpointer’s detection area is concentrated at the tip, facilitating accurate target location. With dual battery operation and a durable construction, the Bullseye TRX is built to meet the demands of both casual and professional metal detecting enthusiasts, offering exceptional performance and reliability in diverse settings. These specifications make it a versatile and efficient tool for pinpointing treasures with precision and confidence.

Troubleshooting Common Issues

Experiencing issues with your Whites Bullseye TRX pinpointer? Here are some common problems and solutions to help you get back to detecting. Reduced sensitivity: Ensure proper ground balancing and check for low battery levels. False signals: Adjust sensitivity settings or move away from sources of interference. LED light not working: Verify battery connections or replace batteries if necessary. Pinpointer not turning on: Check battery installation and ensure the power button is functioning correctly. Intermittent operation: Clean the device’s contacts and ensure no debris is obstructing the sensor. For persistent issues, consult the user manual or contact Whites Electronics support. Regular maintenance and proper handling can prevent many of these problems, ensuring optimal performance in the field.

Accessories and Maintenance

To maximize the performance and longevity of your Whites Bullseye TRX pinpointer, consider investing in recommended accessories and following proper maintenance routines. A durable carry case or holster is essential for protecting the device during transportation. Extra batteries are a must, as the TRX operates on two AA batteries, and having spares ensures uninterrupted use. A cleaning cloth can help maintain the pinpointer’s exterior, while a lanyard or wrist strap prevents accidental loss. Regularly inspect and clean the tip and sensor area to remove dirt or debris that might affect sensitivity. Store the TRX in a dry place to prevent moisture damage. For optimal performance, avoid exposing the device to extreme temperatures or physical stress. By maintaining your Bullseye TRX and equipping it with the right accessories, you can ensure reliable operation and extend its service life.

Manual Content and Guidance

The Whites Bullseye TRX pinpointer manual provides comprehensive guidance for users, ensuring they can fully utilize its features. The manual begins with an introduction, congratulating users on their purchase and highlighting the device’s unique capabilities. It then details the pinpointer’s components, including the control button, LED light, and battery compartment. Setup instructions are provided, explaining how to insert batteries, adjust sensitivity, and access the ground-balancing feature. Operating modes are discussed, such as the silent mode for stealth operations and the audible mode for clear feedback. The manual also includes troubleshooting tips, addressing common issues like false signals or low battery life. Additionally, maintenance advice is offered to prolong the device’s lifespan. Users can find the manual on the Whites Electronics website, Garretts website, or through FCC ID resources. The guide ensures users can optimize their metal detecting experience with the Bullseye TRX, making it an indispensable resource for both beginners and experienced detectors.

Where to Find the Manual

The Whites Bullseye TRX pinpointer manual can be easily accessed through various channels. The primary source is the official Whites Electronics website, where users can download the manual directly. Additionally, the manual is available on Garretts website, which hosts a comprehensive library of Whites metal detector manuals. For convenience, users can also access the manual via the FCC ID database, specifically under the identifier KHS800-0343. Some retailers who sell the Bullseye TRX may include a digital copy of the manual with purchase. If the manual is not provided, contacting Whites Electronics customer support or authorized service centers can help users obtain a copy. The manual is available in multiple languages, including English and Spanish, ensuring accessibility for a broad audience. Whether downloaded online or obtained through customer support, the manual is a vital resource for optimizing the use of the Bullseye TRX pinpointer.

The Whites Bullseye TRX pinpointer is a standout tool in metal detecting, offering exceptional performance and ease of use. With its advanced ground-balancing VLF technology, it delivers precise target detection and impressive depth capabilities. The manual provides comprehensive guidance, ensuring users maximize the device’s potential. Available online through Whites Electronics, Garretts website, and FCC databases, the manual is accessible to all. Its detailed instructions cover setup, operation, and troubleshooting, making it an essential resource. Whether for professionals or enthusiasts, the Bullseye TRX enhances metal detecting experiences, combining innovation with reliability. This pinpointer is a testament to Whites Electronics’ commitment to quality, solidifying its reputation as a leader in metal detection technology. By following the manual, users can unlock the full capabilities of the Bullseye TRX, ensuring successful and rewarding metal detecting adventures.

PDF

rotator cuff physical therapy exercises pdf

Physical therapy exercises are essential for rotator cuff recovery, enhancing strength and flexibility. Consistency is key to improving shoulder function and preventing future injuries. A printable PDF guide provides structured routines for effective rehabilitation.

1.1 Overview of Rotator Cuff Injuries and the Role of Physical Therapy

Rotator cuff injuries, often caused by trauma or chronic overuse, lead to pain and weakness in shoulder movements. Physical therapy plays a crucial role in rehabilitation by restoring strength, flexibility, and stability. It aims to alleviate symptoms, improve range of motion, and prevent further injury or the need for surgery, fostering long-term recovery and functional independence.

1.2 Importance of Consistency in Exercise Programs

Consistency is vital in rotator cuff rehabilitation, as regular exercise ensures gradual healing and strength improvement. Irregular efforts may lead to prolonged recovery or recurrence of symptoms. A structured program, including range of motion and strengthening exercises, should be followed diligently to achieve optimal results and prevent future injuries, ensuring long-term shoulder health and functionality.

Understanding the Rotator Cuff and Its Functions

The rotator cuff is a group of muscles and tendons stabilizing the shoulder joint, enabling movement and preventing dislocation. Its primary functions include controlling arm rotation, providing stability, and supporting overhead activities, making it crucial for maintaining shoulder health and mobility.

2.1 Anatomy of the Rotator Cuff

The rotator cuff consists of four muscles: supraspinatus, infraspinatus, teres minor, and subscapularis, along with their tendons. These muscles originate from the scapula and attach to the humerus, forming a cuff around the shoulder joint. This complex structure stabilizes the shoulder, enabling a wide range of motion while maintaining joint integrity. Understanding its anatomy is crucial for effective rehabilitation exercises.

2.2 Common Causes of Rotator Cuff Injuries

Rotator cuff injuries often result from acute trauma, such as falls or direct blows, or chronic overuse from repetitive movements. Poor posture, weak shoulder muscles, and age-related wear and tear can also contribute. Activities involving overhead motions or heavy lifting increase the risk. Early identification and targeted exercises can address these issues, promoting recovery and preventing further damage.

Key Components of a Rotator Cuff Rehabilitation Program

A comprehensive program includes warm-up routines, stretching for flexibility, and strengthening exercises to enhance shoulder stability. Consistency and proper progression are vital for optimal recovery and improved function.

3.1 Warm-Up and Preparation

A proper warm-up is crucial for rotator cuff rehabilitation. Start with 5-10 minutes of low-impact activity like walking or cycling to increase blood flow. Gentle arm circles and shoulder rolls can prepare the muscles for more intense exercises. Using a heating pad or warm compress may also reduce stiffness and enhance flexibility, ensuring a safe and effective session.

3.2 Stretching Exercises for Flexibility

Stretching exercises improve shoulder flexibility, reducing stiffness and pain. The cross-body stretch and passive techniques target tight muscles. Hold stretches for 15-30 seconds to maximize benefits. Perform these exercises daily to enhance range of motion and support recovery. Consistency ensures lasting flexibility, aiding in overall rotator cuff health and function.

3.3 Strengthening Exercises for Stability

Strengthening exercises are crucial for restoring shoulder stability and preventing reinjury. Scapular stability exercises, like shoulder shrugs and blade squeezes, enhance muscle support. Progressive resistance and external rotations target the rotator cuff muscles. Perform these exercises 3-4 times weekly to build strength and maintain joint stability, ensuring long-term shoulder health and function.

Stretching Exercises for Rotator Cuff Rehabilitation

Stretching exercises improve flexibility and reduce shoulder stiffness, enhancing range of motion. Gentle stretches, like cross-body and passive techniques, are essential for rehabilitation and preventing tightness.

4.1 Cross-Body Stretch

The cross-body stretch targets the rotator cuff muscles, improving flexibility and range of motion. To perform, gently pull your injured arm across your chest toward the opposite shoulder. Hold for 15-30 seconds and repeat 2-4 times. This stretch helps reduce stiffness and enhances shoulder mobility, making it a cornerstone of rotator cuff rehabilitation programs.

4.2 Passive Stretching Techniques

Passive stretching involves using external assistance, such as a therapist or equipment, to stretch the rotator cuff muscles. This technique enhances flexibility without active muscle engagement, benefiting those with limited mobility. Gentle, controlled movements are used to avoid pain. A common example is the cross-body stretch, where the arm is guided across the chest. Regular passive stretching improves shoulder range of motion and reduces stiffness effectively.

Strengthening Exercises for Rotator Cuff Rehabilitation

Strengthening exercises target the rotator cuff muscles to improve stability and function. Resistance bands and light weights are commonly used to build endurance and prevent further injury.

5.1 Scapular Stability Exercises

Scapular stability exercises are crucial for rotator cuff rehabilitation. Techniques like shoulder shrugs and scapular squeezes strengthen the muscles around the shoulder blade, improving posture and reducing strain on the rotator cuff. These exercises often involve gentle movements that target the trapezius and rhomboid muscles. Consistency in performing these exercises helps restore shoulder balance and promotes long-term stability.

5.2 External Rotation Exercises

External rotation exercises target the rotator cuff muscles, enhancing shoulder stability and mobility. Techniques like standing in a doorway with the arm pressed against the frame or using resistance bands are common. These exercises improve strength and reduce injury risk. Consistency and proper form, guided by a physical therapist, are essential for effective rehabilitation and long-term shoulder health.

Using the Rotator Cuff Physical Therapy Exercises PDF


The rotator cuff physical therapy exercises PDF provides a comprehensive guide for rehabilitation, with detailed instructions and visuals to enhance patient engagement and therapist guidance.

6.1 Benefits of a Printable Exercise Guide

A printable rotator cuff physical therapy exercises PDF offers accessibility and clarity, ensuring patients can follow structured routines. It serves as a handy reference, promoting consistency and adherence to rehabilitation programs. The guide’s visual aids and detailed instructions enhance understanding, while its portability allows patients to perform exercises anywhere, maintaining progress between therapy sessions.

6.2 How to Follow the Exercise Program

Begin each session with a warm-up, such as 5-10 minutes of low-impact activity. Perform stretching exercises first, followed by strengthening routines. Repeat stretches after strengthening to improve flexibility. Exercises should be done 2-3 times weekly, using the PDF guide for clarity. Avoid pain during exercises and adjust as needed. Track progress and consult your therapist for program adjustments to ensure safe and effective rehabilitation.

Progression and Modification of Exercises

Exercises progress from passive to active movements, with intensity adjusted based on recovery. Modifications ensure safety and effectiveness, tailored to individual healing stages and therapist guidance.

7.1 Adjusting Exercises Based on Pain Levels

Exercises should be modified based on pain levels to avoid aggravating the injury. If pain occurs, stop or ease the exercise. Consult a physical therapist to adjust routines, ensuring movements remain comfortable and effective. Gentle progression and pain-free ranges are prioritized to promote healing and prevent setbacks during rehabilitation.

7.2 Gradually Increasing Exercise Intensity

Exercise intensity should be increased gradually to avoid overexertion; Start with gentle movements and progress to resistance bands or light weights as strength improves; Focus on controlled motions and avoid sudden increases in load or repetition. Consult a physical therapist to ensure progression aligns with healing and strength gains, preventing re-injury while enhancing shoulder stability and function.

Importance of Postural Correction in Rotator Cuff Rehabilitation

Proper posture reduces shoulder strain and promotes healing. Correcting rounded shoulders and forward head position improves scapular alignment, enhancing rotator cuff function and reducing injury risk.

8.1 Role of Scapular Positioning

Proper scapular positioning is vital for shoulder stability and rotator cuff function. Maintaining neutral spine alignment prevents strain on the rotator cuff muscles. Exercises like shoulder shrugs and scapular squeezes strengthen the muscles around the shoulder blades, improving posture and reducing injury risk. Physical therapists often emphasize scapular stabilization to enhance overall shoulder mechanics and promote efficient movement patterns during rehabilitation.

8.2 Exercises to Improve Posture

Exercises targeting scapular stabilization and chest mobility are crucial for improving posture. Scapular squeezes and chest stretches help reduce rounded shoulders, enhancing shoulder mechanics. Strengthening the scapular stabilizers improves posture, reducing strain on the rotator cuff. These exercises promote proper spinal alignment, addressing muscle imbalances that contribute to poor posture and shoulder dysfunction, fostering long-term shoulder health and stability.

Consistent practice of rotator cuff exercises ensures lasting shoulder health. Regular stretching and strengthening routines prevent future injuries, maintaining stability and mobility for long-term recovery success.

9.1 Maintaining Shoulder Health After Rehabilitation

Maintaining shoulder health after rehabilitation involves consistent exercise routines, proper posture, and avoiding repetitive strain. Incorporate stretching and strengthening exercises to prevent re-injury. Use a rotator cuff physical therapy exercises PDF for guidance, ensuring long-term stability and mobility. Regular monitoring of progress and adherence to a structured plan are crucial for sustained shoulder health and overall well-being.

9.2 Preventing Future Injuries

Preventing future rotator cuff injuries requires ongoing strength and flexibility exercises, proper posture correction, and avoiding repetitive overuse. Incorporate scapular stability exercises and maintain a structured routine using a rotator cuff physical therapy exercises PDF; Avoid heavy overhead activities without proper warm-up and technique. Regular monitoring and adjustments to your exercise program can significantly reduce the risk of re-injury and promote long-term shoulder health.

Manuals

fluke manual 87

The Fluke 87 manual provides comprehensive guidance for using the True RMS multimeter, emphasizing safety, setup, and precise measurements․ It ensures versatility and durability for professionals and hobbyists․

Overview of the Fluke 87 Multimeter

The Fluke 87 multimeter is a portable, 4000-count True RMS digital multimeter designed for precise measurements in field, lab, and home environments․ It measures AC/DC voltage, current, resistance, and temperature using type-K thermocouples․ Part of the 87 Series IV, it includes models like the 87V and 87V MAX, offering advanced features such as wireless connectivity via Fluke Connect․ Known for its rugged design, it withstands drops up to 4 meters and features a user-friendly interface, making it ideal for professionals and enthusiasts alike․

Importance of the Manual for Users

The Fluke 87 manual is essential for optimizing multimeter usage, ensuring safety, and unlocking its full potential․ It details setup, measurement techniques, and troubleshooting, helping users achieve accurate results․ The guide also covers warranty terms and maintenance tips, enhancing device longevity․ By following the manual, users can operate the multimeter confidently, understanding its capabilities and limitations, which is crucial for both professionals and newcomers to electrical measurement tasks․ Adhering to the guidelines ensures reliable performance and extends the product’s lifespan effectively․

Safety Information and Precautions

Adhering to safety guidelines is crucial when using the Fluke 87․ The manual outlines essential precautions to prevent injury and ensure accurate measurements in hazardous environments․

General Safety Guidelines for Using the Fluke 87

Always read the safety section before use․ Ensure the multimeter is set to the correct range for measurements․ Avoid using damaged leads or fuses․ Wear protective gear in hazardous environments․ Never measure voltage with the multimeter in the current mode․ Keep the device away from water and extreme temperatures․ Regularly inspect the multimeter and leads for damage․ Follow proper procedures for replacing fuses․ Ensure the multimeter is turned off when not in use․

Understanding Safety Ratings and Certifications

Understanding safety ratings ensures safe operation․ The Fluke 87 meets MIL-PRF-28800F standards for Class 2 devices, ensuring reliability in harsh environments․ It holds certifications for hazardous locations, like the Ex-rated model, designed for explosive atmospheres․ The multimeter is built to withstand drops up to 4 meters, reflecting its rugged design․ Compliance with international safety standards guarantees protection against electrical overloads․ Familiarizing yourself with these ratings ensures proper use in various industrial and laboratory settings, maintaining user safety and device reliability․

Key Features of the Fluke 87V Multimeter

The Fluke 87V features True RMS measurements, 4000-count resolution, and wireless connectivity via Fluke Connect․ It measures AC/DC voltage, current, resistance, and temperature with Type-K thermocouples, ensuring accuracy and versatility in field, lab, and home use, with rugged durability for demanding environments․

True RMS Measurements and Accuracy

The Fluke 87V delivers precise True RMS measurements, ensuring accuracy for non-sinusoidal waveforms․ With a 4000-count display, it offers high resolution for AC and DC voltage, current, and resistance․ The multimeter accurately measures crest factors up to 3, making it ideal for industrial and field use․ Its rugged design withstands harsh environments, ensuring reliable performance in demanding conditions․ This feature-rich tool is trusted for its durability and measurement capabilities, providing reliable results in various applications․


Temperature Measurement with Type-K Thermocouples

The Fluke 87 supports temperature measurement using Type-K thermocouples, offering precise readings with a Celsius scale selection․ This feature enhances versatility for field and laboratory use․ The thermocouple, included in the kit, ensures accurate temperature monitoring․ The manual provides clear setup instructions for this function, enabling users to obtain reliable data effortlessly․ This capability makes the Fluke 87 a comprehensive tool for diverse applications, combining electrical and thermal measurement capabilities in one robust device․

Operating Instructions for the Fluke 87

The Fluke 87 manual details step-by-step guides for setup, measurement modes, and wireless connectivity, ensuring precise and efficient operation across various electrical and thermal applications․

Setting Up the Multimeter for Different Measurements

Setting up the Fluke 87 involves selecting the appropriate measurement mode using the rotary switch․ For voltage, current, or resistance, choose the corresponding function and range․ Use the SELECT button to enable autoranging for automatic adjustment․ For temperature, connect the Type-K thermocouple and select the temperature mode․ Ensure proper input connection to avoid damage․ The multimeter’s intuitive design allows seamless transitions between measurement types, ensuring accuracy and efficiency in various applications․

  • Select measurement mode (voltage, current, resistance, temperature)․
  • Use autoranging for optimal scale selection․
  • Connect probes or thermocouples as needed․

Using the Fluke Connect System for Wireless Connectivity

The Fluke Connect system enables wireless communication between the Fluke 87 multimeter and compatible devices․ Using the Fluke Connect app, users can transmit measurement data to smartphones or tablets for real-time monitoring and analysis․ This feature enhances collaboration and data logging, allowing technicians to share results instantly․ The system streamlines workflows, reducing manual documentation and improving productivity in field and laboratory settings․

  • Connect via wireless using the Fluke Connect app․
  • Transmit data to smartphones or tablets․
  • Enable real-time monitoring and analysis․
  • Enhance team collaboration and reporting․

Measurement Techniques and Best Practices

The Fluke 87 manual outlines best practices for accurate measurements, ensuring precision in AC/DC voltage, resistance, and continuity testing while adhering to safety guidelines․

Measuring AC and DC Voltage with High Precision

The Fluke 87 manual guides users to measure AC and DC voltage accurately using its True RMS technology․ Select the correct range for precise readings, ensuring the multimeter is set to the appropriate mode (AC or DC)․ For AC measurements, the True RMS capability provides accurate results even for non-sinusoidal waveforms․ Always connect the probes correctly to avoid damage․ The multimeter’s high input impedance ensures minimal circuit interference․ Follow safety guidelines to prevent electrical hazards and ensure reliable measurements across various applications․

Continuity Testing and Autoranging Capabilities

The Fluke 87 manual details its continuity testing feature, which uses manual ranging for precise circuit checks․ Autoranging automatically adjusts measurement ranges, ensuring quick and accurate readings․ This capability enhances efficiency when measuring resistance, voltage, and current․ The multimeter’s advanced circuitry ensures fast switching between ranges, while continuity testing provides clear auditory feedback for open or short circuits․ These features combine to streamline troubleshooting and maintenance tasks, making the Fluke 87 a versatile tool for professionals and technicians alike;

Warranty and Support Information

Fluke offers a limited 3-year warranty for the 87V, covering defects in material and workmanship․ Dedicated support is available through phone, email, and online resources․

Fluke’s Limited Warranty and Liability Terms

Fluke’s limited warranty ensures the 87V multimeter is free from material and workmanship defects for three years from purchase․ Liability is limited to repair or replacement, excluding consequential damages․ This warranty underscores Fluke’s commitment to quality and customer satisfaction, providing users with assurance of reliability and performance in their measurements and testing applications․

Contacting Fluke for Service and Support

For service or support, visit the official Fluke website or consult the provided contact details in the manual․ Users can access resources like service manuals and troubleshooting guides online․ Fluke offers a comprehensive support system, ensuring prompt assistance for repairs, replacements, or technical inquiries․ The company provides clear guidelines for returning devices, covering postage costs after repair or replacement․ For the latest updates, users are encouraged to visit http://us․fluke․com/usen/support/manuals․

Physical Specifications and Durability

The Fluke 87 features a rugged design, withstanding drops up to 4 meters, ensuring industrial-strength durability․ Its compact build and removable holster enhance portability and reliability in harsh environments․

Design and Build Quality of the Fluke 87

The Fluke 87 is renowned for its robust and ergonomic design, crafted with high-quality materials to ensure longevity․ Its lightweight yet durable construction features a removable holster for convenient storage and transport․ The multimeter boasts an IP67 rating, providing excellent protection against dust and moisture․ The backlit display and intuitive interface enhance usability, while the protective over-molded case ensures resilience in harsh environments․ Built to withstand rough handling, the Fluke 87 combines precision engineering with user-friendly design for reliable performance in industrial and field applications․

Drop Test Ratings and Ruggedness

The Fluke 87 is built to endure extreme conditions, with a rugged design that withstands drops up to 4 meters (13 feet)․ Its industrial-strength casing and protective over-mold provide superior shock resistance․ The multimeter’s durability ensures reliability in demanding environments, while its compact size maintains portability․ Fluke’s commitment to resilience is evident in its ability to endure accidental drops without compromising performance or accuracy, making it a dependable tool for field professionals․ This robustness is a testament to Fluke’s high manufacturing standards and focus on user needs․

Troubleshooting and Maintenance

This section covers common issues, solutions, and maintenance tips for the Fluke 87․ It guides users on troubleshooting, calibration, and ensuring optimal performance and accuracy over time;

Common Issues and Solutions for the Fluke 87

Troubleshooting the Fluke 87 often involves addressing inaccurate measurements, connectivity issues, or thermocouple errors․ Checking leads, recalibrating, or updating firmware typically resolves these problems․ For display malfunctions, restarting the device or replacing the battery may help․ Ensure all connections are secure and consult the manual for specific error codes․ Regular maintenance, like cleaning terminals, prevents many issues․ Refer to the support section for advanced solutions or contact Fluke for professional assistance, ensuring optimal performance and accuracy․

Calibration and Maintenance Tips

Regular calibration ensures the Fluke 87’s accuracy․ Perform self-calibration via the menu or use external calibration services․ Clean terminals and leads to maintain conductivity․ Store the multimeter in a dry, cool place to prevent damage․ Replace batteries when low to avoid measurement errors․ Check for firmware updates to enhance functionality․ Inspect the thermocouple periodically for wear․ Follow the manual’s maintenance schedule to uphold performance and extend the device’s lifespan, ensuring reliable and precise measurements over time․

PDF

old testament reading plan pdf

Exploring the Old Testament requires a structured approach to grasp its historical and spiritual significance. A well-designed reading plan provides clarity, ensuring a meaningful journey through Scripture.

Using a PDF format enhances accessibility, allowing readers to follow a consistent schedule and delve deeper into the biblical narrative with ease and organization.

1.1 Overview of the Old Testament

The Old Testament is a foundational collection of sacred writings that outline God’s relationship with humanity. It includes 39 books, divided into sections like the Law, Historical Books, Wisdom Literature, and the Prophets. These texts explore themes of creation, covenant, redemption, and divine justice, offering insights into Israel’s history and spiritual journey. The Old Testament sets the stage for understanding biblical theology and provides a rich tapestry of stories, teachings, and prophecies. A structured reading plan helps navigate its depth, ensuring a comprehensive and meaningful engagement with its teachings and historical context, ultimately enriching one’s faith journey and understanding of Scripture.

1.2 Importance of a Structured Reading Plan

A structured reading plan is essential for systematically exploring the Old Testament, ensuring consistency and depth in study. It helps readers stay organized, avoiding overwhelm from the vast content. By breaking the text into manageable portions, a plan fosters better retention and understanding. Additionally, it encourages daily engagement, fostering spiritual growth and familiarity with Scripture. A well-structured plan also integrates supplementary materials, such as study guides or commentaries, enhancing comprehension. For those using a PDF format, the plan’s clarity and portability make it easier to follow, ensuring accountability and progress. Ultimately, a structured approach empowers readers to fully grasp the Old Testament’s richness and relevance.

1.3 Benefits of Using a PDF Format

Using a PDF format for an Old Testament reading plan offers numerous advantages. It provides a clean, readable layout that enhances the study experience. PDFs are easily accessible on multiple devices, making it convenient to follow the plan anywhere. They also allow for customization, such as highlighting and note-taking, which can deepen engagement with the text. Additionally, PDFs often include supplementary materials like study guides and commentary, offering a comprehensive learning experience. The portable nature of PDFs ensures that readers can stay organized and focused, while the structured format helps maintain consistency in daily study routines. This makes PDFs an ideal choice for those seeking a seamless and enriching Old Testament reading journey.

Key Features of an Effective Old Testament Reading Plan

A well-structured plan includes manageable segments, study guides, and balanced historical-spiritual context. It ensures steady progress and deeper understanding of the biblical narrative.

  • Clear segmentation for easy tracking.
  • Integrated study resources for insights.
  • Blend of history and spiritual reflection.

This approach fosters engagement and comprehension, making the Old Testament accessible and meaningful for readers of all levels.

2.1 Breaking Down the Old Testament into Manageable Segments

Dividing the Old Testament into smaller, digestible parts ensures a steady and organized approach to reading. This method prevents overwhelm and enhances comprehension. By segmenting the text into books, themes, or historical periods, readers can focus on key narratives and teachings. For example, grouping the Pentateuch, Historical Books, Wisdom Literature, and Prophets separately allows for a clearer understanding of each genre. Additionally, incorporating daily or weekly reading goals within these segments helps maintain consistency. This structured breakdown also enables the integration of study resources, such as commentary and reflection questions, to deepen engagement with the text.

  • Segments based on literary genres or themes.
  • Weekly or daily reading goals for consistency.
  • Inclusion of study aids like commentary and reflection prompts.

This approach ensures a balanced and engaging journey through the Old Testament.


2.2 Incorporating Study Guides and Commentary

Enhancing your Old Testament reading plan with study guides and commentary enriches your understanding of the text. These resources provide historical context, theological insights, and practical applications, making Scripture more relatable. Study guides often include questions and reflections to deepen engagement, while commentaries offer expert interpretations to clarify complex passages. By integrating these tools, readers can explore themes, identify key verses, and connect biblical teachings to modern life. This approach fosters a more immersive and meaningful study experience, helping to uncover the depth and relevance of the Old Testament.

  • Provides historical and theological context.
  • Includes reflection questions and practical applications.
  • Clarifies complex passages with expert insights.

This integration enhances comprehension and spiritual growth.

2.3 Balancing Historical and Spiritual Context

Balancing historical and spiritual context is essential for a comprehensive understanding of the Old Testament. Historical context reveals the cultural, social, and political backdrop of the text, while spiritual context connects the reader to its theological and devotional significance. By integrating both perspectives, readers can appreciate the ancient setting while uncovering timeless truths. Study guides and commentaries often bridge this gap, offering insights into the original meaning and its relevance today. This balanced approach enriches the reading experience, fostering both intellectual and spiritual growth.

  • Historical context provides cultural and social insights.
  • Spiritual context connects to theological truths.
  • Study tools help integrate both perspectives.

This balance deepens understanding and application.

Popular Types of Old Testament Reading Plans

Popular plans include chronological, thematic, and devotional-style approaches, catering to diverse preferences and goals, ensuring a structured and meaningful engagement with the Old Testament text.

3.1 Chronological Reading Plans

A chronological reading plan offers a sequential journey through the Old Testament, tracing events from creation to the prophets. This approach helps readers understand the historical context and progression of biblical narratives. By following the timeline, readers can appreciate how themes and stories intertwine, providing a cohesive view of God’s plan. Many PDF plans divide the text into daily or weekly segments, making it easier to track progress. This method is ideal for those seeking to grasp the overarching story and appreciate the development of Israel’s history and spiritual journey over time.

3.2 Thematic Reading Plans

Thematic reading plans focus on exploring specific themes or topics within the Old Testament, such as redemption, wisdom, or leadership. These plans organize passages around central ideas, offering deeper insight into biblical concepts. Readers can trace how themes like covenant, sacrifice, or prophecy unfold across different books. This approach is particularly useful for those interested in applying biblical teachings to modern life. Many PDF plans categorize texts by theme, making it easy to follow and reflect on related scriptures. Thematic plans also encourage readers to connect Old Testament truths with New Testament fulfillments, enhancing devotion and study. They provide flexibility for personal interests and spiritual growth.

3.3 Devotional-Style Reading Plans

Devotional-style reading plans combine scripture with reflection, fostering a deeper spiritual connection. These plans often include daily readings paired with brief commentary, prayer prompts, or journaling space. They emphasize personal application, helping readers connect Old Testament teachings to their modern lives. Many PDF plans offer devotional-style formats, blending historical context with spiritual insights. This approach encourages consistent reflection and meditation, making the Old Testament more accessible and meaningful. Devotional plans are ideal for those seeking to enrich their faith journey and cultivate intimacy with God through structured, thoughtful engagement with His Word.

Tips for Creating a Personalized Old Testament Reading Plan

Set realistic goals, choose resources aligning with your interests, and incorporate reflection and journaling to deepen your understanding of Scripture and make it personally meaningful.

4.1 Setting Realistic Goals and Schedules

Establishing achievable milestones is crucial for staying committed to your Old Testament reading plan. Begin by assessing your availability and setting a realistic daily or weekly reading target. Break the Old Testament into manageable portions, such as reading a few chapters each week, to avoid overwhelm. Consider your lifestyle and schedule, ensuring your goals align with your routine. Flexibility is key—allow room for adjustments as needed. Using a PDF reading plan can help you stay organized and track your progress visually. Consistency is more important than speed, so prioritize understanding and reflection over rushing through the text.

4.2 Choosing the Right Study Resources

Selecting appropriate study resources is essential for deepening your understanding of the Old Testament. Utilize study guides, commentaries, and devotional materials to enhance your reading experience. These tools provide historical context, theological insights, and practical applications. PDF templates often include space for notes and reflections, fostering engagement with the text. Additionally, consider incorporating maps, timelines, and concordances to enrich your study. Online ministries and educational platforms offer a wealth of free or affordable resources tailored to various learning styles. By combining these elements, you can create a comprehensive and enriching study environment that supports your spiritual growth and intellectual curiosity.

4.3 Engaging with the Text Through Reflection and Journaling

Engaging with the Old Testament through reflection and journaling enhances your study experience. Reflection allows you to connect deeply with the text, considering its relevance to your life and faith. Journaling provides a space to record insights, questions, and personal applications. Many PDF reading plans include prompts or sections for notes, guiding you in documenting your journey. Reflecting on key verses and their meanings can deepen your understanding. Journaling also serves as a record of spiritual growth, capturing moments of revelation and personal transformation. By combining reflection with journaling, you create a meaningful and interactive approach to studying the Old Testament, fostering a richer spiritual connection.

Resources for Downloading Old Testament Reading Plans

Discover reliable websites and ministries offering free Old Testament reading plans in PDF format. These resources provide structured guides, study aids, and downloadable templates for easy access.

5.1 Recommended Websites and Ministries

Several trusted websites and ministries offer high-quality Old Testament reading plans in PDF format. Popular options include YouVersion, Bible Gateway, and LifeWay Christian Resources, which provide structured guides for deeper biblical study.

These platforms often include customizable plans, study notes, and commentary to enhance your reading experience. Additionally, ministries like Desiring God and Focus on the Bible offer free downloadable resources tailored for personal or group study.

Exploring these websites ensures access to well-curated plans that cater to various learning styles and preferences, making your Old Testament journey both enriching and organized.

5.2 Free PDF Templates and Guides

Various websites provide free PDF templates and guides for Old Testament reading plans, offering customizable schedules and study aids. Platforms like YouVersion and Bible Gateway feature downloadable resources designed to enhance your reading experience.

These guides often include customizable templates, study notes, and commentary, allowing you to tailor your plan to fit your preferences and schedule. Many resources are available for immediate download, enabling you to print or digitalize them for convenience.

Whether for personal or group study, these free PDF guides offer a structured approach to exploring the Old Testament, making meaningful Bible study accessible to everyone.

PDF

santo rosario en inglés pdf

1․1 Definition and Purpose of the Holy Rosary

The Holy Rosary is a revered Catholic devotion consisting of prayers and meditations on the life of Jesus Christ and the Virgin Mary․ It is typically prayed using a rosary beads‚ which guide the recitation of specific prayers․ The Rosary serves as a spiritual tool to deepen faith‚ foster contemplation‚ and seek divine intercession․ Its purpose is to honor Mary while reflecting on key events in salvation history‚ known as the Joyful‚ Sorrowful‚ Glorious‚ and Luminous Mysteries․ Praying the Rosary fosters inner peace‚ unity with God‚ and devotion to the Blessed Mother․

1․2 Importance of Praying the Rosary in English

Praying the Rosary in English offers a universal way to connect with Catholic traditions and deepen spiritual life․ It provides a structured method for meditation on the Mysteries of the Rosary‚ fostering reflection on the lives of Jesus and Mary․ Praying in English ensures accessibility for speakers worldwide‚ uniting the faithful across cultures․ The Rosary also strengthens devotion‚ promotes inner peace‚ and serves as a powerful means of intercession․ By reciting prayers like the Hail Mary and Our Father‚ believers honor Mary and seek guidance from her maternal care․ Regular recitation cultivates a deeper relationship with God․

Structure of the Rosary Prayer

The Rosary consists of five decades‚ each containing an Our Father‚ ten Hail Marys‚ and a Glory Be․ Mysteries are meditated upon in each set․

2․1 Overview of the Rosary Beads and Their Significance

The Rosary is a sacred devotional tool consisting of 59 beads‚ divided into five decades‚ each representing a mystery․ The beads are arranged with a crucifix at the center‚ symbolizing Christ’s sacrifice‚ and two introductory beads for the Apostles’ Creed and the Our Father․ Each decade includes an Our Father bead and ten Hail Mary beads‚ facilitating meditation on specific mysteries․ The Rosary beads serve as a tactile guide‚ helping believers focus on prayer and reflection․ They are often made of various materials‚ such as wood or glass‚ and carry deep spiritual significance;

2․2 Components of Each Decade in the Rosary

Each decade of the Rosary is composed of specific prayers and meditations․ It begins with the Our Father‚ a prayer honoring God the Father‚ followed by ten Hail Marys‚ which venerate the Virgin Mary․ The decade concludes with the Glory Be‚ praising the Holy Trinity․ This structure allows for a balanced blend of worship‚ intercession‚ and reflection․ The crucifix is also integral‚ symbolizing Christ’s sacrifice․ The repetition of prayers fosters a rhythm of contemplation‚ making the Rosary a powerful tool for spiritual growth and connection with divine mysteries․

The Mysteries of the Rosary

The Rosary consists of four sets of mysteries: Joyful‚ Sorrowful‚ Glorious‚ and Luminous․ Each mystery represents key events in the lives of Jesus and Mary‚ aiding meditation and reflection on their divine messages․

3․1 Joyful Mysteries of the Rosary

The Joyful Mysteries are the first set of reflections in the Rosary‚ focusing on the early life of Jesus and Mary․ They include the Annunciation‚ the Visitation‚ the Nativity‚ the Presentation‚ and the Finding of Jesus in the Temple․ These mysteries emphasize the joy and wonder of the Incarnation and the role of Mary as the Mother of God․ Praying these mysteries helps deepen devotion to the Holy Family and their divine mission‚ fostering gratitude and humility in those who meditate upon them․

3․2 Sorrowful Mysteries of the Rosary

The Sorrowful Mysteries reflect on the passion and death of Jesus Christ‚ inviting contemplation of His sacrifice for humanity․ They include the Agony in the Garden‚ the Scourging at the Pillar‚ the Crowning with Thorns‚ the Carrying of the Cross‚ and the Crucifixion․ These mysteries deepen devotion to Christ’s redemptive love and encourage believers to unite their sufferings with His․ Praying the Sorrowful Mysteries fosters compassion‚ gratitude‚ and a deeper understanding of the sacrifice that brings salvation and eternal life․ They are traditionally prayed on Tuesdays and Fridays․

3․3 Glorious Mysteries of the Rosary

The Glorious Mysteries celebrate the triumph of Jesus Christ and the Blessed Virgin Mary‚ emphasizing their divine glory and eternal victory․ These mysteries include the Resurrection‚ Ascension‚ Descent of the Holy Spirit‚ Assumption of Mary‚ and Coronation of Mary as Queen of Heaven․ Praying the Glorious Mysteries fosters hope‚ joy‚ and gratitude for the ultimate triumph of good over evil․ They are traditionally prayed on Wednesdays and Sundays‚ offering believers a profound connection to the divine plan of salvation and the eternal life promised through Christ․

3․4 Luminous Mysteries of the Rosary

The Luminous Mysteries‚ introduced by Pope John Paul II in 2002‚ illuminate key events in Jesus’ public life‚ revealing His divine light to the world․ These mysteries include the Baptism of Jesus‚ the Wedding at Cana‚ the Proclamation of the Kingdom‚ the Transfiguration‚ and the Institution of the Eucharist․ Praying the Luminous Mysteries fosters a deeper understanding of Christ’s mission and encourages believers to reflect on His teachings and miracles․ They are traditionally prayed on Thursdays‚ offering a connection to the radiant light of Christ’s divine nature and mission․

Prayers of the Rosary

The Rosary includes essential Catholic prayers like the Sign of the Cross‚ Apostles’ Creed‚ Our Father‚ Hail Mary‚ Glory Be‚ and Hail Holy Queen․

4․1 The Sign of the Cross

The Sign of the Cross is a sacred gesture that initiates the Rosary prayer․ It symbolizes the Trinity and invokes God’s protection․ To perform it‚ touch your forehead at “Father‚” chest at “Son‚” left shoulder at “Holy‚” and right shoulder at “Spirit․” This act expresses faith‚ devotion‚ and commitment to Christian beliefs․ It is a universal Catholic practice that prepares the heart for prayer and reminds us of Christ’s sacrifice․ The Sign of the Cross is both a gesture of faith and a shield of spiritual protection․

4․2 Apostles’ Creed

The Apostles’ Creed is a foundational prayer recited at the beginning of the Rosary․ It professes belief in God the Father‚ Jesus Christ‚ and the Holy Spirit․ The Creed states: “I believe in God‚ the Father Almighty‚ Creator of heaven and earth‚ and in Jesus Christ‚ His only Son‚ our Lord‚ Who was conceived by the Holy Spirit‚ born of the Virgin Mary‚ suffered under Pontius Pilate‚ was crucified‚ died‚ and was buried․ He descended into hell‚ rose again on the third day‚ and is seated at the right hand of God․” It concludes with belief in the Holy Spirit‚ the Catholic Church‚ and the forgiveness of sins․ This prayer sets the tone for the Rosary by affirming core Christian beliefs․

4․3 Our Father

The Our Father‚ also known as the Lord’s Prayer‚ is a central prayer in the Rosary․ It is recited at the beginning of each decade and is the first prayer after the Apostles’ Creed․ The prayer begins with “Our Father‚ Who art in heaven‚ hallowed be Thy name‚” and continues with petitions for God’s will‚ daily bread‚ forgiveness‚ and protection from evil․ This prayer‚ taught by Jesus‚ emphasizes humility‚ trust in God‚ and unity with others․ It is repeated to seek divine guidance and strength‚ reflecting the essence of Christian spirituality․

4․4 Hail Mary

The Hail Mary is a cornerstone prayer of the Rosary‚ recited after the Our Father in each decade․ It begins with the angel Gabriel’s greeting to Mary‚ “Hail Mary‚ full of grace‚ the Lord is with thee‚” followed by Elizabeth’s exclamation‚ “Blessed art thou among women and blessed is the fruit of thy womb‚ Jesus․” The prayer concludes with a plea for Mary’s intercession: “Holy Mary‚ Mother of God‚ pray for us sinners‚ now and at the hour of our death․ Amen․” This prayer honors Mary’s role in salvation and seeks her maternal guidance and protection․

4․5 Glory Be

The Glory Be‚ also known as the “Gloria Patri‚” is a brief prayer that praises the Holy Trinity․ It is recited at the end of each decade of the Rosary‚ following the Hail Marys and‚ if included‚ the Fatima Prayer․ The prayer begins with “Glory be to the Father‚ and to the Son‚ and to the Holy Spirit‚” emphasizing the equality and eternal nature of the three divine persons․ It concludes with “As it was in the beginning‚ is now‚ and ever shall be‚ world without end․ Amen․” This prayer underscores the Rosary’s Trinitarian dimension and offers glory to God for His divine plan revealed in the mysteries․

4․6 Hail Holy Queen

The Hail Holy Queen‚ or “Salve Regina‚” is a beautiful prayer that concludes the Rosary․ It is a salutation to the Virgin Mary‚ seeking her intercession and mercy․ The prayer begins with “Hail‚ holy Queen‚ Mother of mercy‚” and asks for her protection and guidance․ It ends with a request to show us Jesus‚ the blessed fruit of her womb‚ after this life․ The Hail Holy Queen emphasizes Mary’s role as a compassionate advocate and reflects devotion to her as the Mother of God․ This prayer is often sung or recited in Latin as “Salve Regina․”

How to Pray the Rosary

To pray the Rosary‚ begin with the Sign of the Cross and Apostles’ Creed․ Recite the Our Father‚ ten Hail Marys‚ and Glory Be for each decade․ Conclude with the Hail Holy Queen․

5․1 Step-by-Step Guide to Praying the Rosary

To pray the Rosary‚ begin with the Sign of the Cross and recite the Apostles’ Creed․ On the first bead‚ say the Our Father‚ followed by ten Hail Marys and a Glory Be․ Announce each mystery and meditate on it while praying․ After five decades‚ conclude with the Hail Holy Queen and the Final Prayer․ This structured approach helps deepen devotion and reflection․ The Santo Rosario en Español PDF provides a clear guide for both beginners and experienced prayer warriors‚ ensuring a meaningful and prayerful experience․ Download the PDF for easy access to the prayers and mysteries․

5․2 Meditating on the Mysteries While Praying

Meditating on the Rosary mysteries enhances spiritual reflection and deepens understanding of the life of Jesus and Mary․ Each mystery invites contemplation of specific events‚ fostering a connection with divine grace․ As you pray‚ visualize the scenes and relate them to your life․ This practice strengthens faith and encourages personal growth․ The Santo Rosario en Español PDF provides descriptions of the Joyful‚ Sorrowful‚ Glorious‚ and Luminous Mysteries‚ offering guidance for meaningful meditation․ Regular reflection on these sacred events enriches prayer and nurtures a closer relationship with God․

Downloading the Santo Rosario en Español PDF

The Santo Rosario en Español PDF is freely available online‚ offering prayers‚ mysteries‚ and guidance for reciting the Rosary in Spanish․ It serves as a handy spiritual guide․

6․1 Availability of the Holy Rosary PDF in English

The Holy Rosary PDF in English is widely available for free download online․ It can be found on various Catholic websites‚ religious portals‚ and platforms like Google Drive or Dropbox․ These PDF guides typically include the full text of Rosary prayers‚ such as the Apostles’ Creed‚ Our Father‚ Hail Mary‚ and Glory Be‚ along with the Joyful‚ Sorrowful‚ Glorious‚ and Luminous Mysteries․ Many versions also offer step-by-step instructions for praying the Rosary‚ making it accessible for both experienced devotees and newcomers․ The PDF format ensures convenience and portability for spiritual practice․

6․2 Benefits of Using a PDF Guide for the Rosary

Using a PDF guide for the Rosary offers numerous benefits‚ including convenience‚ accessibility‚ and clarity․ The digital format allows users to carry the guide on their devices‚ making it easy to pray anywhere․ PDFs often feature clear layouts‚ readable fonts‚ and organized sections‚ ensuring a smooth prayer experience․ Additionally‚ they provide step-by-step instructions and full texts of prayers‚ such as the Apostles’ Creed and Hail Mary‚ helping users stay focused and avoid mistakes․ PDF guides also preserve traditional content while offering modern flexibility‚ making them ideal for both personal and group devotion․

Manuals

singer simple sewing machine manual

Welcome to the Singer Simple Sewing Machine Manual! This comprehensive guide is designed to help you navigate the features, setup, and operation of your machine with ease.

Whether you’re a seasoned sewer or a beginner, this manual will provide clear instructions to ensure you get the most out of your Singer Simple Sewing Machine.

Reading this manual carefully will help you understand the machine’s capabilities, troubleshoot common issues, and maintain its performance for years to come.

Let’s dive in and explore the world of sewing with Singer!

1.1 Overview of the Manual

This manual provides a detailed guide to the Singer Simple Sewing Machine, covering its features, setup, and operation. It includes step-by-step instructions for basic sewing techniques, maintenance tips, and troubleshooting solutions. Designed for both beginners and experienced users, the manual ensures you maximize your machine’s potential and enjoy a seamless sewing experience.


1.2 Importance of Reading the Manual

Reading the manual is essential for understanding your Singer Simple Sewing Machine’s features, proper setup, and safe operation. It provides troubleshooting tips, maintenance guidance, and step-by-step instructions for optimal performance. By following the manual, you ensure safety, maximize efficiency, and extend the machine’s lifespan, making your sewing experience enjoyable and productive.

Key Features of the Singer Simple Sewing Machine

The Singer Simple Sewing Machine offers essential features for effortless sewing, including a 1-step buttonhole, free arm, and variable stitch settings for versatility. It comes with standard presser feet and is designed for both beginners and experienced sewers, making it perfect for various projects.

2.1 Basic Sewing Functions

The Singer Simple Sewing Machine provides essential functions for everyday sewing, including straight stitching, reverse stitching, and adjustable stitch length. These features allow for versatility in handling different fabrics and sewing tasks, ensuring smooth and precise results for both beginners and experienced users. The machine is designed to make basic sewing tasks efficient and straightforward.

2.2 1-Step Buttonhole Feature

The Singer Simple Sewing Machine includes a convenient 1-step buttonhole feature, allowing you to create professional-looking buttonholes effortlessly. Simply select the buttonhole setting, place your fabric, and let the machine guide you through the process. This feature ensures consistent results and saves time, making it ideal for garments, home decor, and other sewing projects.

2.3 Free Arm Convenience

The Singer Simple Sewing Machine offers a free arm design, providing easy access for sewing cylindrical or hard-to-reach areas like sleeves and pant hems. This feature enhances versatility and makes handling complex projects simpler. Additionally, the free arm stores essential accessories, keeping them within easy reach for a more organized and efficient sewing experience.

2.4 Variable Stitch Length and Width

The Singer Simple Sewing Machine allows you to adjust both stitch length and width, offering flexibility for various fabrics and projects. This feature ensures precise control, whether sewing delicate fabrics with shorter stitches or heavier materials with longer ones, enhancing stitch quality and adaptability for different sewing needs.

Setting Up the Singer Simple Sewing Machine

Setting up your Singer Simple Sewing Machine involves unpacking, connecting to power, threading, and bobbin installation. Follow these steps to ensure safety and proper machine performance.

3.1 Unpacking and Initial Setup

Carefully unpack your Singer Simple Sewing Machine and inspect for damage. Remove the protective cover and stored accessories. Locate the removable storage compartment to access the free arm for sewing tubular projects. Wipe off any excess oil with a soft cloth before use. Sew a test stitch on scrap fabric to ensure proper setup and functionality.

3.2 Connecting to a Power Source

Plug the machine into a polarized outlet using the provided cord. Ensure the plug’s wider blade aligns with the outlet’s slot. If it doesn’t fit, do not modify it—contact a licensed electrician. Always unplug the machine when not in use for safety. This ensures proper operation and prevents electrical hazards.

3.3 Threading the Machine

Turn off the power before threading. Pull 6-8 inches of thread from the spool and guide it through the machine’s tension discs. Use the automatic needle threader to thread the needle. Gently pull excess thread to secure it. Ensure the thread is seated properly in the tension guides for consistent stitching. Always keep the machine threaded correctly for optimal performance.

3.4 Bobbin Installation

Turn off the machine before installing the bobbin. Use only Singer Class 15 transparent bobbins. Insert the bobbin into the bobbin case, ensuring it sits securely. Pull thread through the case’s slot and gently tug to seat it. Close the bobbin case and ensure the machine is threaded correctly for proper stitch formation and sewing performance.

Basic Sewing Techniques

Master the fundamentals of sewing with the Singer Simple Sewing Machine. Learn straight stitching, decorative stitching, stretch stitching, buttonhole creation, and sewing buttons for versatile sewing projects.

4.1 Sewing a Straight Stitch

The straight stitch is ideal for sewing seams and topstitching. Use a shorter stitch length for lightweight fabrics and longer for heavier materials. Gently hold thread tails to guide fabric smoothly under the presser foot. This stitch provides a strong, consistent seam, perfect for basic sewing projects.

4.2 Sewing a Decorative Stitch

A decorative stitch adds flair to your projects. Use a stabilizer to prevent puckering and reduce upper tension by 1-2 numbers to avoid thread visibility. Ideal for embellishing fabrics, decorative stitching is versatile and enhances creativity. Visit www.singerco.com for additional stitch ideas to expand your sewing possibilities.

4.3 Sewing a Stretch Stitch

A stretch stitch is ideal for knit fabrics, allowing seams to stretch with the fabric. Adjust stitch settings for optimal results. Use a stabilizer to support the fabric and reduce upper tension slightly. Test on scrap fabric first. This stitch ensures flexibility and durability, perfect for garments that require movement. Visit www.singerco.com for additional stretch stitch options.

4.4 Creating a Buttonhole

The Singer Simple Sewing Machine features a 1-step buttonhole, making it easy to create professional-looking buttonholes. Place fabric under the needle, select the buttonhole setting on the Stitch Selector Dial, and sew. Use a stabilizer to prevent fabric puckering. Slightly reduce upper tension for cleaner stitches. Test on scrap fabric before sewing on your project for best results.

4.5 Sewing a Button

To sew a button, use the Button Sewing Foot for easy attachment. Center the button on the fabric, aligning it under the needle. Select the appropriate stitch and sew around the button securely. The machine will automatically sew a tight stitch around the edges. Test on scrap fabric first to ensure proper settings and alignment for the best results.

Maintenance and Troubleshooting

Regularly clean and lubricate your Singer Simple Sewing Machine to maintain optimal performance. Refer to specific sections for troubleshooting common issues and adjusting settings for smooth operation;

5.1 Cleaning the Machine

Regular cleaning is essential for maintaining your Singer Simple Sewing Machine. Turn off the power and unplug it before cleaning. Use a soft, dry cloth to wipe the exterior and remove any dust or debris. For internal cleaning, remove the removable storage compartment and gently brush away lint from the needle plate and bobbin area. Avoid using harsh chemicals or liquids, as they may damage the machine. Cleaning ensures smooth operation and prevents thread jams or tension issues. Always refer to the manual for specific cleaning instructions tailored to your machine. Regular maintenance will extend its lifespan and performance. Keep your Singer Simple Sewing Machine in pristine condition for years of reliable service.

5.2 Adjusting Thread Tension

Proper thread tension is crucial for even stitching. Turn the upper tension dial to adjust the thread tightness. For decorative or stretch stitches, slightly loosen the tension to prevent thread visibility. Always test settings on scrap fabric before sewing your project. Avoid over-tightening, as it may cause fabric puckering or machine jamming. Ensure balanced tension for optimal results.

5.3 Changing the Needle

Regularly replace the needle to maintain stitch quality. Turn off the machine and loosen the needle clamp screw. Remove the old needle and insert a new one with the flat side facing the back. Tighten the screw securely. Use SINGER-branded needles for optimal performance. Change the needle after every 4 projects or 16 hours of use to prevent wear-related issues.

5.4 Common Issues and Solutions

If the machine sews in reverse, check the reverse lever. For uneven stitches, adjust thread tension or clean the machine. If fabric doesn’t move, ensure the presser foot is down. Lubricate parts if noisy. Refer to the troubleshooting guide for more solutions to keep your Singer Simple Sewing Machine performing optimally.

Accessories and Optional Attachments

The Singer Simple Sewing Machine comes with standard presser feet and optional attachments for specialized tasks. Explore additional accessories like the button sewing foot for enhanced functionality and convenience.

6.1 Standard Presser Feet

The Singer Simple Sewing Machine includes standard presser feet for various sewing tasks. These feet are designed to handle different fabrics and stitches, ensuring smooth operation. Use the all-purpose foot for general sewing, the buttonhole foot for creating buttonholes, and the zipper foot for sewing zippers and heavy fabrics. Additional feet may be stored in the removable compartment for easy access.

6.2 Optional Accessories

Optional accessories for the Singer Simple Sewing Machine enhance your sewing experience. These include specialized presser feet like the button sewing foot, quilting guides, and additional storage compartments; Explore Singer’s official website for a full list of compatible accessories tailored to your specific sewing needs and projects.

6.3 Using the Button Sewing Foot

The Singer Simple Sewing Machine’s Button Sewing Foot simplifies attaching buttons. Found in the removable storage compartment, it easily attaches by sliding the pin into the shank groove. Center the button under the foot, lower the presser foot, and sew. This accessory ensures secure, professional button attachment with minimal effort.

Safety Instructions

Always turn off the machine before threading, changing needles, or making adjustments. Use the foot control to regulate sewing speed and keep loose clothing tied back while sewing.

Avoid sewing near children or flammable materials. Ensure the machine is placed on a stable surface and unplugged when not in use for safety.

7.1 General Safety Precautions

Always keep the machine out of children’s reach and avoid sewing near flammable materials. Ensure the sewing area is well-lit and free from clutter. Use the foot control to regulate sewing speed and maintain control. Avoid wearing loose clothing or jewelry that could get caught in moving parts. Keep long hair tied back while sewing. Unplug the machine when not in use or during maintenance. Never touch electrical components with wet hands to prevent shock. Regularly inspect and maintain the machine to ensure safe operation. Follow all safety guidelines provided in the manual to minimize risks and ensure a safe sewing experience. By adhering to these precautions, you can enjoy a safe and productive time with your Singer Simple Sewing Machine.

7.2 Electrical Safety

Always use the machine with a polarized plug and ensure it fits correctly in the outlet. Never modify the plug or use adapters that could compromise safety. Avoid overloading circuits and keep the power cord away from heat sources or sharp objects. Unplug the machine when not in use or before cleaning. Ensure the machine is turned off before threading or changing the needle. Keep the sewing area dry and avoid sewing in humid environments. Use the foot control responsibly and store the machine in a dry, cool place when not in use. Proper electrical safety ensures reliable performance and protects against hazards.

7.3 Handling the Machine

Always lift and place the machine gently to avoid damage. Turn off the power before handling internal parts like the bobbin or needle. Use the foot control responsibly to maintain sewing speed. Store the machine in a dry, cool place when not in use. Regularly clean dust and lint from the machine to ensure smooth operation. Proper handling extends the machine’s lifespan and ensures optimal performance.

Singer’s Green Initiative

Singer is committed to reducing its environmental footprint by offering digital manuals exclusively online, minimizing paper usage and waste. This initiative supports eco-friendly practices while maintaining accessibility for users.

8.1 Digital Manuals and Downloads

Singer offers free digital manuals and downloads, reducing paper waste and promoting sustainability. Users can easily access guides, stitch charts, and updates online, ensuring they always have the latest information for their machine. This initiative supports Singer’s commitment to environmental responsibility while maintaining convenience and accessibility for customers worldwide.

8.2 Environmental Benefits

Singer’s shift to digital manuals reduces paper waste, aligning with their Green Initiative. This eco-friendly approach minimizes environmental impact while promoting sustainable practices. Energy-efficient production and recyclable packaging further support their commitment to preserving the planet. By adopting digital solutions, Singer encourages users to contribute to a greener future through responsible resource management and reduced carbon footprint.

The Singer Simple Sewing Machine Manual provides a comprehensive guide to mastering your machine, ensuring creative and efficient sewing experiences. Happy sewing!

9.1 Final Tips for Using the Singer Simple Sewing Machine

Always clean and oil your machine regularly to maintain performance. Use compatible needles and threads for optimal results. Experiment with stitches on scrap fabric before sewing projects. Keep accessories organized for easy access. Practice patience and consistency to refine your sewing skills. Happy creating with your Singer Simple Sewing Machine!

PDF

d’aulaires book of greek myths pdf

D’Aulaires’ Book of Greek Myths is a timeless collection of ancient Greek myths, first published in 1962 by Ingri and Edgar Parin d’Aulaire. This engaging book, available in PDF, offers a captivating introduction to Greek mythology, blending vivid storytelling with stunning illustrations. Over 50 years in print, it remains a cherished resource for readers of all ages, making classical tales accessible and memorable. The PDF version ensures easy access, allowing modern readers to explore the gods, heroes, and legends of ancient Greece with convenience.

1.1 Overview of the Book

D’Aulaires’ Book of Greek Myths is a captivating collection of ancient Greek myths, first published in 1962 by Ingri and Edgar Parin d’Aulaire. This beloved book, available as a PDF, offers an engaging introduction to Greek mythology, blending vivid storytelling with stunning illustrations. It has remained in print for over 50 years, charming readers of all ages with its timeless tales of gods, heroes, and legendary creatures.

1.2 Background of the Authors: Ingri and Edgar Parin d’Aulaire

Ingri and Edgar Parin d’Aulaire were a Norwegian-American author-illustrator duo renowned for their captivating children’s books. Ingri, born in 1904, and Edgar, born in 1898, collaborated on numerous works, blending storytelling with vivid illustrations. Their timeless D’Aulaires’ Book of Greek Myths, first published in 1962, remains a beloved classic, introducing generations to Greek mythology. The couple’s work also includes D’Aulaires’ Book of Norse Myths, further showcasing their mastery of mythological storytelling.

Historical Context and Publication Details

D’Aulaires’ Book of Greek Myths was first published in 1962, introducing ancient tales to young readers. A 2017 edition features a new cover and afterword, while the PDF version, released in 2021, offers modern readers convenient access to this timeless collection of myths.

2.1 Publication History and Editions

D’Aulaires’ Book of Greek Myths was first published in 1962 by Doubleday, with subsequent editions released by Random House in 2017. The PDF version, published in 2021, offers a modern format for readers. This edition includes a new cover and afterword, enhancing its appeal while maintaining the timeless stories and illustrations by Ingri and Edgar Parin d’Aulaire.

2.2 Impact on Children’s Literature

D’Aulaires’ Book of Greek Myths has profoundly influenced children’s literature by making mythology accessible and engaging for young readers. Its vivid storytelling and illustrations set a new standard, blending education with entertainment. The PDF version has further expanded its reach, ensuring the timeless tales of Greek gods and heroes remain relevant and captivating for modern youth.

Content and Structure of the Book

D’Aulaires’ Book of Greek Myths masterfully blends vivid storytelling with captivating illustrations, introducing readers to Greek mythology’s iconic gods, heroes, and legendary creatures in an engaging and accessible format.
The PDF version retains this structure, ensuring the timeless tales remain vivid and immersive for modern readers.

3.1 Major Gods and Goddesses of Olympus

D’Aulaires’ Book of Greek Myths vividly portrays the major gods and goddesses of Olympus, such as Zeus, Hera, Athena, Apollo, and Dionysus. Their divine roles and human-like qualities are brought to life through engaging storytelling and detailed illustrations. The PDF version preserves these vibrant depictions, making the gods’ adventures and personalities accessible and captivating for readers of all ages.

3.2 Heroes and Their Quests

D’Aulaires’ Book of Greek Myths captivatingly recounts the bravery of legendary heroes like Hercules, Theseus, and Perseus. Their epic quests, from slaying monsters to overcoming divine challenges, are vividly detailed in the PDF version. The stories highlight themes of courage, wit, and destiny, making these ancient tales relatable and inspiring for young readers while preserving the essence of Greek mythology.

3.3 Key Myths and Their Interpretations

D’Aulaires’ Book of Greek Myths delves into iconic tales like Persephone’s descent into the underworld and Perseus’s battle with Medusa. The PDF version enriches understanding by interpreting these myths as reflections of human nature, fate, and moral lessons. The authors’ engaging narrative style brings these ancient stories to life, offering timeless insights into their cultural and symbolic significance.

Themes and Lessons in the Book

D’Aulaires’ Book of Greek Myths explores universal themes like morality, courage, and destiny, offering timeless lessons. The stories highlight human frailty and divine justice, teaching readers about ethical choices and resilience.

4.1 Morality and Ethics in Greek Myths

D’Aulaires’ Book of Greek Myths explores morality and ethics through timeless stories. Myths like Pandora’s box and Icarus’ fall highlight consequences of overreaching and curiosity. Hercules’ labors exemplify redemption and perseverance, while Zeus’ justice teaches accountability. These tales, retold for children, convey universal lessons about right and wrong, encouraging reflection on human behavior and divine judgment in an engaging, accessible way.

4.2 Bravery, Sacrifice, and Destiny

D’Aulaires’ Book of Greek Myths vividly portrays bravery, sacrifice, and destiny through the exploits of legendary heroes. Hercules’ twelve labors and Perseus’ battle with Medusa exemplify courage and selflessness. These stories highlight the inevitability of fate, as heroes confront their destinies with valor. The book’s retelling of these myths inspires young readers, emphasizing the importance of honor and resilience in the face of adversity and divine will.

4.3 The Human Condition in Mythology

D’Aulaires’ Book of Greek Myths explores the human condition through timeless stories of love, ambition, and frailty. Myths like Pandora’s box and Icarus’ fall reveal universal human struggles, such as curiosity and hubris. These tales, rich in emotional depth, connect readers to shared experiences, illustrating how ancient myths continue to reflect modern human nature and its complexities.

Educational Value and Classroom Use

D’Aulaires’ Book of Greek Myths serves as an invaluable classroom resource, offering a guide for teachers and students. Its engaging storytelling and rich illustrations make it an excellent tool for integrating mythology into curricula, fostering both literacy and cultural awareness in young learners.

5.1 Guide for Teachers and Students

D’Aulaires’ Book of Greek Myths offers a comprehensive guide for teachers and students, providing engaging lesson plans and discussion ideas. The PDF version enhances accessibility, allowing educators to easily incorporate the book into curricula. Its vivid storytelling and illustrations make complex myths understandable, fostering a deeper appreciation of Greek mythology in the classroom.

5.2 Integrating the Book into Curricula

D’Aulaires’ Book of Greek Myths seamlessly integrates into school curricula as a valuable educational resource. The PDF version facilitates easy distribution and access for students. Teachers can use its engaging stories to enhance lessons on mythology, literature, and history, while the vivid illustrations and clear narratives support visual and auditory learners, enriching the educational experience.

Popularity and Legacy

D’Aulaires’ Book of Greek Myths remains a beloved classic, captivating readers for over 50 years. Its enduring popularity stems from its engaging storytelling and timeless themes, making it a cherished resource for exploring Greek mythology. The PDF version ensures its legacy continues, offering easy access to its vivid tales and illustrations for new generations of readers.

6.1 Why the Book Remains Timeless

D’Aulaires’ Book of Greek Myths remains timeless due to its masterful blend of engaging storytelling and vivid illustrations. The authors’ ability to present complex myths in an accessible, humorous, and relatable manner has captivated readers for generations. Its themes of heroism, morality, and the human condition resonate universally, making it a cherished resource for both children and adults. The PDF format ensures its legacy endures, introducing ancient tales to modern audiences with ease and charm.

6.2 Reviews and Recommendations

D’Aulaires’ Book of Greek Myths has received widespread acclaim for its vivid storytelling and captivating illustrations. Educators and readers alike praise its ability to make Greek mythology accessible to children while retaining the depth and complexity of the original tales. The PDF version is highly recommended for its convenience, ensuring this classic work remains a staple in both homes and classrooms for years to come.

Availability and PDF Version

D’Aulaires’ Book of Greek Myths is widely available in digital formats, including a free PDF download. The PDF version, sized at 41.7MB, offers convenient access to the timeless tales, ensuring the book’s enduring accessibility for modern readers.

7.1 How to Access the PDF

To access the PDF version of D’Aulaires’ Book of Greek Myths, visit online platforms like Google Books or the Internet Archive. Search for the title, and download the free 41.7MB file. Ensure you use reliable sources to avoid unauthorized versions. This digital format allows easy reading on various devices, making the timeless tales of Greek mythology readily accessible to modern readers.

7.2 Benefits of the Digital Format

The PDF version of D’Aulaires’ Book of Greek Myths offers portability and convenience, allowing readers to access the timeless tales on tablets, e-readers, or smartphones. The digital format ensures crisp, clear text and illustrations, while its compact size saves storage space. It also enables easy sharing and accessibility, making the classic stories more reachable for modern audiences worldwide. This modern convenience enhances the book’s enduring appeal.


Similar Books and Recommendations

D’Aulaires’ Book of Norse Myths and D’Aulaires’ Trolls are excellent companions, offering similar storytelling and artistry. For diverse reads, The Paper Bag Princess by Robert Munsch is a delightful choice.

8.1 Other Works by the D’Aulaires

The D’Aulaires are renowned for their captivating storytelling and intricate illustrations. Beyond D’Aulaires’ Book of Greek Myths, they authored D’Aulaires’ Book of Norse Myths, exploring Scandinavian legends, and D’Aulaires’ Book of Trolls, a whimsical collection of troll tales. These works showcase their mastery in blending cultural richness with accessible narratives, making them timeless favorites for readers of all ages.

8.2 Books on Greek Mythology for Children

Beyond D’Aulaires’ work, children can explore Greek mythology through Rick Riordan’s Percy Jackson series, which modernizes myths into thrilling adventures. Marcia Williams’ “Greek Myths” offers a lively, illustrated retelling, while Robert Graves’ “The Greek Myths” provides a detailed, age-appropriate account. These books captivate young minds with their rich storytelling and accessible narratives, making mythology an enduring favorite for readers of all ages.

Cultural Significance and Artistic Style

The d’Aulaires’ artistic style brings Greek myths to life with vibrant illustrations and engaging narratives, making the book a beloved resource that popularized mythology for generations.

9.1 The D’Aulaires’ Illustrative Approach

The D’Aulaires’ illustrative approach in their Book of Greek Myths combines vivid storytelling with stunning, detailed artwork. Their engaging and humorous style brings ancient tales to life, making them relatable and timeless. The illustrations, full of character and warmth, humanize the gods and heroes, appealing to readers of all ages and enriching the storytelling experience.

9.2 The Book’s Role in Popularizing Greek Myths

D’Aulaires’ Book of Greek Myths has played a pivotal role in popularizing Greek mythology among children and adults alike. Its accessible storytelling and vibrant illustrations have made ancient tales relatable and engaging, introducing generations to the rich world of Greek gods, heroes, and legends. The book’s enduring popularity has cemented its status as a cornerstone in children’s literature.

D’Aulaires’ Book of Greek Myths remains a beloved and enduring introduction to Greek mythology, offering timeless stories and vibrant illustrations. Its PDF format ensures accessibility for modern readers, preserving its legacy as a cherished resource for exploring ancient Greek culture and mythology.

10.1 Final Thoughts on the Book’s Enduring Appeal

D’Aulaires’ Book of Greek Myths captivates readers with its dynamic storytelling and artistry, making ancient myths relatable. The PDF version enhances accessibility, ensuring its legacy endures. Its blend of education and entertainment solidifies its place as a timeless classic, cherished across generations for its engaging portrayal of Greek mythology’s fascinating world.

10.2 Encouragement to Read and Explore

Embark on a fascinating journey through ancient Greece with D’Aulaires’ Book of Greek Myths. The PDF version makes it easy to access and enjoy the captivating tales of gods, heroes, and mythical creatures. Perfect for both children and adults, this book not only entertains but also enlightens, inspiring a deeper appreciation for classical mythology. Dive into the stories that have shaped Western culture and continue to inspire imagination today.

Manuals

green life rice cooker manual pdf

Welcome to the Green Life Rice Cooker Manual, your comprehensive guide to mastering rice and grain preparation. This manual covers features, operation, and maintenance, ensuring optimal performance and care. With detailed instructions, safety tips, and troubleshooting, it helps you achieve perfect results every time.

Important Safety Precautions

General Safety Guidelines

  • Always follow basic safety precautions to reduce fire, electric shock, and injury risks.
  • Keep the rice cooker away from water and avoid submerging it.
  • Use extreme caution when handling hot surfaces or steam;
  • Always place the rice cooker on a stable, heat-resistant, and dry surface to prevent accidental tipping or electrical issues.
  • Avoid overheating by ensuring proper ventilation and not covering the cooker during operation.
  • Keep children away from the cooker, as hot surfaces and steam can cause burns.
  • Never insert metal objects or fingers into the cooker, as this can lead to electric shock or injury.
  • Use the provided measuring cup to avoid overfilling, which can cause spills and safety hazards.
  • Unplug the cooker when not in use or before cleaning to ensure safety.
  • Regularly inspect the power cord and plug for damage, and avoid using the cooker if any damage is found.
  • Follow the recommended water levels to prevent overflow and maintain safe cooking conditions.

Specific Safety Tips for the Green Life Rice Cooker

Always unplug the cooker when not in use or before cleaning to prevent electric shock. Use extreme caution when opening the lid, as hot steam may cause scalding. Avoid leaving rice in the inner pot with the Keep-Warm function on for more than 12 hours to prevent burning. Ensure the power cord is dry and free from damage before use. Never submerge the cooker in water or expose it to excessive moisture. Keep the cooker on a flat, stable surface away from flammable materials. Regularly clean the steam vent to maintain proper function and safety.


Understanding the Parts of the Green Life Rice Cooker

The Green Life Rice Cooker features a ceramic nonstick inner pot, control panel with preset options, lid lock button, removable steam valve, and a convenient carrying handle for easy transport.

Key Components and Their Functions

The Green Life Rice Cooker includes essential components designed for efficient cooking. The ceramic nonstick inner pot ensures even heat distribution and easy cleaning. The control panel features preset buttons for different cooking modes, such as white rice, brown rice, and quinoa. The lid lock button secures the lid during cooking, while the removable steam valve allows for venting excess moisture. The power cord provides reliable electrical connection, and the carrying handle makes the cooker portable.

Control Panel and Settings Overview

The control panel of the Green Life Rice Cooker is designed for intuitive operation. It features preset modes for white rice, brown rice, quinoa, and steel cut oats, ensuring perfect results. The delay timer allows scheduling, while the Keep Warm function maintains ideal temperature. A digital display shows cooking progress, and the Menu button cycles through options. The Start button initiates cooking, and the Keep Warm/Stop button toggles modes. These settings offer versatility, making it easy to customize cooking to your preferences.

Operating the Green Life Rice Cooker

Measure rice, rinse, and add water to the marked level. Place the inner pot, close the lid, and select the desired mode. Press Start to begin cooking.

Step-by-Step Instructions for Cooking Rice

Measure rice using the provided cup and rinse thoroughly to remove excess starch.
Fill the inner pot with water to the marked level corresponding to the rice amount.
Place the inner pot into the cooker and close the lid securely.
Select the desired mode (White Rice or Brown Rice) using the control panel.
Press the Start button to begin cooking.
The cooker will automatically switch to Keep Warm mode once cooking is complete.
Allow the rice to rest for 5-10 minutes before serving.
Avoid overfilling the pot to ensure even cooking and prevent overflow.

Cooking Other Grains and Settings

Beyond rice, the Green Life Rice Cooker excels at preparing quinoa, steel-cut oats, and other grains. For quinoa, use a 2:1 water ratio and select the Quinoa mode. Steel-cut oats cook perfectly on the Oat mode with a 4:1 water ratio. Beans and porridge can also be cooked using the dedicated settings. Rinse grains thoroughly before cooking and adjust water levels as needed. Use the control panel to choose the appropriate mode for your grain type. The cooker’s presets ensure optimal results for a variety of dishes, making it a versatile kitchen companion.

Cooking Modes and Presets

The Green Life Rice Cooker offers preset modes for white rice, brown rice, quinoa, and steel-cut oats, ensuring perfect results every time with intelligent cooking technology.

White Rice, Brown Rice, and Quinoa Modes

The Green Life Rice Cooker features dedicated modes for white rice, brown rice, and quinoa, ensuring optimal cooking results. White rice mode cooks quickly for fluffy texture, while brown rice mode adjusts for longer cooking time and nuttier flavor. Quinoa mode ensures grains are tender without overcooking. These presets utilize fuzzy logic technology to automatically adjust water levels and cooking times, delivering perfectly cooked grains every time. Simply select the mode, add ingredients, and let the cooker do the work for a hassle-free experience.

Steel Cut Oats and Other Grain Options

The Green Life Rice Cooker excels at preparing steel cut oats and other grains with ease. Simply add the recommended water ratio, select the appropriate grain mode, and let the cooker handle the rest. Steel cut oats cook to a perfect creaminess, while other grains like barley or Kamut are evenly cooked. The cooker’s intelligent settings ensure each grain type is cooked to its optimal texture, offering versatility and convenience for a variety of breakfast or meal options.

Maintenance and Cleaning Tips

Regularly clean the inner pot and exterior with a damp cloth. Avoid abrasive scrubbers or harsh chemicals. Dry thoroughly to prevent bacterial growth and maintain performance.

How to Clean the Rice Cooker Effectively

For effective cleaning, unplug the rice cooker and let it cool. Wipe the exterior with a damp cloth, avoiding harsh chemicals. Rinse the inner pot after use, scrubbing gently with a soft sponge to remove residue. Soak stubborn areas in warm water. Clean the steam valve and vents with a toothbrush to prevent clogs. Mix vinegar and water to descale, ensuring mineral buildup is removed. Dry all parts thoroughly after cleaning to prevent bacterial growth. Regular maintenance ensures optimal performance and longevity.

Extending the Lifespan of Your Appliance

To extend the lifespan of your Green Life rice cooker, ensure proper maintenance. Regularly clean the inner pot, lid, and steam valve to prevent residue buildup. Avoid using abrasive cleaners or metal utensils, as they may damage the nonstick coating. Dry the appliance thoroughly after cleaning to prevent rust or bacterial growth. Store the cooker in a dry place when not in use, and avoid submerging electrical components in water. By following these care tips, you can enjoy optimal performance and longevity from your appliance.

Troubleshooting Common Issues

Identify and resolve issues like overcooked rice, sticking, or faulty sensors. Refer to the manual for solutions or reset the cooker. Contact customer support for persistent problems.

Resolving Cooking Time and Texture Problems

If your rice is undercooked, overcooked, or mushy, check the water ratio and cooking mode. Ensure the inner pot is clean and dry before use. For sticky rice, rinse thoroughly and adjust water levels. If cooking time is inconsistent, verify the rice type selected matches your grain. Allow the cooker to cool slightly before fluffing with a fork. For persistent issues, reset the cooker or consult the troubleshooting section for further guidance to achieve perfect texture every time.

Addressing Technical or Electrical Concerns

If the cooker fails to turn on, ensure it is properly plugged into a 120V AC outlet and the circuit is not overloaded. Avoid exposing the appliance to water or moisture, as this can damage electrical components. If steam escapes excessively, check the seal or steam valve for proper alignment. For persistent malfunctions, unplug the cooker, allow it to cool, and consult the manual or contact customer support for assistance. Regular cleaning and maintenance can prevent many technical issues.

Additional Resources and Support

Access the Green Life Rice Cooker Manual PDF for detailed guidance. Contact customer service at 1-877-926-6526 or visit the official website for online support and resources.

Accessing the Green Life Rice Cooker Manual PDF

To access the Green Life Rice Cooker Manual PDF, visit the official Green Life website or trusted platforms like ManualsLib. Search for your specific model, such as GreenLife CC004429-001, and download the PDF. The manual includes detailed instructions, safety guidelines, and troubleshooting tips. For further assistance, contact customer service at 1-877-926-6526 or refer to the resources provided in the manual. Ensure you have the correct model number for accurate information.

Customer Service and Online Assistance

For any inquiries or issues, Green Life offers dedicated customer service. Contact their support team at 1-877-926-6526 for assistance with your rice cooker. Additionally, online resources, including the manual PDF, are available on platforms like ManualsLib. Visit their official website for troubleshooting guides, FAQs, and model-specific support. Whether you need operational guidance or maintenance tips, Green Life ensures comprehensive assistance to enhance your cooking experience.

The Green Life Rice Cooker Manual serves as a valuable resource, guiding users to achieve perfect results every time. By following the provided instructions, safety tips, and maintenance advice, you can enjoy healthy, flavorful meals effortlessly. Explore the cooker’s versatile features and modes to expand your culinary horizons. Should questions arise, refer back to this manual or access online support for assistance. Happy cooking with your Green Life Rice Cooker!

Guide

juki mo 7600 knife guide attachment so you cant cut

The Juki MO 7600 is a high-speed serger designed for precision and versatility‚ featuring a knife guide attachment that ensures clean‚ accurate fabric cutting and minimal waste.

1.1 Overview of the Juki MO 7600 Series

The Juki MO 7600 series is a line of high-speed‚ semi-dry head overlock and interlock sewing machines designed for precision and versatility. These machines are ideal for various fabrics‚ offering superior stitching quality and durability. The series includes advanced features like the knife guide attachment‚ which enhances cutting accuracy and minimizes fabric waste‚ making it a valuable tool for both professional sewers and hobbyists alike.

1.2 Key Features of the Juki MO 7600

The Juki MO 7600 features a robust knife system‚ essential for clean fabric cutting‚ and a precision knife guide attachment that ensures accurate cuts and reduces waste. It also includes high-speed stitching capabilities‚ durable construction‚ and compatibility with various attachments‚ making it a versatile tool for both industrial and home sewing projects.

Understanding the Knife Guide Attachment

The knife guide attachment is a crucial component of the Juki MO 7600‚ designed to enhance cutting precision and ensure smooth fabric handling during serging operations.

2.1 Purpose of the Knife Guide Attachment

The knife guide attachment on the Juki MO 7600 is designed to ensure precise fabric cutting by maintaining consistent edge alignment‚ preventing uneven cuts‚ and enhancing overall sewing accuracy. It is particularly useful for handling curved seams and intricate patterns‚ ensuring smooth operation and professional-grade results. This accessory is essential for achieving clean‚ accurate cuts consistently.

2.2 How the Knife Guide Enhances Cutting Precision

The knife guide attachment enhances cutting precision by providing a stable reference point‚ ensuring fabric remains aligned during serging. It prevents slippage and maintains consistent seam allowances‚ delivering straight‚ accurate cuts. This accessory minimizes human error and ensures uniform results‚ making it indispensable for precise fabric trimming and professional-grade sewing projects.

Benefits of Using the Knife Guide Attachment

The knife guide attachment enhances cutting accuracy‚ reduces fabric waste‚ and optimizes sewing efficiency‚ ensuring precise results and minimizing material loss for professional-grade projects.

3.1 Improved Fabric Cutting Accuracy

The knife guide attachment ensures precise fabric cutting by maintaining consistent alignment‚ reducing errors‚ and preventing uneven edges. This enhances overall sewing quality‚ especially on delicate or thick materials‚ making it ideal for both professional and hobbyist projects requiring high accuracy and clean finishes.

3.2 Reduced Fabric Waste

By ensuring accurate cuts and consistent fabric edge alignment‚ the knife guide attachment minimizes unnecessary fabric waste. This feature is especially beneficial for expensive or specialty materials‚ allowing sewists to maximize their fabric usage efficiently while maintaining high-quality results in every project.

3.3 Enhanced Sewing Efficiency

The knife guide attachment streamlines the sewing process by ensuring precise fabric alignment and consistent cutting. This eliminates the need for constant adjustments‚ allowing for smoother operation and faster completion of projects. The attachment’s ability to handle sharp curves and straight lines with equal accuracy further boosts productivity‚ making it an indispensable tool for both professionals and hobbyists seeking efficient sewing results.

Installation and Setup

The Juki MO 7600 knife guide attachment is installed by attaching it to the machine’s face plate. Proper alignment ensures precise cutting and optimal performance.

4.1 Step-by-Step Guide to Attaching the Knife Guide

To attach the knife guide‚ first‚ ensure the machine is turned off. Locate the face plate and align the guide with the designated attachment points. Secure it using the provided screws‚ tightening firmly but avoiding overtightening. Once attached‚ test the guide by running a scrap fabric through to ensure proper alignment and smooth operation. This ensures accurate cutting and prevents fabric mishandling.


4.2 Adjusting the Knife Guide for Optimal Performance

Adjusting the knife guide ensures precise fabric cutting. Start by aligning the guide parallel to the fabric edge. Use the adjustment screws to position it correctly‚ ensuring even cutting. Test with scrap fabric to verify accuracy. Fine-tune as needed for different fabric types to maintain optimal performance and minimize waste. Regular checks and adjustments are crucial for consistent results.

Maintenance and Care

Regular maintenance ensures optimal performance of the knife guide attachment. Clean the knife and surrounding areas with a soft brush to remove debris. Lubricate moving parts periodically to prevent wear and tear. Proper care extends the lifespan and maintains precise cutting accuracy.

5.1 Cleaning the Knife Guide

To maintain the Juki MO 7600 knife guide’s performance‚ clean it regularly using a soft-bristled brush to remove fabric remnants and debris. Avoid harsh chemicals; instead‚ use a mild detergent dissolved in warm water and a lint-free cloth to wipe down the guide. Ensure the area is dry after cleaning to prevent rust or corrosion. This routine preserves sharpness and ensures consistent fabric cutting accuracy.

5.2 Lubrication and Regular Maintenance Tips

Regular lubrication of the knife guide is essential to prevent friction and ensure smooth operation. Use a high-quality sewing machine oil‚ applying a few drops to the guide’s moving parts. Check for dust and fabric remnants weekly and clean with a soft-bristled brush. Re-oil every 50 hours of use to maintain optimal performance. Avoid over-lubrication to prevent debris buildup.

Troubleshooting Common Issues

Common issues include improper knife alignment and blade dullness. Regular maintenance and adjustments ensure optimal functionality.

6.1 Resolving Cutting Inconsistencies

Cutting inconsistencies can arise from improper knife alignment or dull blades. Ensure the knife guide is securely attached and adjusted properly. Regularly clean and lubricate the knife system to maintain sharpness and performance. If issues persist‚ check for fabric thickness or irregularities. Sharpen or replace blades as needed‚ and consult the user manual for troubleshooting guides. Proper maintenance ensures consistent cutting accuracy.

6.2 Addressing Knife Guide Misalignment

Misalignment of the knife guide can lead to uneven cutting. To correct this‚ adjust the guide according to the fabric’s edge‚ ensuring it aligns with the presser foot. Refer to the user manual for precise adjustment steps. If the issue persists‚ check for loose screws or debris. Clean and realign the guide‚ or seek professional assistance if necessary‚ to restore optimal performance. Regular checks prevent misalignment issues.

Compatibility with Other Juki Accessories

The knife guide attachment seamlessly integrates with other Juki accessories‚ enhancing sewing efficiency. It works perfectly with Juki presser feet and additional attachments‚ optimizing performance.

7.1 Using the Knife Guide with Other Juki Attachments

The knife guide attachment is designed to work seamlessly with other Juki accessories‚ such as the coverstitch hemmer and beading presser foot‚ enhancing versatility. It integrates effortlessly‚ allowing for smooth transitions between different sewing techniques and projects. This compatibility ensures that users can maximize their serger’s potential without compromising on precision or efficiency‚ making it a valuable addition to any sewing setup.

7.2 Integration with Juki Serger Presser Feet

The knife guide attachment integrates flawlessly with various Juki serger presser feet‚ enhancing fabric handling and cutting precision. It works seamlessly with standard and specialized feet‚ ensuring accurate edge guidance and consistent results. This integration allows for smoother operations‚ particularly when handling curved or delicate fabrics‚ making it an indispensable tool for achieving professional-level finishes in a wide range of sewing projects.

User Reviews and Feedback

Professionals and hobbyists praise the Juki MO 7600 knife guide attachment for its precision and efficiency‚ ensuring clean cuts and minimizing fabric waste across projects.

8.1 Professional Sewers’ Experiences

Professional sewers highly commend the Juki MO 7600 knife guide attachment for its exceptional precision and reliability. Many report significant improvements in cutting accuracy‚ ensuring clean‚ consistent edges. The attachment’s durability and ease of maintenance are also praised‚ making it a indispensable tool for high-volume projects. Its ability to minimize fabric waste has been particularly beneficial for professionals seeking efficiency and cost-effectiveness in their sewing operations.

8.2 Hobbyists’ Perspectives on the Knife Guide

Hobbyists have expressed enthusiasm for the Juki MO 7600 knife guide attachment‚ praising its ability to enhance precision and consistency in fabric cutting. Many find it user-friendly‚ allowing them to achieve professional-level results with ease. The attachment’s durability and ease of maintenance are also highlighted‚ making it a valuable tool for hobbyists seeking to elevate their sewing projects and explore creative possibilities with confidence.

Comparisons with Other Serger Models

The Juki MO 7600 stands out among serger models for its advanced knife guide attachment‚ offering superior cutting precision and efficiency compared to competitors.

9.1 Juki MO 7600 vs. Other Juki Models

The Juki MO 7600 distinguishes itself from other Juki models with its advanced knife guide attachment‚ offering enhanced cutting precision and fabric handling. While other models like the MO 600 and MO 700 series provide reliable performance‚ the MO 7600 excels in versatility and efficiency‚ making it a top choice for both professionals and hobbyists seeking superior serging capabilities.

9.2 Competitive Advantages of the MO 7600 Knife Guide

The MO 7600 knife guide attachment offers unmatched precision‚ minimizing fabric waste and ensuring clean cuts. Its robust design and compatibility with various fabrics set it apart from competitors‚ providing seamless integration for optimal performance. This feature enhances efficiency‚ making the MO 7600 a preferred choice for professional sewers and hobbyists alike‚ delivering exceptional results across diverse sewing projects.

The Juki MO 7600 knife guide attachment is an indispensable tool for precise fabric cutting‚ offering exceptional accuracy and efficiency‚ making it a must-have for sewers of all levels.

10.1 Final Thoughts on the Juki MO 7600 Knife Guide

The Juki MO 7600 knife guide attachment is an indispensable accessory for precise fabric cutting‚ ensuring clean edges and minimal waste. Its robust design and ease of use make it ideal for both professionals and hobbyists‚ enhancing sewing efficiency and versatility. This attachment is a testament to Juki’s commitment to quality‚ offering a reliable solution for accurate serging and seamless project completion.

10.2 Recommendations for Potential Buyers

The Juki MO 7600 knife guide attachment is a valuable investment for sewists seeking precision and efficiency. It is ideal for professionals and hobbyists alike‚ offering clean cuts and minimal fabric waste. Buyers will appreciate its durability and ease of use‚ making it a must-have accessory for enhancing their serging experience. Highly recommended for those looking to optimize their sewing projects with accuracy and versatility.

Frequently Asked Questions (FAQs)

Common questions include inquiries about the knife guide’s purpose‚ installation‚ and troubleshooting. Users often ask how it enhances cutting precision and reduces fabric waste effectively.

11.1 Common Queries About the Knife Guide

Users often inquire about the knife guide’s function‚ installation‚ and troubleshooting. They seek advice on achieving precise cuts‚ minimizing fabric waste‚ and resolving cutting inconsistencies. Many ask about compatibility with other attachments and maintenance tips to ensure optimal performance. These questions highlight the guide’s importance in enhancing sewing efficiency and overall user experience with the Juki MO 7600 serger.

11.2 Answers to Technical and Usage Questions

For precise cutting‚ ensure the knife guide is properly aligned and adjusted. Regularly clean and lubricate the knife system to maintain performance. For different fabric types‚ adjust the guide’s position to accommodate thickness and texture. If experiencing cutting inconsistencies‚ check for misalignment or dull blades. Refer to the official Juki documentation for detailed troubleshooting and maintenance guidelines to optimize your sewing experience with the MO 7600 serger.

Resources and Further Reading

For detailed guides and support‚ refer to official Juki documentation and explore online communities like forums and sewing groups for hands-on advice and troubleshooting tips.

12.1 Official Juki Documentation and Guides

Visit the official Juki website for comprehensive guides‚ manuals‚ and technical specifications for the MO 7600 serger and its knife guide attachment. Download the Knife Guide Attachment Manual (part A9140C090B0) for detailed installation and maintenance instructions. These resources provide essential troubleshooting tips and ensure optimal performance‚ helping you achieve clean cuts and minimal fabric waste with your Juki MO 7600 serger.

12.2 Online Communities and Forums for Support

Join online communities like Sewing Parts Online and Juki Serger Forums for troubleshooting and expert advice. These platforms offer detailed discussions‚ user experiences‚ and solutions for the MO 7600 knife guide attachment. Engage with sewists and professionals to resolve cutting issues and optimize your serger’s performance‚ ensuring precise fabric handling and minimal waste.

PreviousNext

You Want To Have Your Favorite Car?

We have a big list of modern & classic cars in both used and new categories.