PDF

car detailing checklist pdf

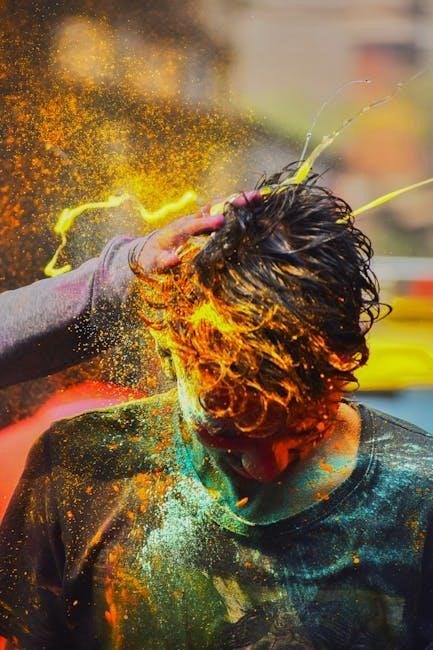
A car detailing checklist is a comprehensive guide to ensure thorough vehicle cleaning and maintenance‚ covering exterior and interior processes. It helps maintain consistency and efficiency‚ guaranteeing a spotless finish every time. This checklist is essential for car enthusiasts and professionals alike‚ providing step-by-step instructions for optimal results. By following it‚ you can achieve a showroom-like appearance and protect your vehicle’s surfaces from damage. Regular use of a detailing checklist ensures long-term care and enhances your car’s overall aesthetics and functionality. It’s a must-have tool for anyone passionate about car maintenance.

1.1 What is Car Detailing?

Car detailing is a meticulous process of cleaning‚ restoring‚ and protecting a vehicle’s exterior and interior. It enhances appearance‚ maintains surfaces‚ and ensures longevity. Detailing involves specialized techniques and products‚ addressing paint‚ wheels‚ glass‚ upholstery‚ and more. Regular detailing preserves the car’s condition‚ boosting both aesthetics and resale value.

1.2 Why Use a Car Detailing Checklist?

A car detailing checklist ensures consistency‚ efficiency‚ and thoroughness in maintaining your vehicle. It helps avoid missed steps‚ saving time and effort. By following a structured plan‚ you can achieve professional-level results‚ protect surfaces‚ and enhance aesthetics. Regular use of a checklist extends the life of your car’s interior and exterior‚ preserving its condition and resale value effectively;

1.3 Brief History of Car Detailing

Car detailing has evolved significantly over the years‚ originating from basic car cleaning to advanced precision techniques. Early practices focused on paint correction and interior sanitization‚ while modern methods incorporate cutting-edge tools and eco-friendly products. The rise of professional detailing in the 80s and 90s popularized structured checklists‚ making detailing more accessible and systematic for enthusiasts and professionals alike.

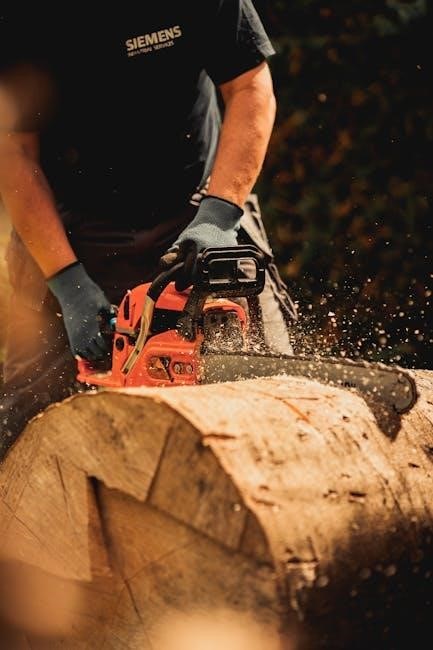
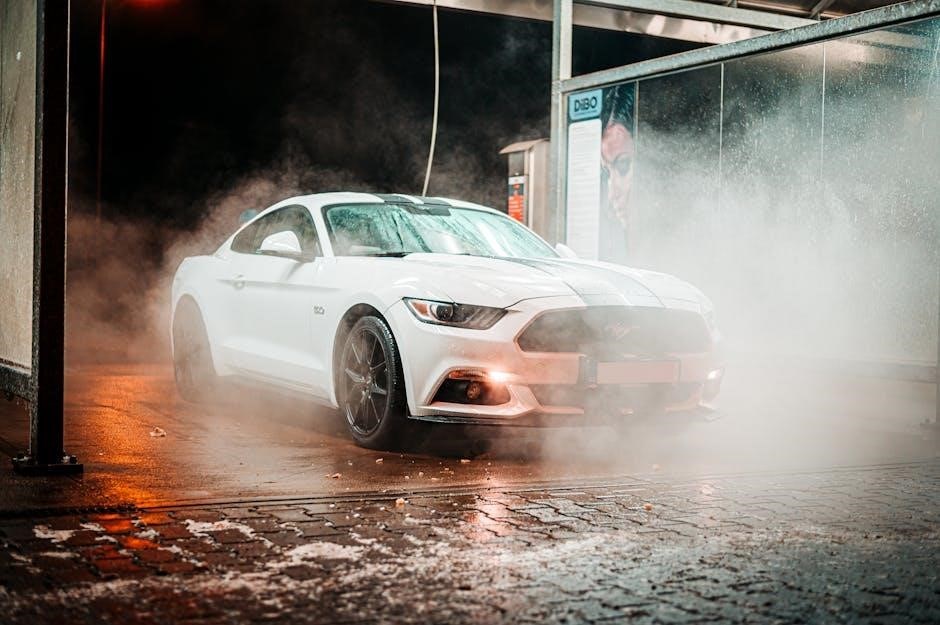
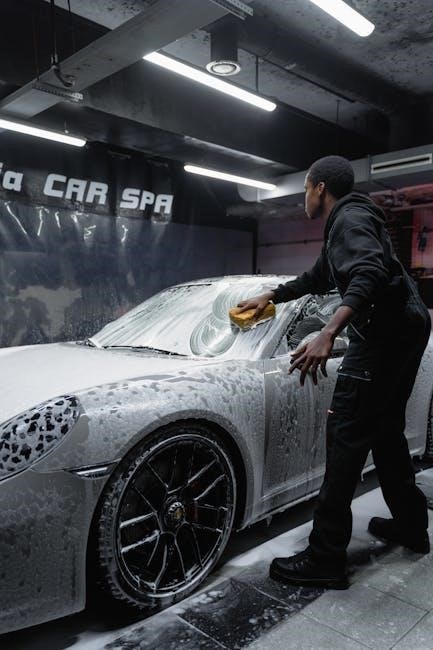
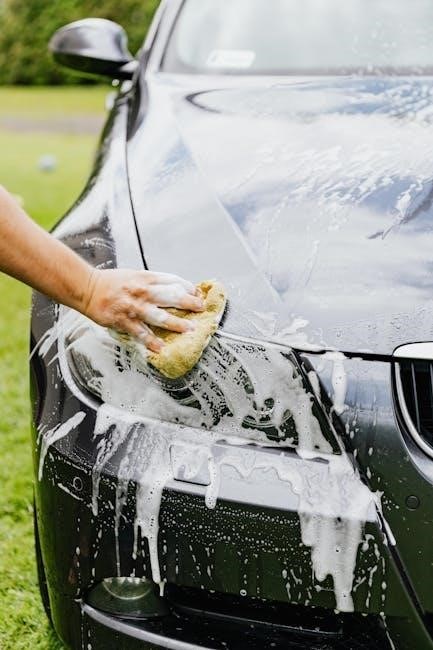
Exterior Detailing Checklist

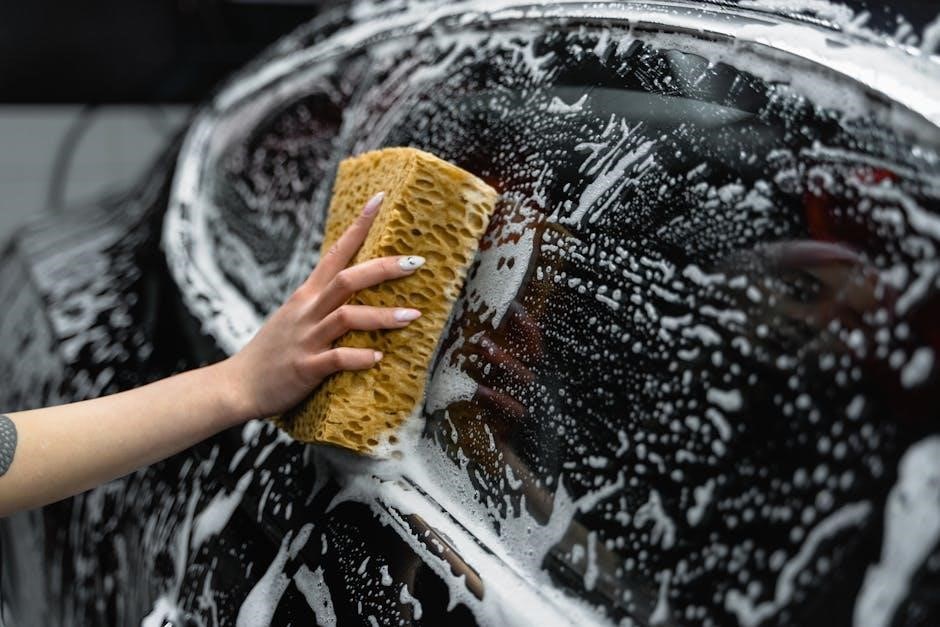
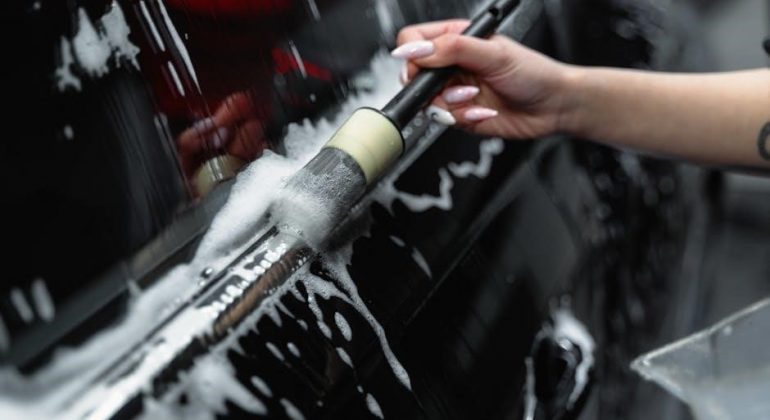
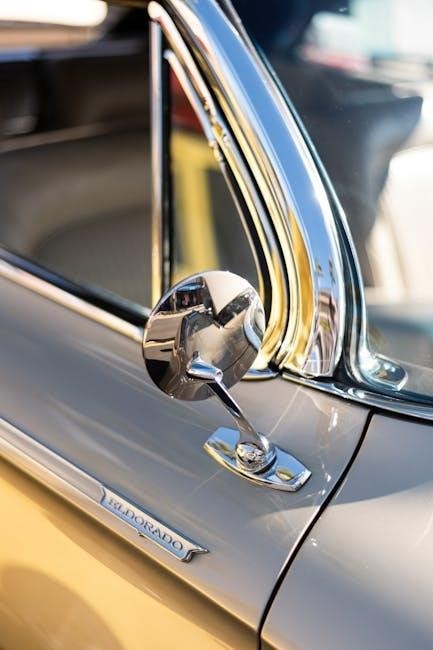
An exterior detailing checklist ensures thorough cleaning and protection of your car’s outer surfaces. It includes wheel and tire cleaning‚ paint correction‚ and glass treatment techniques to maintain a pristine appearance and protect against environmental damage. Regular exterior detailing enhances your car’s visual appeal and long-term durability.

2.1 Wheels and Tires Cleaning Process

The wheels and tires cleaning process involves removing brake dust and grime using specialized cleaners. Brushes are used to scrub wheel spokes and tires. Rinse thoroughly with water to remove any residue. Apply tire dressing to protect rubber and enhance appearance. Avoid harsh chemicals that can damage finishes or dry out tires. Regular cleaning ensures a polished look and prevents long-term damage.

2.2 Paint Correction and Protection Methods

Paint correction involves polishing to remove scratches and imperfections‚ restoring a smooth surface. Protection methods include applying ceramic coatings or waxes to shield paint from environmental damage. Regular polishing maintains gloss and clarity‚ while protective layers prevent fading and contamination. These steps ensure the vehicle’s paint remains pristine and protected‚ enhancing its visual appeal and long-term durability.

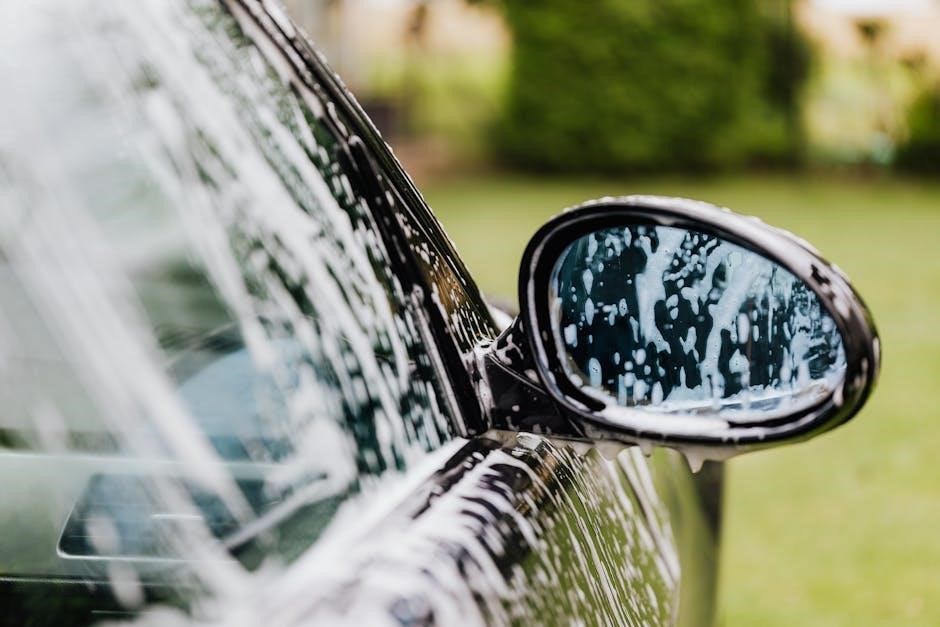
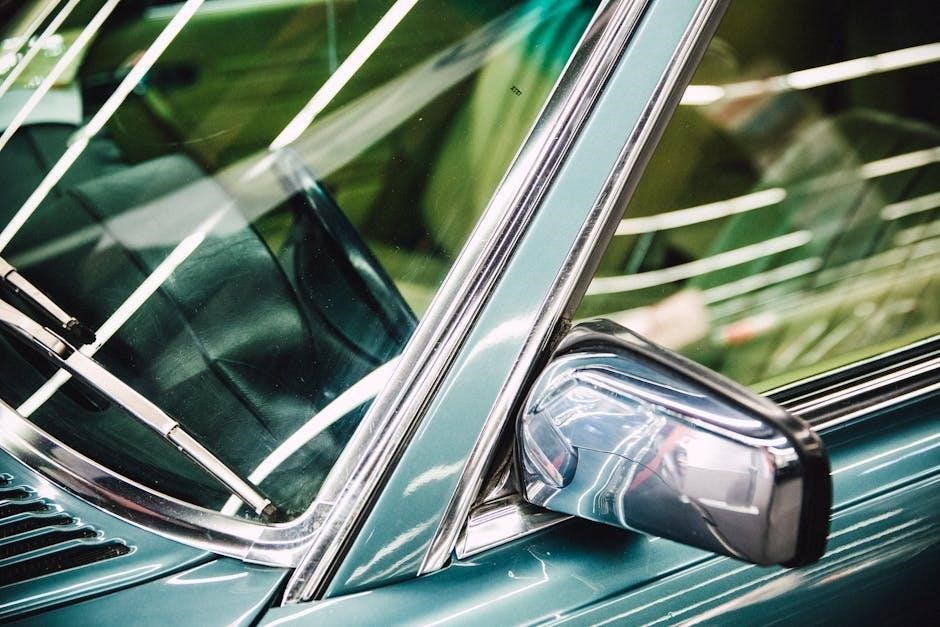
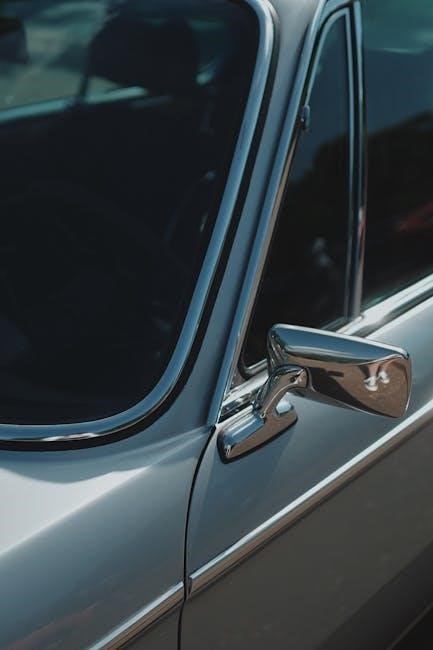
2.3 Glass and Window Treatment Techniques

Glass treatment involves cleaning windows‚ windshields‚ and mirrors with specialized products to eliminate streaks and water spots. Hydrophobic coatings are applied to repel water‚ improving visibility. Regular cleaning with microfiber towels and glass-specific cleaners ensures clarity and safety. Proper techniques prevent scratches and maintain optical clarity‚ enhancing driver visibility and overall vehicle aesthetics for a polished look.

Interior Detailing Checklist

An interior detailing checklist ensures a systematic approach to cleaning and maintaining surfaces‚ seats‚ carpets‚ and glass. It includes steps for sanitization‚ stain removal‚ and odor elimination‚ using specialized products and tools like microfiber cloths and vacuums. This process enhances the car’s comfort and appearance‚ leaving a spotless and fresh interior environment for drivers and passengers.


3.1 Dashboard and Surface Sanitization

Sanitizing the dashboard and surfaces is a crucial step in interior detailing. Using a microfiber cloth with a gentle‚ non-abrasive cleaning agent ensures effective germ removal without damaging materials. Avoid harsh chemicals that may cause discoloration or cracks. Regular sanitization maintains a hygienic environment‚ prevents odors‚ and preserves the car’s interior appearance‚ ensuring longevity and a fresh cabin for drivers and passengers. Consistent sanitization is key to maintaining a pristine interior.

3.2 Seat and Upholstery Cleaning Methods

Effective seat and upholstery cleaning involves vacuuming to remove debris‚ followed by spot testing with a gentle cleaning agent. For leather‚ use a soft brush and leather-specific cleaners. Fabric seats benefit from foam cleaners applied with a microfiber cloth. Avoid harsh chemicals to prevent damage. Regular cleaning maintains material integrity‚ removes stains‚ and keeps seats looking pristine. Consistent upkeep ensures comfort and longevity of the upholstery.

3.3 Carpet and Floor Mat Maintenance Tips

Regular vacuuming of carpets and floor mats is essential to remove dirt and debris. Spot clean stains using mild detergents and avoid harsh chemicals. Rinse thoroughly and dry completely to prevent mold. Shake out floor mats and brush them to remove embedded dirt. Apply fabric protectants to repel future stains and maintain cleanliness. Consistent care ensures a fresh‚ dirt-free interior.

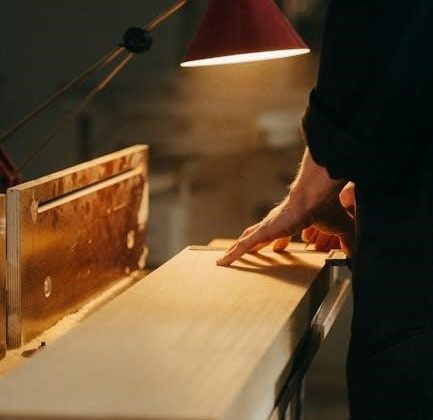
Essential Products and Tools

Quality cleaning agents‚ polishing tools‚ and protective products are vital for effective car detailing. They ensure surfaces are clean‚ shiny‚ and well-maintained‚ enhancing the vehicle’s overall appearance and longevity.

4.1 Best Cleaning Agents for Detailing

Premium cleaning agents are essential for car detailing‚ ensuring all surfaces are immaculate. They effectively remove dirt and contaminants from paint‚ glass‚ and upholstery without causing damage. Through A/B testing‚ the best products are identified‚ offering superior cleaning power and protection. These agents are vital for maintaining your car’s appearance‚ protecting it from environmental elements‚ and ensuring a professional‚ showroom-like finish consistently for long-term vehicle care.

4.2 Polishing Tools and Equipment

Premium polishing tools‚ such as dual-action polishers and rotary buffers‚ are crucial for car detailing. They effectively remove imperfections and restore paint clarity. Microfiber pads‚ wool pads‚ and foam pads cater to different detailing needs. Variable speed control ensures safe and precise polishing‚ preventing damage to surfaces. These tools are essential for achieving a flawless finish and maintaining long-term paint protection‚ ensuring your car looks its best always.

4.3 Protective Products for Long-Term Care

Protective products like ceramic coatings‚ wax‚ and sealants shield your car’s surfaces from environmental damage. Ceramic coatings offer long-lasting protection against UV rays and contaminants. Glass treatments enhance visibility and repel water‚ while interior protectants safeguard upholstery and carpets from spills and wear. Regular application of these products ensures durability and maintains your car’s pristine condition over time‚ preserving its value and appearance effectively.

Tips for Using a Car Detailing Checklist

Using a car detailing checklist ensures efficiency and consistency. Start with pre-wash inspections and follow a logical order. Invest in quality tools and products for best results. Regular updates keep your checklist relevant. Always refer to manufacturer guidelines for specific treatments. This structured approach saves time and ensures no detail is overlooked‚ achieving professional-grade outcomes every time. Consistency is key to maintaining your car’s optimal condition and appearance. A well-organized checklist helps prevent missed steps‚ ensuring a flawless detailing process. Stay organized‚ and your efforts will yield exceptional results. Professional detailers swear by checklists for precision and thoroughness. Tailor your checklist to your vehicle’s unique needs for personalized care. Detailed records help track maintenance‚ preventing neglect and extending your car’s lifespan. A checklist is more than a guide—it’s a commitment to excellence in car care. By following it diligently‚ you protect your investment and enjoy a cleaner‚ safer ride.

5.1 Best Practices for Detailing

5.2 Common Mistakes to Avoid

  • Using household cleaners‚ which can damage surfaces.
  • Not rinsing thoroughly‚ leading to soap residue.
  • Using dirty towels‚ causing scratches.
  • Ignoring wheel and tire cleaning.
  • Forgetting to dry the vehicle‚ causing water spots.
  • Using high-pressure washes on sensitive areas.
  • Neglecting glass cleaning for clear visibility.
  • Not testing products on a small area first.
  • Skipping the drying step entirely.
  • Using the same tools for multiple areas.
  • Not following product instructions.
  • Rushing the process‚ leading to poor results.

Avoiding these mistakes ensures a professional-grade finish and protects your car’s surfaces from damage. Attention to detail and patience are crucial for achieving optimal results.

Importance of Regular Car Maintenance

Regular car maintenance ensures optimal performance‚ extends vehicle longevity‚ and enhances safety. It prevents costly repairs‚ improves fuel efficiency‚ and maintains aesthetic appeal‚ protecting your investment effectively.

6.1 Benefits of Regular Detailing

Regular detailing enhances your car’s appearance‚ protecting surfaces from damage. It boosts resale value‚ reduces maintenance costs‚ and ensures a clean environment inside. With a detailed checklist‚ you can achieve consistent results‚ preserving your vehicle’s condition and longevity effectively.

6.2 How to Create a Maintenance Schedule

To create a maintenance schedule‚ start by assessing your vehicle’s needs based on mileage and usage. Plan regular detailing sessions‚ including exterior washes‚ interior cleanups‚ and protective treatments. Use a checklist to track progress and adjust the schedule as needed. This ensures consistent care and prolongs your car’s condition effectively over time.

Q1: What frequency is best for detailing based on daily use?
Q2: How should I prioritize tasks in my schedule?
Q3: What tools are essential for maintaining the schedule?

DIY vs. Professional Detailing

DIY detailing offers cost savings and personal satisfaction‚ while professional detailing provides expert results and convenience. Choose based on your skills‚ time‚ and desired outcome. Both methods ensure a well-maintained vehicle‚ but professionals often deliver superior finishes and longevity. Assess your needs to decide the best approach for your car’s care.

7.1 Pros and Cons of DIY Detailing

DIY detailing saves money and allows personal touch‚ but requires time and effort. It can be cost-effective but may lack professional results. DIY also risks damage if techniques or products are misused. However‚ it offers flexibility and satisfaction for car enthusiasts. Weighing pros and cons helps decide if DIY suits your skills and goals. Balance convenience with potential outcomes carefully.

7.2 When to Hire a Professional Detailer

Hire a professional detailer for complex tasks like paint correction or ceramic coating. They excel at advanced techniques and deliver flawless results. Time constraints or lack of expertise also make hiring a pro beneficial; Professionals have specialized tools and products‚ ensuring superior outcomes. Consider their services for deep cleaning‚ odor removal‚ or restoring vehicles to showroom condition efficiently and effectively.

Advanced Detailing Techniques

Advanced detailing involves specialized methods like ceramic coating for paint protection and headlight restoration for clarity. These techniques enhance vehicle appearance and durability‚ offering long-term benefits.

8.1 Ceramic Coating Application

Ceramic coating application involves applying a liquid polymer to protect paint and surfaces. Proper preparation is key‚ including thorough cleaning and paint correction. Using microfiber applicators‚ the coating is evenly spread‚ then cured under specific conditions. It provides long-lasting protection against UV rays‚ contaminants‚ and minor scratches. Regular maintenance enhances durability‚ ensuring a glossy‚ resilient finish for years. This advanced technique is popular among detailing professionals for its superior protective qualities.

8.2 Headlight Restoration Process

Headlight restoration involves reviving cloudy‚ oxidized lenses to restore clarity and safety. Sanding with progressively finer grits removes yellowing‚ followed by polishing to achieve a smooth surface. Protective coatings are applied to prevent future oxidation. This process enhances nighttime visibility and improves the vehicle’s overall appearance‚ making it a crucial step in advanced detailing techniques for safety and aesthetics.

8.3 Odor Removal and Sanitization

Odor removal and sanitization are critical for a fresh‚ healthy car interior. This process targets bacteria‚ mold‚ and embedded smells in upholstery and carpets. Techniques include vacuuming‚ steam cleaning‚ and using enzymatic cleaners to break down organic matter. Ozone generators or air purifiers may also be employed for deep sanitization. Regular sanitization prevents lingering odors and maintains a clean‚ hygienic environment inside the vehicle‚ enhancing comfort and resale value.

Case Studies and Examples

Real-world applications of detailing checklists showcase dramatic before-and-after results‚ proving their effectiveness in achieving professional-grade finishes. These examples inspire enthusiasts to adopt structured maintenance routines for stunning outcomes.

9.1 Before and After Detailing Results

Dramatic transformations highlight the effectiveness of detailing checklists. From dull‚ dirty exteriors to pristine finishes‚ and from stained interiors to clean‚ fresh spaces‚ these results showcase the power of structured detailing processes. Vehicles often look like new‚ with restored paint‚ polished glass‚ and sanitized surfaces‚ proving the checklist’s role in achieving professional-grade outcomes. The contrast is striking‚ inspiring enthusiasts to adopt thorough maintenance routines for long-lasting results.

9.2 Real-Life Applications of Checklists

Detailing checklists are widely used by professionals and enthusiasts to ensure consistent‚ high-quality results. They help car owners track maintenance‚ prevent overlooked areas‚ and enhance efficiency. Many detailers rely on these lists for pre-service inspections‚ ensuring every step is followed meticulously. Checklists also serve as educational tools‚ guiding novices through complex processes and helping businesses maintain uniform standards across all vehicles. Their practicality makes them indispensable in the detailing world.

10.2 Final Thoughts on Car Detailing

A car detailing checklist is a valuable resource for maintaining your vehicle’s appearance and longevity; It ensures consistency‚ efficiency‚ and attention to detail‚ making it an essential tool for enthusiasts and professionals alike. By following this guide‚ you can preserve your car’s beauty and functionality‚ ensuring it remains in pristine condition for years to come.

PDF

chaplet of the holy face pdf

The Chaplet of the Holy Face is a devotion honoring the Face of Jesus, seeking reparation and the triumph of the Church through prayer․

1․1․ Definition and Purpose

The Chaplet of the Holy Face is a Catholic devotion consisting of prayers and meditations focused on honoring the Face of Jesus Christ․ Its primary purpose is to seek reparation for blasphemies and sins committed against the Holy Face, while also imploring divine mercy and the triumph of the Catholic Church․ Rooted in revelations received by Sister Marie of St․ Peter in the 19th century, this chaplet emphasizes the importance of devotion to Christ’s Face as a symbol of His divine love and redemption․ By praying the chaplet, the faithful seek spiritual graces, protection, and intercession, aligning their intentions with the sacred wounds and sufferings of Jesus․

1․2․ Historical Background

The Chaplet of the Holy Face traces its origins to the 19th century, specifically to revelations received by Sister Marie of St․ Peter, a Carmelite nun in Tours, France, during the 1840s․ Jesus appeared to her, emphasizing the importance of devotion to His Holy Face as a means of reparation for blasphemies and sins․ This devotion gained popularity in the 20th century, particularly through the efforts of the Benedictine monk Father Jacques Paredes․ The chaplet is deeply rooted in Catholic tradition, drawing inspiration from biblical references to Christ’s Passion and the significance of His Face as a symbol of divine love and redemption․ Its historical development reflects the Church’s enduring commitment to prayer and reparation․

Structure of the Chaplet of the Holy Face

The chaplet includes a cross and 39 beads, symbolizing Christ’s life․ A square medal is attached, and the beads are divided into five sets of six beads each․

2․1․ Components of the Chaplet

The Chaplet of the Holy Face consists of a cross, 39 beads, and a square medal․ The cross symbolizes Redemption, while the 39 beads represent Christ’s 33 years of life, divided into five sets of six beads each for reparation․ A square medal bearing the Holy Face is attached to the chaplet․ The beads are arranged in a circlet with a pendant, and three separate beads above the cross signify the public life of Jesus․ Prayers include “Arise, O Lord!” and “Glory be to the Father,” focusing on reparation for blasphemies against Christ’s Holy Face․ This structure reflects the devotion’s purpose of honoring and seeking mercy through the veneration of Jesus’ Face․


2․2․ Significance of the Beads and Medals

The beads and medals in the Chaplet of the Holy Face hold profound symbolic meaning․ The 33 beads represent the 33 years of Christ’s life, with 30 beads for His private life and 3 for His public life․ Each bead serves as a reminder to honor Christ and seek reparation for blasphemies against His Holy Face․ The square medal, often depicting the Holy Face, symbolizes devotion to Jesus’ countenance and acts as a visual reminder of the prayer’s purpose․ The chaplet’s structure and components are designed to deepen devotion and focus the mind on the redemptive mission of Christ, emphasizing the importance of reverence and reparation through prayer․

How to Pray the Chaplet of the Holy Face

Begin with the cross, invoking God’s assistance․ Pray specific prayers on each bead, reflecting on Christ’s life and Passion, and conclude with a final invocation․

3․1․ Step-by-Step Prayer Guide

Begin by making the sign of the cross on the crucifix, saying, O God, come to my assistance; O Lord, make haste to help me․ Glory be to the Father․ Pray the “Arise” prayer on the first six beads, followed by the “Eternal Father” on the next six beads, and repeat this pattern․ Each set of six beads represents reparation for blasphemies against God․ After completing the 39 beads, conclude with three “Glory Be” prayers․ End by praying the Prayer of Adoration on the medal, seeking God’s mercy and protection․ This structured approach ensures a meaningful and reverent prayer experience, honoring the Holy Face and seeking divine grace․

3․2․ Recommended Prayers and Intentions

The Chaplet of the Holy Face incorporates specific prayers to deepen devotion and reparation․ Begin with the “Arise” prayer, invoking God’s intervention against evil․ Follow with the “Eternal Father” prayer, seeking mercy and protection․ These prayers are repeated throughout the chaplet, emphasizing contrition and divine intercession․ Intentions include reparation for blasphemies against God and the Holy Face, as well as protection from spiritual and temporal evils․ Praying for the triumph of the Catholic Church and the conversion of sinners is also encouraged․ The chaplet is often prayed daily, with a focus on humility and love for Christ’s sacred countenance․ By aligning intentions with these prayers, devotees seek spiritual grace and divine favor․

Theological Significance of the Holy Face

The Holy Face embodies divine love and redemption, symbolizing Christ’s sacrifice․ Its veneration connects believers to His Passion, emphasizing God’s mercy and the power of His countenance․

4․1․ Biblical Foundations

The Chaplet of the Holy Face is deeply rooted in biblical tradition, emphasizing the divine significance of Christ’s Face․ In the Old Testament, the face of God symbolizes His divine presence and mercy, as seen in Psalm 27:8-9, where the Psalmist seeks God’s Face․ The New Testament reveals Jesus as the visible Face of the Father, embodying divine love and redemption․ The veil in Exodus 34:33-35 and 2 Corinthians 3:13-18 prefigures the unveiling of God’s glory in Christ’s Face․ Prophetic references, such as Isaiah 50:5-9, foreshadow the suffering and wounded Face of the Messiah․ These biblical foundations highlight the Chaplet’s purpose of reparation and devotion to the Holy Face, seeking God’s mercy and grace through the countenance of His beloved Son․

4․2․ Connection to the Passion of Christ

The Chaplet of the Holy Face is intricately linked to the Passion of Christ, emphasizing reparation for blasphemies against His sacred countenance․ The devotion reflects the brutal disfigurement of Jesus’ Face during His Passion, symbolizing the depths of His suffering for humanity’s salvation․ Prayers within the Chaplet, such as “Arise, O Lord, and let Thy enemies be scattered,” echo the divine triumph over evil․ The 39 beads represent Christ’s 33 years of life, while the crucifix underscores the Redemption through His sacrifice․ This connection invites devotees to meditate on Christ’s Passion, seeking reparation and divine mercy, while honoring the Face that endured immense pain for the salvation of the world․

Benefits of Praying the Chaplet

Praying the Chaplet of the Holy Face brings spiritual grace, reparation, and protection, while seeking the triumph of the Church and intercession against evil forces․

5․1․ Spiritual Grace and Reparation

The Chaplet of the Holy Face offers profound spiritual grace, providing reparation for sins, especially blasphemy, while fostering a deeper connection to Christ’s Passion and divine mercy․

5․2․ Intercession and Protection

The Chaplet of the Holy Face is a powerful tool for intercession, offering protection against evil and spiritual attacks․ By praying this chaplet, devotees seek Jesus’ intervention, trusting in His divine care to safeguard souls and guide them through life’s challenges․ It is particularly effective in times of turmoil, providing comfort and strength․ The chaplet’s prayers, rooted in devotion to Christ’s Face, serve as a spiritual shield, defending against negative influences and fostering inner peace․ Many believers attest to its protective grace, emphasizing its role in their spiritual journeys and daily lives as a means of invoking divine assistance and mercy․ This devotion strengthens faith and offers solace, reinforcing trust in God’s providence and love․

The Chaplet in Modern Devotion

The Chaplet of the Holy Face remains a timeless devotion, offering reparation and spiritual protection․ Its adaptability ensures it stays relevant in contemporary Catholic practices and worship․

6․1․ Popular Practices and Adaptations

The Chaplet of the Holy Face has evolved into various devotional practices, blending tradition with modern spirituality․ Many Catholics incorporate it into daily prayer routines, often reciting it during Lent or on Fridays to deepen their connection to Christ’s Passion․ Digital versions and prayer apps now make it accessible to a wider audience, allowing for guided recitations and reflections․ Some devotees pray it in groups, fostering a sense of community and shared spiritual growth․ Additionally, the chaplet’s meditative nature has led to its use in retreats and personal reflection․ Its adaptability ensures it remains a vibrant and relevant devotion in contemporary Catholic life, appealing to both traditional and modern worshippers alike․

6․2․ Its Role in Contemporary Catholic Devotion

The Chaplet of the Holy Face holds a significant place in contemporary Catholic devotion, serving as a powerful tool for reparation and intercession․ Many Catholics turn to this devotion to seek protection, healing, and spiritual strength in today’s challenging world․ Its focus on honoring Christ’s Face resonates deeply, especially in a culture often disconnected from sacred values․ The chaplet’s structured prayers and meditative rhythm make it accessible for both personal and communal worship․ Additionally, its adaptability to modern life—through digital versions and prayer apps—ensures its relevance for younger generations․ By emphasizing the triumph of God’s Church and the conversion of sinners, the Chaplet of the Holy Face remains a vital expression of faith and devotion in the modern era․

PDF

bigby presents: glory of the giants free pdf

Bigby Presents: Glory of the Giants is a comprehensive sourcebook for 5th-edition Dungeons & Dragons, released on August 15, 2023. Written from the perspective of Bigby the Great, it delves into the history, cultures, and races of giants, offering new player options and DM content. This guide explores giant societies, their mythology, and their role in shaping the D&D world, making it a must-have for fans of these iconic creatures.

Overview of the Sourcebook

Bigby Presents: Glory of the Giants is a detailed sourcebook for Dungeons & Dragons 5th Edition, released on August 15, 2023. Authored by Bigby the Great, this guide explores the history, mythology, and societal structures of giants in the D&D multiverse. It is divided into four chapters, each focusing on different aspects of giants, from character creation and racial traits to adventure ideas and encounter design. The book also includes new subclasses, archetypes, and stat blocks, making it a valuable resource for both players and Dungeon Masters. Available as a free PDF, it has quickly become popular among fans for its deep dive into giant lore and its versatile gameplay options.

Key Features of the Book

Bigby Presents: Glory of the Giants stands out with its rich content tailored for both players and Dungeon Masters. The sourcebook includes giant-themed character creation options, such as subclasses and archetypes, allowing players to craft unique giant-inspired characters. It also features racial traits and abilities for various giant races, enhancing customization. For DMs, the book offers encounter design tips and stat blocks for giant monsters, including undead and elemental variants. Additionally, it provides campaign ideas centered around giant societies and their hierarchical structure, known as the ordning. Available as a free PDF, this resource is a must-have for fans looking to integrate giants into their D&D games in creative and immersive ways.

Release Date and Availability

Bigby Presents: Glory of the Giants was officially released on August 15, 2023, making it a recent and exciting addition to the D&D community. The sourcebook is available as a free PDF, ensuring accessibility for all enthusiasts. Players and Dungeon Masters can download it from various online platforms, including the Internet Archive and other digital repositories. Since its release, the PDF has been widely shared and discussed, with many praising its detailed content and creative ideas. Its availability as a free resource has made it a popular choice for those looking to expand their D&D campaigns with giant-themed adventures and character options.

Understanding the Giants in D&D

Giants in D&D are fascinating beings with a rich history and culture, explored in Bigby Presents: Glory of the Giants, which highlights their mythology and societal structures.

History and Mythology of Giants

The history and mythology of giants are deeply rooted in the primordial empires of the Material Plane, as explored in Bigby Presents: Glory of the Giants. These colossal beings are tied to ancient lore, with their origins tracing back to the All-Father, Annam, who sired the first giants. The book delves into the ordning, the hierarchical structure of giant society, revealing their religious beliefs, societal organizations, and the downfall of their civilizations. Giants are portrayed as powerful, storied creatures, shaping the world’s history and leaving a lasting impact on modern D&D realms. Their mythology is rich with tales of grandeur and decline, offering a fascinating backdrop for adventures and storytelling.

Giant Races and Their Roles

The sourcebook details various giant races, each with unique traits and roles in the D&D world. Cloud giants are wise and inhabit majestic cloud castles, while fire giants are aggressive master craftsmen. Frost giants are fearsome warriors thriving in icy realms, and stone giants are reclusive, blending into mountainous landscapes. Each race has distinct cultural and societal norms, shaping their interactions with other beings. These giants are not just enemies but also potential allies or neutral entities, enriching campaigns with depth and complexity. Understanding their roles helps players and DMs integrate them into stories, whether as formidable foes or intriguing NPCs, enhancing the game’s immersive experience.

Character Creation and Giant-Themed Options

Bigby Presents: Glory of the Giants offers extensive character creation options, including new giant races, subclasses, and racial traits. This section provides players with unique giant-inspired characters and DMs with tools for seamless integration, enhancing gameplay and storytelling with diverse giant-themed content.

Character Creation Options

Bigby Presents: Glory of the Giants introduces a wide array of character creation options tailored to giant-themed play. Players can explore new giant races, each with unique racial traits, such as heightened strength, resistance to elemental forces, and cultural bonuses; The sourcebook also includes custom backgrounds and feats that allow characters to embrace their giant heritage or interact with giant societies. Additionally, it provides giant-specific class features and multiclass options, enabling players to craft characters that reflect the majesty and diversity of giants. These options are designed to seamlessly integrate into existing campaigns, offering rich storytelling potential and mechanical depth for both players and Dungeon Masters. The guide ensures that giant characters are not only powerful but also deeply rooted in their lore and world-building.

Giant Subclasses and Archetypes

Bigby Presents: Glory of the Giants introduces a variety of unique subclasses and archetypes tailored to giant-themed characters. These include the Giant Soul sorcerous origin, linking magic to the legacy of giant ancestors, and the Path of the Giant barbarian archetype, channeling primal giant fury. The sourcebook also offers giant-specific archetypes like the Goliath Ranger and Hill Giant Druid, blending racial traits with class abilities. While some fans noted the absence of previously teased subclasses, the provided options enrich giant character builds, offering thematic depth and mechanical versatility. These subclasses and archetypes seamlessly integrate into the D&D multiverse, respecting established lore while expanding giant-related gameplay possibilities. Players and DMs alike will find robust tools to craft compelling giant-centric stories and encounters.

Giant Racial Traits and Abilities

Bigby Presents: Glory of the Giants details extensive racial traits and abilities for giant races in D&D. Each giant subtype, such as Cloud, Fire, and Stone Giants, gains unique bonuses reflecting their heritage. The sourcebook introduces size-based advantages, elemental resistances, and abilities tied to the ordning. For example, Cloud Giants get resistance to lightning damage, while Fire Giants gain ignition abilities. These traits enhance gameplay by offering thematic consistency and mechanical depth. Players can craft giant characters with distinct identities, while DMs can leverage these abilities to create immersive encounters. The guide ensures balance, preventing giant traits from overshadowing other races, making them a fun and integral part of any campaign.


Giant Adventures and Encounters

Bigby Presents: Glory of the Giants offers fresh stat blocks for undead and elemental giants, along with ideas for integrating the ordning into campaign themes, enhancing encounter design.

Giant Adventures and Campaign Ideas

Bigby Presents: Glory of the Giants provides inspiration for epic campaigns, featuring undead and elemental giants. Players can explore ancient giant ruins, battle colossal foes, and unravel the mysteries of the ordning. The book introduces concepts like cloud castles and elemental themes, allowing DMs to craft unique adventures. With undead giants adding a dark twist and elemental giants offering environmental challenges, this sourcebook enriches any campaign setting. Its creative ideas ensure memorable encounters, blending history and innovation for unforgettable giant-themed stories.

Encounter Design with Giants

Bigby Presents: Glory of the Giants offers innovative ideas for designing encounters with these iconic beings. The book introduces undead and elemental giants, each with unique abilities that challenge players in different ways. DMs can craft battles in cloud castles, ancient ruins, or elemental planes, creating dynamic combat scenarios. The sourcebook provides new stat blocks and strategies to integrate giants into any campaign, ensuring encounters are both memorable and balanced. With creative environmental interactions and varied giant types, this guide helps DMs elevate giant encounters from simple fights to epic storytelling moments that highlight their lore and might.

Obtaining the PDF

The Bigby Presents: Glory of the Giants PDF is available for free on platforms like D&D Beyond and DriveThruRPG, released on August 15, 2023.

Where to Find the Free PDF

The Bigby Presents: Glory of the Giants PDF is readily available for download on popular platforms such as D&D Beyond and DriveThruRPG. Released on August 15, 2023, this free resource provides players and Dungeon Masters with in-depth insights into the world of giants. Additionally, enthusiasts can access it through the official D&D website or trusted third-party sellers. For convenience, the PDF is also shared on community forums and repositories dedicated to D&D content. Ensure you download from reputable sources to avoid any issues. The PDF includes detailed character options, giant subclasses, and adventure ideas, making it a valuable addition to any D&D collection. Don’t miss out on this free resource to enhance your giant-themed campaigns!

Downloading and Sharing the PDF

Downloading Bigby Presents: Glory of the Giants is straightforward, with the PDF available on platforms like DriveThruRPG and D&D Beyond. Ensure you download from official sources to avoid pirated versions. Sharing the PDF is encouraged within gaming communities, but always respect copyright laws and avoid unauthorized distribution. The free PDF is designed to enhance your D&D experience, offering detailed giant-themed content for players and Dungeon Masters alike. By downloading and sharing responsibly, you support the creation of high-quality D&D resources. Make sure to explore the PDF’s features, including giant subclasses, racial traits, and adventure ideas, to elevate your campaigns to new heights.

Bigby Presents: Glory of the Giants is a must-have resource for any D&D enthusiast looking to dive deeper into the world of giants. This free PDF offers a wealth of content, from character creation options to detailed encounter designs, making it a valuable tool for both players and Dungeon Masters. Its exploration of giant history, cultures, and roles in the D&D universe adds richness to any campaign. By downloading and sharing this guide responsibly, you can enhance your gaming experience while supporting the creation of high-quality D&D resources. Whether you’re crafting a giant-themed adventure or seeking new character options, Bigby Presents: Glory of the Giants is an essential addition to your collection.

Manuals

noco boost gbx45 manual

The NOCO Boost GBX45 is a portable, ultra-safe lithium jump starter designed for 12V vehicles, offering reliable starting power with advanced safety features and LED status indicators.

1.1 Overview of the NOCO Boost GBX45

The NOCO Boost GBX45 is a portable lithium jump starter designed for 12-volt lead-acid batteries in vehicles up to 6.5L gasoline and 4.0L diesel engines. Compact and lightweight, it features UltraSafe technology for enhanced safety, including spark-proof and reverse polarity protection. The device supports fast charging via USB-C Power Delivery 3.0 and includes multiple USB ports for charging accessories. Its LED indicators provide real-time status updates, while the 60-second timeout feature ensures safe operation. Ideal for cars, trucks, boats, and more, it’s a reliable solution for emergency jump-starts.

1.2 Key Features and Benefits

The NOCO Boost GBX45 offers a 1250A starting current, fast charging via USB-C Power Delivery 3.0, and a 60-second timeout feature for enhanced safety. Its UltraSafe technology prevents sparks and reverse polarity issues, while the compact design makes it easy to carry; The device supports multiple vehicle types, including cars, trucks, and boats, and features LED indicators for charge status and diagnostics. With its high compatibility and advanced safety measures, it ensures reliable performance in emergency situations.

Safety Information and Precautions

Understanding safety guidelines is crucial to avoid risks like electrical shock, explosion, or fire. Always follow instructions carefully and wear protective gear to ensure safe operation and prevent accidents.

2.1 General Safety Guidelines

Always read and understand all safety information before using the NOCO Boost GBX45. Avoid electrical shock, explosion, or fire risks by following precautions. Never cut power cords or submerge the device in water. Keep it away from combustible materials and avoid smoking nearby. Wear eye protection and ensure good ventilation. Do not use damaged products or connectors. Handle batteries with care, avoiding metal contact that could cause sparks. Follow all instructions carefully to ensure safe and effective operation.

2.2 Explosion, Fire, and Electrical Shock Hazards

The NOCO Boost GBX45 poses risks of explosion, fire, and electrical shock if misused. Damaged or incompatible batteries can explode, while electrical sparks near combustible gases may ignite. Do not use near open flames or sparks and ensure the device is kept dry to prevent electrical hazards. Never alter the product or use it with damaged cords, as this can lead to serious injury or property damage. Proper usage in well-ventilated areas is essential for safety.

2.3 Personal Protective Equipment Recommendations

Always wear eye protection and protective clothing when using the NOCO Boost GBX45. Gloves are recommended to prevent skin irritation from battery acid. Avoid wearing loose jewelry or metal objects near the battery to minimize the risk of sparks. Keep water and soap nearby for quick cleanup in case of acid exposure. Proper PPE ensures safer operation and protects against potential hazards associated with battery handling and jump-starting procedures.

Charging the NOCO Boost GBX45

Charge the GBX45 using the included USB-C cable and a compatible USB-C Power Delivery 3.0 charger. LED indicators show charge progress, ensuring safe and efficient charging.

3.1 First-Time Charging Instructions

Before first use, charge the GBX45 using the included USB-C cable and a compatible USB-C Power Delivery 3.0 charger. Connect the USB-C IN/OUT port to a powered USB source, such as a wall adapter, car charger, or laptop. The LED indicators will pulse during charging and turn solid when fully charged. Ensure the device is powered off during charging for optimal performance. Avoid using unapproved adapters to prevent damage. The green 100 LED will illuminate when charging is complete. Charging time varies based on discharge level and power source.

3.2 Fast Charging Technology and Requirements

The GBX45 supports USB-C Power Delivery 3.0 for fast charging, requiring a 60W USB-C charger. Connect the device to a compatible charger, and the fast charge LED will illuminate when charging exceeds 15W. For maximum speed, use the NOCO Auto Charger with the vehicle’s engine running. Charging time varies based on the battery’s discharge level and power source. Ensure the device is powered off during fast charging to optimize performance and safety.

3.3 Maintenance Charging and LED Indicators

The GBX45 features maintenance charging to preserve battery health. The LED indicators show charge levels: slow pulsing during charging, solid when fully charged. The green 100 LED stays on, while others turn off. Periodic green LED pulses indicate maintenance charging. This ensures the battery remains ready for use without overcharging, providing long-term reliability and safety. Always monitor the LEDs to understand the device’s charging status and maintain optimal performance.

Using the NOCO Boost GBX45

The GBX45 is designed for safe and efficient jump-starting. It features a 60-second timeout, manual override for low-voltage batteries, and LED indicators for status monitoring.

4.1 Step-by-Step Jump-Starting Process

Ensure the vehicle is turned off and in park or neutral. Locate the 12-volt lead-acid battery and identify the positive (+) and negative (-) terminals.

Connect the positive clamp to the positive terminal and the negative clamp to a metal ground or negative terminal.

Press the power button to activate the GBX45. The boost LED will illuminate when a battery is detected.

Start the vehicle and allow it to run for a few minutes. Once started, remove the clamps in reverse order.

Monitor the GBX45’s LED indicators for charging status and maintenance needs.

4.2 Manual Override Mode for Low Voltage Batteries

The Manual Override Mode allows jump-starting 12-volt lead-acid batteries below 3 volts. When the battery voltage is too low, the Boost LED remains off. To activate, press and hold the power button for 3 seconds. This mode disables safety features like spark-proof and reverse polarity protection, requiring extreme caution. Use only for 12-volt lead-acid batteries, ensuring correct polarity to avoid sparks or heat. If unsure, seek professional assistance to avoid risks of injury or damage.

4.3 60-Second Timeout Feature

The 60-Second Timeout Feature initiates a countdown upon battery detection. After 60 seconds, the jump-start function deactivates, and the Boost LED turns off. To restart, press the power button to reset the function. This feature ensures safety by preventing prolonged activation. However, the timeout is disabled during Manual Override Mode, allowing continuous power supply. Always turn off the device immediately after starting the vehicle to conserve battery life and maintain optimal performance. This feature enhances user safety and efficiency during jump-starting operations.

Maintenance and Storage

Store the NOCO Boost GBX45 in a cool, dry place, away from direct sunlight and moisture. Regularly clean the device and ensure it is fully charged before storage. Avoid extreme temperatures and physical stress to maintain optimal performance and longevity. Always update the software when prompted for enhanced functionality and safety.

5.1 Proper Storage Conditions

Store the NOCO Boost GBX45 in a cool, dry, well-ventilated area, away from direct sunlight, moisture, and extreme temperatures; Avoid exposure to humidity or liquids, as this can damage the device. Keep it indoors when not in use and ensure it is fully charged before long-term storage. Prevent physical stress or impacts that could harm the unit. Do not disassemble or modify the device, as this may cause irreversible damage. Regularly inspect for wear and tear to maintain optimal performance.

5.2 Care and Handling Tips


Handle the NOCO Boost GBX45 with care to prevent damage. Avoid exposing it to water, extreme temperatures, or physical stress. Regularly clean the terminals to ensure proper connections. Store it in a dry environment and avoid overcharging. Inspect cables and components for wear and tear. Do not disassemble or modify the device, as this may void the warranty or cause malfunction. Always follow the manufacturer’s guidelines for maintenance and operation to ensure optimal performance and longevity.

5.3 Updating and Servicing the Device

Regularly check for firmware updates through the NOCO app or website to ensure optimal performance. Updates may enhance features or fix issues. For servicing, contact authorized NOCO support to avoid voiding the warranty. Do not attempt repairs yourself, as this could damage the device. If the GBX45 is damaged, stop use immediately and seek professional assistance. Always follow the manufacturer’s guidelines for updates and servicing to maintain the device’s functionality and safety.

Troubleshooting Common Issues

Check battery connections for proper contact and ensure the GBX45 is fully charged. If issues persist, consult the LED indicator guide or reset the device by powering it off and on.

6.1 Battery Detection Problems

If the GBX45 fails to detect a battery, ensure the clamps are securely connected to the correct terminals. Check for loose connections or corrosion. For batteries below 3V, use Manual Override Mode by holding the power button for three seconds. Ensure the battery type is compatible with the GBX45, as it only supports 12V lead-acid batteries. If issues persist, restart the device or refer to the LED diagnostic guide for troubleshooting. Proper polarity and terminal cleanliness are crucial for accurate detection. Always verify the battery voltage matches the device specifications to avoid detection issues. If the problem continues, consult the user manual or contact NOCO support.

6.2 Charging Issues and Solutions

If the GBX45 isn’t charging, ensure the USB-C cable is securely connected to both the device and the power source. Check for damage or debris in the port. Use a compatible USB-C Power Delivery 3.0 charger for fast charging. If charging from another USB device, ensure the GBX45 is powered off. If issues persist, restart the device or consult the LED indicators for diagnostic guidance. Contact NOCO support for further assistance if the problem remains unresolved.

6.3 LED Indicator Meanings and Diagnostics

The GBX45 features LED indicators that provide essential diagnostic information. The charge LEDs pulse during charging and turn solid when fully charged. A blinking LED indicates a charging issue or low battery. The fast charge LED illuminates during USB-PD 3.0 charging. When jump-starting, the boost LED remains on if connected correctly and flashes if a problem is detected. The 100% LED blinks during maintenance charging. Refer to the LED patterns in the manual for troubleshooting or contact NOCO support for assistance with unclear indicators.

Warranty and Support

The NOCO Boost GBX45 is backed by a limited warranty. For support, visit NOCO’s website or contact their customer service team for assistance and resources.

7.1 Warranty Terms and Conditions

The NOCO Boost GBX45 is covered by a limited warranty for defects in material and workmanship. The warranty period is 18 months from the date of purchase. Registration may be required for warranty activation. The warranty does not cover damage caused by misuse, neglect, or normal wear and tear. For full details, refer to the official NOCO website or the product’s warranty section in the manual.

7.2 Contacting NOCO Support

For assistance with the NOCO Boost GBX45, contact NOCO’s customer support through their official website. Visit the support page to access contact forms, FAQs, and downloadable resources. You can also reach them via phone or email for troubleshooting, warranty inquiries, or general questions. Ensure to have your product serial number ready for efficient service.

7.3 Online Resources and Downloads

NOCO provides comprehensive online resources for the Boost GBX45. Visit their official website to download the PDF user manual, warranty information, and troubleshooting guides. Additional resources include product images, SDS sheets, and catalogs. Users can access these materials through the support section or dedicated download hub, ensuring easy access to essential documentation and updates for optimal performance and safety.

FAQs and User Tips

Frequently asked questions and user tips for the NOCO Boost GBX45 cover common inquiries, troubleshooting, and best practices, ensuring optimal usage and longevity of the device.

8.1 Common Questions About the GBX45

Common questions about the NOCO Boost GBX45 include its compatibility with various vehicles, charging methods, and safety features. Users often inquire about manual override mode and LED indicators. The GBX45 supports 12V lead-acid batteries and is compatible with cars, trucks, and RVs. It features USB-C Power Delivery for fast charging and spark-proof technology for safe connections; Proper storage and maintenance are also frequently discussed to ensure optimal performance and longevity of the device. Always refer to the manual for detailed instructions.

8.2 Best Practices for Extended Lifespan

To extend the lifespan of the NOCO Boost GBX45, store it in a cool, dry place and avoid extreme temperatures. Keep the device away from moisture and ensure all connections are clean and secure. Regular maintenance charging is recommended, and the unit should be charged every 6 months when not in use. Avoid overcharging and never disassemble or modify the device. Always use the included USB-C cable for charging to prevent damage. Proper handling and adherence to safety guidelines will ensure optimal performance and longevity.

8.3 Compatibility with Different Vehicle Types

The NOCO Boost GBX45 is compatible with a wide range of vehicles, including cars, trucks, boats, RVs, and even tractors. It supports 12V lead-acid batteries and can jump-start vehicles with up to 6.5L gasoline or 4.0L diesel engines. Its compact design and portability make it ideal for emergency use across various vehicle types, ensuring reliable performance in diverse situations. Always verify vehicle specifications to ensure compatibility and safe operation.

The NOCO Boost GBX45 is an exceptional portable jump starter, offering reliable performance, advanced safety features, and versatility for various vehicles. Its compact design and powerful capabilities make it an essential tool for emergencies and everyday use. By following the guidelines in this manual, users can ensure optimal performance and longevity of the device. Proper care and storage will maximize its effectiveness, providing peace of mind for years to come. Always refer to the manual for troubleshooting and maintenance tips.

PDF

invisalign instructions pdf

Invisalign is a revolutionary orthodontic treatment using clear, custom-made aligners to straighten teeth. Properly following the instructions ensures optimal results and maintains oral hygiene throughout the process.

What is Invisalign?

Invisalign is a revolutionary orthodontic treatment that uses clear, removable aligners to straighten teeth. Made from Invisalign’s proprietary SmartTrack material, these custom-made aligners are designed to gently move teeth into their desired position. Using advanced 3D computer imaging, Invisalign creates a personalized treatment plan based on your orthodontist’s prescription. The aligners are nearly invisible, making them a more aesthetic and comfortable alternative to traditional braces. They are removable, allowing you to eat, drink, and maintain oral hygiene with ease. Treatment typically lasts 12-18 months, depending on the complexity of your case.

Key Components of Invisalign Treatment

Invisalign treatment consists of several key components designed to ensure effective and comfortable teeth straightening. Custom-made aligners, crafted from Invisalign’s proprietary SmartTrack material, are the primary tool for moving teeth. A personalized treatment plan, created using advanced 3D imaging, guides the process. Additional components include chewies for aligner seating, storage cases to protect aligners, and optional attachments for complex movements. Regular orthodontist check-ups and virtual monitoring also play a crucial role in tracking progress. Retainers, like Vivera, are used post-treatment to maintain results, ensuring long-term alignment and a healthy smile.

Importance of Following Instructions for Optimal Results

Adhering to Invisalign instructions is crucial for achieving the best outcomes. Wearing aligners for 22 hours daily ensures consistent teeth movement, while removing them only for eating, brushing, or cleaning prevents relapse. Proper cleaning with water and toothpaste, avoiding damaging products, and storing aligners safely maintain their effectiveness. Skipping steps or neglecting care can prolong treatment or reduce results. Consistency and discipline are key to achieving a straight, healthy smile. Always follow your orthodontist’s guidance to maximize success and avoid complications during your Invisalign journey.

Understanding the Invisalign Process

Invisalign treatment involves clear, custom-made aligners that gradually straighten teeth using advanced 3D technology. The process includes scans, aligner creation, and regular monitoring by an orthodontist for precise results.

How Invisalign Works

Invisalign uses clear, removable aligners crafted from 3D imaging technology to apply controlled forces, gently shifting teeth into alignment. Each aligner is worn for 1-2 weeks, 20-22 hours daily, before progressing to the next set. The process involves regular orthodontist check-ins to monitor progress and adjust treatment as needed. This system is designed for mild to moderate orthodontic issues, offering a discreet and efficient alternative to traditional braces, with treatment typically lasting 12-18 months.

Eligibility Criteria for Invisalign Treatment

Invisalign is suitable for individuals with mild to moderate orthodontic issues, such as crowded teeth, spacing issues, or bite problems. Ideal candidates are teenagers and adults who are committed to wearing aligners for 20-22 hours daily. Patients must also maintain good oral hygiene and attend regular orthodontist appointments. Severe cases may not qualify, as Invisalign is less effective for complex misalignments. A comprehensive evaluation by an orthodontist determines eligibility, ensuring the treatment aligns with the patient’s needs and goals.


Invisalign vs. Traditional Braces: Key Differences

Invisalign and traditional braces differ significantly in appearance and functionality. Invisalign uses clear, removable aligners, offering aesthetic appeal and ease of use, while braces employ fixed metal wires for tooth movement. Invisalign allows for easier oral hygiene and dietary flexibility, as aligners can be removed during meals and brushing. Comfort levels vary, with Invisalign often being less irritating. Treatment duration can differ, with Invisalign sometimes achieving results faster for mild cases. Cost and suitability depend on the severity of misalignment, with Invisalign typically addressing moderate issues effectively. Personal preference and lifestyle often dictate the choice between these options.

Wearing Instructions for Invisalign Aligners

Wear Invisalign aligners for at least 22 hours a day to ensure proper tooth movement. Remove them only for eating, drinking, brushing, or cleaning to maintain effectiveness and hygiene.

How and When to Wear Your Aligners

Wear Invisalign aligners for at least 22 hours a day to ensure proper tooth movement. Remove them only for eating, drinking, brushing, or cleaning. The more consistently you wear the aligners, the better your teeth will align. Avoid extended periods without them, as this can delay progress. Use the provided case to store aligners safely when not in use. For optimal results, wear each aligner as directed by your orthodontist and switch to the next one at the prescribed time. Proper wear ensures a smooth and efficient treatment process.

How to Properly Put On and Remove Aligners

To put on your Invisalign aligners, start by gripping them at the back and gently pushing forward with your fingers. Ensure they fit snugly over your teeth. For removal, begin at the back molars, pulling downward and working your way forward on both sides. Use your fingers to carefully dislodge the aligners without force. Avoid using sharp objects, as they may damage the aligners. Proper handling ensures comfort and prevents distortion. Always store aligners in their case when not in use to maintain hygiene and shape.

How to Get Used to Wearing Aligners

Initially, you may feel mild discomfort or notice a slight lisp due to the aligners. Practice speaking by reading aloud for a few minutes daily to adapt. Start with short periods of wear if needed, gradually increasing to the recommended 22 hours. Use the provided chewies to help seat the aligners properly and reduce any uneven pressure. Be patient, as your mouth will adjust within a few days. Consistent wear is key to getting accustomed to the aligners and achieving the best results for your smile.

Cleaning and Maintenance Tips

Regularly clean your aligners with a toothbrush and water. Use Invisalign cleaning products weekly to maintain clarity and freshness. Avoid harsh chemicals to prevent damage.

Daily Cleaning of Aligners

Daily cleaning of your Invisalign aligners is essential to maintain hygiene and clarity. Use a soft toothbrush and lukewarm water to gently scrub away plaque and bacteria. You can also use a small amount of toothpaste, but avoid abrasive products that may scratch the aligners. Rinse thoroughly after cleaning to remove any residue. For a deeper clean, soak your aligners in a solution of water and Invisalign cleaning products as recommended. Avoid using denture cleaners or mouthwash, as they can damage the aligners. Regular cleaning prevents odors and keeps your aligners hygienic and invisible.

Storing Your Aligners Properly

Always store your Invisalign aligners in their provided cases when not in use to protect them from damage or loss. Use the blue case for your current aligner and the red case for the previous one. Avoid exposing aligners to extreme heat, as this can warp their shape. Never wrap aligners in tissues or paper, as this can cause scratches or misplacement. Keep the cases clean and dry to maintain hygiene. Proper storage ensures your aligners remain in good condition and ready for use, helping you stay on track with your treatment plan.

Using Invisalign Cleaning Products

Regularly cleaning your Invisalign aligners with approved products is essential to maintain their clarity and prevent bacterial buildup. Use Invisalign cleaning products or solutions like Retainer Brite or Efferdent to freshen and sanitize your aligners. Avoid harsh chemicals, denture cleaners, or mouthwash, as they can damage the aligners’ surface. Gently brushing your aligners with a toothbrush and water is also effective. Cleaning products should be used as needed to keep your aligners clean and odor-free, ensuring a hygienic and effective treatment process.

Oral Hygiene and Invisalign

Maintaining proper oral hygiene is crucial during Invisalign treatment. Remove aligners before eating and brushing to prevent food particles and plaque buildup. Regular brushing and flossing help keep your mouth clean and healthy, ensuring effective treatment progress.

Proper Oral Hygiene Practices

Proper oral hygiene is essential during Invisalign treatment. Remove aligners before eating, brushing, and flossing to prevent food particles and plaque buildup. Brush your teeth twice daily with fluoride toothpaste and floss once a day to maintain clean teeth and gums. Regularly rinse aligners with water and use Invisalign cleaning products to keep them fresh. Avoid using abrasive materials or products like denture cleaners, as they can damage the aligners; Clean aligners with a soft toothbrush and mild soap if needed. Proper hygiene ensures a healthy smile and effective treatment progress.

Importance of Maintaining Good Oral Habits

Maintaining good oral habits is crucial for successful Invisalign treatment. Consistent oral hygiene prevents tooth decay and gum disease, ensuring teeth move smoothly into place. Avoiding sugary or acidic foods reduces the risk of cavities. Regular dental check-ups monitor progress and address any issues early. Proper habits like removing aligners before eating and cleaning them regularly prevent bacteria buildup. A clean, healthy mouth supports the effectiveness of Invisalign aligners, leading to a straighter, brighter smile and overall oral health. Good habits promote a comfortable and successful treatment experience.

Troubleshooting Common Issues

Common issues with Invisalign include speech difficulties, aligner discomfort, or improper fit. Solutions often involve using Chewies, applying gentle pressure, or adjusting aligner wear to address discomfort effectively.

Common Problems and Solutions

Common issues with Invisalign include speech difficulties, aligner discomfort, or improper fit. To address speech issues, practice speaking while wearing aligners or read aloud. For discomfort, use Chewies to help seat aligners properly. If aligners feel loose, ensure they are worn as directed and avoid removing them excessively. Proper cleaning and storage can prevent damage or discoloration. If issues persist, consult your orthodontist for adjustments or advice. Regular follow-ups and adherence to instructions can mitigate most problems effectively.

Handling Speech Issues with Aligners

Speech difficulties, such as a lisp or mumbling, are common when first wearing Invisalign aligners. To address this, practice speaking while wearing them and read aloud for 5-10 minutes daily. This helps your tongue and lips adapt to the aligners. Massaging your tongue against the aligners can also improve articulation. If issues persist, consult your orthodontist for adjustments. Be patient, as speech typically normalizes within a few days of consistent wear. Regular practice and adaptation will help you speak clearly with aligners.

Congratulations on completing your Invisalign guide! Adhere to instructions for optimal results. Schedule regular check-ups and maintain good oral hygiene. Your new smile awaits!

Final Tips for Success with Invisalign

Consistency is key: wear aligners 22 hours daily for best results. Clean your aligners regularly with a toothbrush and water, and avoid using harsh chemicals. Store them properly in provided cases to prevent damage. Attend all scheduled appointments with your orthodontist to monitor progress. Practice speaking with aligners to reduce any speech issues. Stay committed, and you’ll achieve your desired smile. Remember, proper care ensures effectiveness and longevity of your Invisalign treatment.

What to Expect After Starting Treatment

After beginning Invisalign, expect a brief adjustment period as your mouth adapts to the aligners. Mild discomfort may occur during the first few days, but it should subside quickly. Speech may feel slightly affected initially, but practicing speaking with aligners will help normalize it. Regularly clean and store your aligners to maintain hygiene and clarity. Attend follow-up appointments to monitor progress and ensure proper teeth movement. Consistent wear and proper care are crucial for achieving desired results and a straighter smile.

PDF

the absolutely true diary of part time indian pdf

Sherman Alexie’s The Absolutely True Diary of a Part-Time Indian (2007) is a poignant‚ humorous tale of identity‚ culture‚ and resilience‚ told through Junior’s diary as he navigates two worlds.

Overview of the Novel

The Absolutely True Diary of a Part-Time Indian is a semi-autobiographical novel by Sherman Alexie‚ published in 2007. The story follows Arnold Spirit Jr.‚ a 14-year-old Spokane Indian‚ as he navigates life on the reservation and at a predominantly white high school. Illustrated by Ellen Forney‚ the novel blends humor‚ heartache‚ and resilience‚ offering a raw portrayal of adolescence‚ poverty‚ and cultural identity. Junior’s decision to leave the reservation for Reardan High sparks a journey of self-discovery‚ where he grapples with belonging‚ racism‚ and the complexities of his heritage. The novel’s diary format and vivid storytelling make it a powerful exploration of identity‚ bridging the gap between two worlds. Its unflinching honesty and unique voice have made it a critically acclaimed and impactful work in contemporary young adult literature‚ earning it the National Book Award for Young People’s Literature in 2007.

Author Background: Sherman Alexie

Sherman Alexie‚ a Spokane/Cœur d’Alene Indian‚ was born on October 7‚ 1966‚ in Wellpinit‚ Washington. Growing up on the Spokane Indian Reservation‚ he experienced poverty‚ alcoholism‚ and the struggles of reservation life‚ which deeply influenced his writing. Alexie attended high school off the reservation‚ a pivotal experience that shaped his identity and informed the themes of The Absolutely True Diary of a Part-Time Indian. He began writing poetry as a teenager and later attended Washington State University‚ where he developed his literary skills. Known for his raw‚ humorous‚ and poignant storytelling‚ Alexie has authored numerous novels‚ short stories‚ and poetry collections. His work often explores themes of identity‚ cultural conflict‚ and resilience. A celebrated Native American writer‚ Alexie has received widespread acclaim for his unflinching portrayal of Indigenous life and his ability to bridge cultural divides through literature.

Autobiographical Elements

Sherman Alexie drew heavily from his own life when crafting The Absolutely True Diary of a Part-Time Indian. Like the protagonist Junior‚ Alexie grew up on the Spokane Indian Reservation and attended a predominantly white high school off the reservation. His experiences with poverty‚ family struggles‚ and cultural identity deeply influenced the novel. Alexie was born with hydrocephalus‚ a condition that affected his early life‚ much like Junior’s physical and emotional challenges. The decision to leave the reservation for a better education‚ a central plot point‚ mirrors Alexie’s own choice to attend Reardan High School. These autobiographical elements lend authenticity to the story‚ as Alexie explores themes of belonging‚ identity‚ and resilience. By weaving his personal history into the narrative‚ Alexie creates a powerful and relatable tale that reflects his own journey of navigating two worlds. This blending of fact and fiction underscores the novel’s emotional depth and cultural significance.

Plot Summary

The Absolutely True Diary of a Part-Time Indian follows Junior‚ a Native American teen‚ as he leaves his reservation to attend a predominantly white high school‚ navigating identity‚ racism‚ and belonging while balancing two worlds.

Protagonist: Arnold Spirit Jr. (Junior)

Arnold Spirit Jr.‚ known as Junior‚ is a 14-year-old Spokane Indian boy. Born with hydrocephalus‚ Junior has physical challenges‚ including a stutter and poor eyesight‚ which set him apart on the reservation. His intelligence and artistic talent further isolate him‚ making him a target for bullying. Junior’s decision to attend Reardan High School‚ a predominantly white institution‚ sparks a journey of self-discovery. He struggles to balance his Native American heritage with his desire to fit into a new world. Through his diary entries and cartoons‚ Junior expresses his humor‚ pain‚ and resilience. His character embodies the complexities of adolescence‚ cultural identity‚ and the search for belonging. Junior’s narrative voice is raw‚ relatable‚ and deeply human‚ making him one of the most memorable protagonists in young adult literature.

Setting: Spokane Indian Reservation and Reardan High School

The story unfolds in two contrasting worlds: the Spokane Indian Reservation and Reardan High School. The reservation‚ Junior’s home‚ is marked by poverty‚ alcoholism‚ and limited opportunities‚ reflecting the struggles of Native American communities. It is a place of deep cultural roots but also of despair and stagnation. In contrast‚ Reardan High School‚ located off the reservation‚ is predominantly white and affluent‚ offering better resources but also exposing Junior to racism and feelings of alienation. The stark differences between these settings highlight Junior’s internal conflict as he navigates his identity. The reservation represents his heritage and family‚ while Reardan symbolizes hope for a better future. These two settings serve as the backdrop for Junior’s journey of self-discovery and resilience.

Central Conflict: Cultural Identity and Belonging

The central conflict of The Absolutely True Diary of a Part-Time Indian revolves around Junior’s struggle to reconcile his cultural identity with his desire to belong. As a Native American teenager‚ Junior faces the daunting challenge of navigating two vastly different worlds: his Native heritage and the predominantly white culture of Reardan High School. His decision to leave the reservation for a better education alienates him from his community‚ making him feel like a traitor. At Reardan‚ he encounters racism and stereotypes‚ further complicating his sense of belonging. Junior’s internal conflict stems from his desire to honor his roots while pursuing opportunities that could lift him out of poverty. This duality of identity creates a profound tension‚ as Junior grapples with what it means to be a “part-time Indian” in a world that often forces him to choose between his two identities.

Major Themes

The novel explores themes of identity‚ cultural identity‚ belonging‚ resilience‚ and racism‚ highlighting the challenges of navigating multiple worlds and confronting societal prejudices.

Identity and Belonging

The struggle to find one’s place between two cultures is central to The Absolutely True Diary of a Part-Time Indian. Junior‚ a Spokane Indian‚ feels torn between his reservation and the predominantly white Reardan High School. His decision to attend Reardan leads to feelings of alienation in both worlds. On the reservation‚ he is seen as a traitor‚ while at Reardan‚ he faces racism and cultural barriers. This duality forces Junior to navigate complex emotions of guilt‚ pride‚ and self-doubt. Through humor and introspection‚ Alexie portrays the difficulties of maintaining cultural identity while seeking opportunities beyond the reservation. The novel ultimately suggests that identity is not static but fluid‚ shaped by experiences and choices that allow for growth and self-acceptance. Junior’s journey reflects the universal human desire to belong while remaining true to oneself.

Racism and Prejudice

Racism and prejudice are pervasive themes in The Absolutely True Diary of a Part-Time Indian‚ shaping Junior’s experiences in both his reservation and the outside world. At Reardan High School‚ Junior faces stereotypes and microaggressions‚ often being treated as an “other” due to his Native American heritage. Back on the Spokane Reservation‚ he encounters prejudice rooted in historical trauma and mistrust of outsiders. The novel highlights how systemic racism impacts Native communities‚ perpetuating cycles of poverty and marginalization. Junior’s narrative exposes the pain of being caught between two worlds‚ where he is judged for not fitting neatly into either. Through his struggles‚ Alexie critiques societal biases and advocates for understanding and empathy. The novel underscores the resilience required to navigate these challenges while maintaining one’s identity and dignity in the face of discrimination.


Poverty and Resilience

Poverty is a stark reality in The Absolutely True Diary of a Part-Time Indian‚ deeply affecting Junior’s family and community on the Spokane Reservation. Financial struggles are evident in the lack of resources‚ poor living conditions‚ and limited opportunities. Junior’s family faces alcoholism and unemployment‚ which further exacerbate their hardship. Despite these challenges‚ resilience shines through as a survival mechanism. Junior’s determination to pursue education and a better life exemplifies his ability to overcome adversity. The novel portrays the strength of community bonds‚ as Junior’s family and friends support him through difficult times. Alexie highlights how humor and hope serve as coping strategies‚ allowing characters to endure poverty’s harsh realities. Through Junior’s journey‚ the novel underscores the resilience required to navigate systemic poverty while maintaining dignity and striving for a brighter future. This theme is central to the novel’s exploration of survival and the pursuit of hope in the face of adversity.

Reception and Impact

The Absolutely True Diary of a Part-Time Indian won the National Book Award in 2007 and sparked debates over its inclusion in school curriculums‚ highlighting its cultural significance and lasting impact.

Literary Accolades: National Book Award

The Absolutely True Diary of a Part-Time Indian earned widespread recognition by winning the National Book Award for Young People’s Literature in 2007. This prestigious honor highlighted Sherman Alexie’s ability to blend humor with poignant storytelling‚ resonating with both critics and readers. The award underscored the novel’s unique voice and its exploration of themes such as identity‚ poverty‚ and cultural struggles. Alexie’s semi-autobiographical narrative struck a chord‚ making the book a landmark in young adult literature. The National Book Award not only solidified Alexie’s reputation as a leading literary figure but also brought attention to the underrepresented experiences of Native American communities. The novel’s success has led to its inclusion in school curriculums nationwide‚ further cementing its legacy as a powerful and thought-provoking work.

Controversies and Bans

The Absolutely True Diary of a Part-Time Indian has faced significant controversy and bans in schools and libraries due to its explicit language‚ sexual references‚ and depictions of violence. Critics argue that the novel’s content is inappropriate for young readers‚ leading to its removal from several school curriculums. Despite its literary acclaim‚ including the National Book Award‚ the book has been challenged for its frank portrayal of poverty‚ alcoholism‚ and racism. Supporters defend the novel‚ asserting that it provides an authentic voice for marginalized communities and fosters necessary discussions about identity and cultural struggles. The debates surrounding the book highlight the tension between censorship and the value of diverse‚ realistic narratives in education. Sherman Alexie’s work remains a focal point in conversations about banned books and intellectual freedom.

Cultural Significance and Legacy

The Absolutely True Diary of a Part-Time Indian holds profound cultural significance as a groundbreaking narrative that amplifies Native American voices and challenges stereotypes. Sherman Alexie’s raw‚ autobiographical storytelling resonates deeply‚ offering a candid look at life on reservations and the struggles of cultural identity. The novel has become a vital tool in classrooms‚ sparking conversations about diversity‚ racism‚ and resilience. Its legacy lies in its ability to humanize marginalized communities and inspire empathy. By blending humor with heartbreak‚ Alexie creates a relatable protagonist in Junior‚ whose journey transcends cultural boundaries. The book’s impact extends beyond literature‚ fostering dialogue about identity and belonging. Its influence continues to grow‚ solidifying its place as a modern classic in American literature and a testament to the power of authentic storytelling.

Manuals

b550i aorus pro ax manual

The Gigabyte B550I Aorus Pro AX is a mini-ITX motherboard designed for AMD Ryzen 5000 and 3000 series processors‚ offering dual-channel DDR4 memory support up to 64GB.

1.1 Overview of the B550I Aorus Pro AX

The Gigabyte B550I Aorus Pro AX is a compact mini-ITX motherboard designed for AMD Ryzen 5000 and 3000 series processors. It supports dual-channel DDR4 memory up to 64GB and features integrated AMD Radeon graphics. With Wi-Fi 6 and Realtek 2.5GbE LAN‚ it offers robust networking options. The motherboard includes high-quality audio capacitors‚ RGB Fusion lighting‚ and Smart Fan 5 cooling control. Its small form factor makes it ideal for nettop systems‚ while maintaining powerful performance and modern connectivity features for versatile computing needs.

1;2 Key Features and Specifications

The Gigabyte B550I Aorus Pro AX features an AMD B550 chipset‚ supporting Ryzen 5000 and 3000 series CPUs with AM4 socket. It includes dual-channel DDR4 memory support up to 64GB and PCIe 4.0 x16 for expansion. The motherboard offers HDMI and DisplayPort for triple display setups‚ Realtek 2.5GbE LAN for fast networking‚ and Wi-Fi 6 connectivity. Its mini-ITX design (17cm x 17cm) is ideal for compact builds‚ while features like Q-Flash Plus‚ RGB Fusion‚ and Smart Fan 5 enhance functionality and customization.

Hardware Installation Guide

This guide covers the Gigabyte B550I Aorus Pro AX motherboard layout‚ CPU installation‚ RAM configuration‚ and expansion card setup‚ ensuring a smooth and safe assembly process for users.

2.1 Motherboard Layout and Components

The Gigabyte B550I Aorus Pro AX features a compact mini-ITX design with essential components‚ including the AM4 socket‚ dual-channel DDR4 memory slots‚ PCIe x16 slot‚ and M.2 SSD slots. Key headers include CPU_FAN‚ SYS_FAN‚ F_PANEL‚ and F_USB‚ while the rear panel offers HDMI‚ DisplayPort‚ USB 3.2 Gen 2‚ and high-quality audio ports. The motherboard also includes RGB Fusion lighting controls‚ Q-Flash Plus for BIOS updates‚ and a debug LED for troubleshooting. Its layout is optimized for small builds‚ ensuring easy access to all connectors and features. Always refer to the quick installation guide for proper handling and assembly to prevent damage from static electricity.

2.2 Installing the CPU

Before installing the CPU on the Gigabyte B550I Aorus Pro AX‚ ensure the motherboard is grounded to prevent static damage. Locate the AM4 socket and lift the lever gently. Align the CPU’s pins with the socket‚ using the arrows on the CPU and socket for guidance. Place the CPU into the socket without forcing it. Lower the lever to secure it. Apply thermal paste to the CPU die if necessary‚ then install an AM4-compatible cooler. Finally‚ connect the CPU fan to the CPU_FAN header near the socket for proper cooling.

2.3 Installing the Memory (RAM)

Installing the memory on the Gigabyte B550I Aorus Pro AX requires careful handling to avoid damage. Turn off the system and unplug the power cord. Locate the dual-channel DDR4 DIMM slots near the CPU socket. Align the notches on the RAM module with the tabs on the slot. Gently push the module down until it clicks securely into place. Ensure the RAM is compatible with the motherboard and configured in the BIOS for optimal performance. Always use memory of the same specifications for dual-channel mode.

2.4 Installing Expansion Cards

To install an expansion card on the Gigabyte B550I Aorus Pro AX‚ first power down the system and unplug the power cord. Locate the PCIe slot on the motherboard‚ ensuring compatibility with your card. Handle the card by the edges to prevent static damage. Remove the expansion bracket from the case and align the card with the slot. Gently push the card down until it clicks into place‚ then secure it with screws. Reinstall the bracket and restart the system to complete the installation.

BIOS Setup and Configuration

The BIOS setup on the Gigabyte B550I Aorus Pro AX provides an intuitive interface for configuring system settings‚ overclocking‚ and enabling advanced features like Q-Flash and Smart Fan 5.

3.1 Accessing the BIOS

To access the BIOS on the Gigabyte B550I Aorus Pro AX‚ press the F2‚ Del‚ or Esc key during system startup. The BIOS interface allows users to configure hardware settings‚ enable features like Q-Flash‚ and adjust system parameters. Advanced users can access overclocking options‚ while the Favorites menu provides quick access to commonly used settings. The BIOS also supports updates via GIGABYTE’s Q-Flash Plus feature‚ ensuring users can easily maintain the latest firmware version for optimal performance and compatibility.

3.2 Navigating the BIOS Interface

The BIOS interface features a user-friendly design with clear menus for easy navigation. Use keyboard arrow keys to move between sections like System Setup‚ Hardware Monitor‚ and Advanced Settings. The Quick Access Bar provides shortcuts to popular features such as Smart Fan 5 and Q-Flash. Press F11 to access Favorites‚ where you can save frequently used settings. The interface also displays hardware details like CPU‚ memory‚ and storage configurations‚ making it easy to monitor system status and adjust settings as needed.

3.3 Overclocking and Advanced Settings

The BIOS offers advanced overclocking options‚ including Core Performance Boost and System Memory Multiplier adjustments. Users can enable XMP profiles for optimized RAM performance. The Tweaker section allows precise voltage and timing controls. Caution is advised‚ as incorrect settings may damage components. For stability‚ default settings are recommended unless you’re experienced. Use Q-Flash to safely update BIOS without an OS‚ ensuring system reliability during overclocking experiments.

Software and Driver Installation

Install essential drivers and software for optimal performance. Ensure chipset drivers and management tools are up-to-date for stability and functionality. Refer to the manual for guidance.

4.1 Essential Software for Optimal Performance

Install Gigabyte’s official drivers and software for optimal performance. These include chipset drivers‚ RGB Fusion‚ and Smart Fan 5. Update firmware and ensure compatibility with AMD Ryzen processors. Use GIGABYTE’s utility tools for system monitoring and customization. Refer to the user manual for specific installation steps and troubleshooting tips. Regular updates ensure stability and enhanced functionality. Proper software setup is crucial for maximizing the motherboard’s features and maintaining system efficiency.

4.2 Updating Drivers and Firmware

Regularly update drivers and firmware for optimal performance. Use GIGABYTE’s Q-Flash Plus for BIOS updates without entering the OS. Download the latest drivers from GIGABYTE’s official website for chipset‚ audio‚ and networking components. Ensure firmware updates are performed carefully to avoid system instability. Always verify the current firmware version before updating. Follow the user manual’s instructions for a smooth process. Keeping drivers and firmware up-to-date enhances system compatibility and stability.

Unique Features of the B550I Aorus Pro AX


The B550I Aorus Pro AX features a compact mini-ITX design‚ Wi-Fi 6 support‚ and high-quality audio capacitors. It also includes RGB Fusion for customizable lighting and Smart Fan 5 for advanced cooling control.

5.1 Q-Flash Plus for BIOS Updates

The Q-Flash Plus feature allows users to update the BIOS without installing a CPU‚ RAM‚ or GPU‚ ensuring a hassle-free update process. Simply download the BIOS file to a USB drive‚ insert it into the dedicated Q-Flash USB port‚ and press the Q-Flash button on the rear I/O panel. This user-friendly tool enables easy BIOS updates‚ preventing potential issues from outdated firmware and ensuring system stability. It’s a convenient solution for maintaining the latest BIOS version without complex setup requirements.

5.2 RGB Fusion for Custom Lighting

The RGB Fusion feature on the B550I Aorus Pro AX allows users to customize lighting effects with vibrant RGB LEDs. With multiple lighting zones‚ users can create unique aesthetics‚ choosing from static‚ breathing‚ or pulsing effects. The RGB Fusion software enables synchronization with compatible peripherals and provides precise control over color schemes and brightness. This feature enhances the visual appeal of the system‚ offering a personalized touch for PC enthusiasts who value both performance and style in their builds.

5.3 Smart Fan 5 for Cooling Control

The Smart Fan 5 technology on the B550I Aorus Pro AX provides intelligent cooling control‚ ensuring optimal system temperatures. It features multiple fan headers with PWM and DC support‚ allowing precise fan speed adjustments. The system automatically detects fan characteristics and optimizes cooling performance‚ minimizing noise. Users can customize fan curves via the BIOS or software‚ balancing thermal efficiency and quiet operation. This advanced cooling solution ensures reliable performance‚ making it ideal for both everyday use and demanding applications.

Troubleshooting and Maintenance

Identify common issues and solutions‚ such as BIOS updates or hardware conflicts. Regularly clean the motherboard to prevent dust buildup and ensure optimal performance. Always ground yourself to prevent static electricity damage during maintenance.

6.1 Common Issues and Solutions

Common issues include no boot or RGB lighting malfunctions. Check power connections and ensure components are securely installed. For BIOS errors‚ use Q-Flash Plus to update or restore settings. If Wi-Fi or LAN connectivity fails‚ reinstall drivers from the official Gigabyte website. Overheating can be addressed by optimizing Smart Fan 5 settings or cleaning dust from cooling systems. Always refer to the manual for specific troubleshooting steps and ensure firmware is up-to-date for optimal performance.

6.2 Cleaning and Maintaining the Motherboard

Regular cleaning ensures optimal performance and longevity. Use compressed air to remove dust from heatsinks and vents. Avoid liquids; instead‚ use a soft brush for gentle cleaning. Ground yourself by touching metal to prevent static damage. Clean RGB lighting with a dry cloth. Inspect and replace thermal paste if needed. Store the motherboard in an anti-static bag when not in use. Follow these steps to maintain your B550I Aorus Pro AX and prevent overheating or component failure.

Environmental Considerations

Gigabyte prioritizes sustainability with recyclable packaging‚ reducing global warming impacts. The B550I Aorus Pro AX promotes eco-friendly practices‚ aligning with environmental responsibility and energy-efficient design principles.

7.1 Recyclable Packaging and Sustainability

Gigabyte incorporates recyclable materials in the B550I Aorus Pro AX packaging to minimize environmental impact. This initiative aligns with global efforts to reduce waste and promote sustainability. By using eco-friendly packaging‚ Gigabyte encourages responsible consumption and supports recycling programs. The company collaborates with users to protect the environment‚ reflecting its commitment to sustainable practices and reducing carbon footprints through innovative‚ green solutions.

7.2 Energy Efficiency and Power Management

The B550I Aorus Pro AX features advanced power management technologies to optimize energy efficiency. With efficient VRM design and intelligent power delivery‚ it minimizes power consumption while maintaining performance. Enhanced circuitry reduces heat generation‚ lowering overall energy use. Additionally‚ the motherboard supports AMD’s low-power states and dynamic voltage adjustments‚ ensuring optimal energy utilization. These features make it an eco-friendly choice for users seeking balance between performance and energy savings.

Warranty and Support

GIGABYTE provides comprehensive warranty and support for the B550I Aorus Pro AX. Users can access online resources‚ FAQs‚ and detailed manuals on the official GIGABYTE support website for assistance.

8.1 Warranty Information

GIGABYTE offers a comprehensive warranty for the B550I Aorus Pro AX‚ ensuring protection for your investment; The warranty period typically covers manufacturing defects‚ with terms varying by region. Registration on GIGABYTE’s website may be required for full coverage. The warranty includes repair or replacement of defective components‚ providing peace of mind for users. Proper handling and installation‚ as outlined in the manual‚ are essential to maintain warranty validity. GIGABYTE also emphasizes eco-friendly practices‚ reflecting their commitment to sustainability.

8.2 Online Support and Resources

GIGABYTE provides extensive online support for the B550I Aorus Pro AX‚ ensuring users have access to comprehensive resources. The official website offers detailed product specifications‚ a user manual‚ and support lists for CPUs‚ memory‚ and storage. FAQs and troubleshooting guides are available to address common issues. Additionally‚ the Q-Flash Plus feature is supported‚ allowing BIOS updates without an installed CPU or RAM. For further assistance‚ users can visit the support page or contact GIGABYTE’s customer service team;

Manuals

echo cs 400 chainsaw manual

Welcome to the Echo CS-400 Chainsaw Manual, your comprehensive guide to safe operation, maintenance, and troubleshooting. This manual provides essential information to ensure optimal performance and user safety.

1.1 Overview of the Manual

This manual provides a detailed guide for the Echo CS-400 chainsaw, covering safety precautions, operational instructions, and maintenance tips. It includes troubleshooting, storage, and environmental information to ensure safe and effective use. The manual is designed to help users understand their chainsaw’s features and proper usage, promoting efficiency and safety in various cutting tasks.

1.2 Importance of Reading the Manual

Reading the Echo CS-400 manual is crucial for safe and effective operation. It provides essential safety precautions, operational guidelines, and maintenance tips to prevent accidents and ensure optimal performance. Understanding the manual helps users identify potential hazards, troubleshoot issues, and comply with safety standards, making it a vital resource for both novice and experienced operators.

Safety Precautions and Guidelines


Always follow safety guidelines to minimize risks. Understand safety symbols, wear protective gear, and ensure a firm grip. Proper handling prevents accidents and ensures safe operation.

2.1 Safety Symbols and Their Meanings

The manual uses specific safety symbols to alert users of potential hazards. These include warning, caution, and notice icons, each accompanied by explanations. Understanding these symbols is crucial for safe operation. They highlight risks such as kickback, cutting hazards, and improper handling. Always read and follow the instructions associated with these symbols to ensure proper and safe use of the chainsaw.

2.2 General Safety Rules for Chainsaw Operation

Always wear protective gear, including gloves, safety glasses, and hearing protection. Ensure a firm grip on the handles and avoid loose clothing. Keep bystanders away and be aware of your surroundings. Maintain proper footing and balance. Never operate the chainsaw while tired or under the influence of drugs/alcohol. Follow all safety guidelines to minimize risks and ensure safe operation.

Chainsaw Specifications and Features

The Echo CS-400 features a powerful 40.2 cc engine, 18-inch bar length, and advanced anti-vibration system for reduced fatigue. Weighing 10.6 lbs, it offers tool-less chain tensioning and automatic oiler for efficient cutting.

3.1 Key Specifications of the Echo CS-400

The Echo CS-400 chainsaw is equipped with a 40.2 cc two-stroke engine, delivering robust power for cutting. It features an 18-inch guide bar, automatic chain oiler, and tool-less chain tensioning. Weighing 10.6 pounds, it includes a side-access chain tensioner and anti-vibration system for user comfort. The engine produces high torque, ideal for various cutting tasks.

3.2 Understanding Chainsaw Components

The Echo CS-400 includes key components like the engine, guide bar, saw chain, air filter, muffler, and ignition system. The engine powers the chain, while the guide bar ensures stable cutting. Regular maintenance of these parts, as outlined in the manual, is crucial for optimal performance and longevity. Understanding each component aids in proper operation and troubleshooting.

Assembly and Initial Setup

Unpack and inspect the chainsaw, ensuring all parts are included. Attach the guide bar and chain, following manual instructions for proper tension and alignment. Hold firmly during assembly.

4.1 Unpacking and Inspecting the Chainsaw

When unboxing the Echo CS-400, carefully inspect all components for damage. Verify the inclusion of the chainsaw, guide bar, chain, and tools. Check for any visible defects or wear. Ensure the chain brake is functional and the saw is clean. Refer to the manual for a complete list of included items and inspection guidelines.

4.2 Attaching the Guide Bar and Chain

Align the guide bar with the chainsaw’s mounting studs. Secure it using the provided screws, ensuring it is tightly fastened. Next, install the chain, making sure it is properly seated on the guide bar and sprocket. Adjust the chain tension by turning the tensioning screw until it fits snugly. Tighten the bar nuts firmly and verify the chain is not over-tensioned. Always refer to the manual for precise torque specifications.

Operating Instructions

Follow instructions for starting and controlling the chainsaw. Ensure a firm grip on both handles during operation for stability and safety. Always maintain control and follow safety guidelines.

5.1 Starting the Chainsaw

To start the Echo CS-400, prime the engine by pressing the primer bulb 2-3 times. Move the choke to the “start” position and pull the starter rope firmly until the engine coughs. Release the choke and pull the rope again until the chainsaw starts. Allow the engine to warm up before use. Always follow the manual’s specific starting instructions for optimal performance.

5.2 Controlling the Chainsaw During Operation

Hold the chainsaw firmly with both hands, maintaining a secure grip on the handles. Keep your left hand on the front handle and your right hand on the rear handle. Adjust your stance for stability and control. Use the throttle interlock to modulate speed, ensuring smooth cuts. Avoid sudden movements and always keep the chain away from your body. Proper control ensures safety and precision during operation.

Maintenance and Upkeep

Regular maintenance ensures optimal performance and longevity of your Echo CS-400. Perform tasks like chain sharpening, cleaning, and lubrication as outlined in the manual to maintain efficiency and safety.

6.1 Regular Maintenance Tasks

Regular maintenance tasks for the Echo CS-400 include cleaning the air filter, inspecting and sharpening the chain, lubricating the bar and chain, and checking the chain brake. These tasks ensure optimal performance, safety, and extend the chainsaw’s lifespan. Always follow the manufacturer’s instructions for proper maintenance procedures.

6.2 Sharpening the Saw Chain

Sharpening the saw chain is essential for maintaining cutting efficiency. Use a round file to sharpen the cutters, ensuring consistent angles and proper depth. Always follow the manufacturer’s instructions for file size and technique. Check chain tension before sharpening and use a sharpening gauge to maintain uniformity. Wear gloves and safety glasses for protection during the process.

6.3 Cleaning the Chainsaw

Regular cleaning is crucial for maintaining your Echo CS-400 chainsaw’s performance. Use a soft-bristle brush to remove sawdust and debris from the guide bar and chain. Apply a cleaning solution like oven cleaner to the chain, let it sit, then rinse thoroughly. Avoid using high-pressure washes, as they may damage internal components. Always check and clean the air filter to ensure proper engine function. Proper cleaning prevents rust and ensures optimal operation.

Troubleshooting Common Issues

Identify and resolve common issues like chain malfunction, engine startup problems, or poor performance. Check chain tension, fuel levels, and air filter cleanliness for optimal operation.

7.1 Identifying and Resolving Chain-Related Problems

Common chain issues include improper tension, lack of lubrication, or worn teeth. Check tension regularly and adjust as needed. Lubricate the chain with bar oil to prevent overheating. Inspect for damage or wear; replace if necessary. Clean debris from the chain and guide bar to ensure smooth operation. Addressing these issues promptly enhances performance and safety.

7.2 Addressing Engine and Performance Issues

For engine and performance issues, check the air filter and spark plug for cleanliness and damage. Ensure proper fuel mixture and quality. Follow the manual’s troubleshooting guide for starting problems or rough operation. Regular maintenance, like cleaning and replacing worn parts, is crucial. Always follow manufacturer guidelines for repairs to maintain warranty validity and ensure safety.

Storage and Transportation

Store the Echo CS-400 in a dry, well-ventilated area, away from flammable materials. Clean the chainsaw thoroughly before storage. Drain fuel for extended storage. Transport securely, using protective covers, and follow local regulations for safe handling and carriage of power tools.

8.1 Proper Storage Conditions

Store the Echo CS-400 chainsaw in a dry, well-ventilated area, away from flammable materials. Ensure the chainsaw is clean and free of debris before storage. For extended storage, drain the fuel tank and store the bar and chain separately. Use a protective cover to prevent dust accumulation and ensure the saw is out of reach of children and pets.

8.2 Safe Transportation Practices

Transport the Echo CS-400 chainsaw safely by securing it firmly to prevent movement. Protect the chain with a cover or guard to avoid injury. Drain fuel before transport to reduce fire risk. Keep the chainsaw upright during transit to prevent fuel leakage. Always follow local regulations and manufacturer guidelines for safe transportation.

Parts Diagram and Catalog

The parts diagram provides a detailed visual guide to identify components of the Echo CS-400. Use the catalog to find part numbers and order replacements easily.

9.1 Understanding the Parts Diagram

The parts diagram in the Echo CS-400 manual is a visual guide that labels and illustrates each component. It helps users identify and locate parts, such as the chain, bar, and engine components. Referencing the diagram ensures accurate assembly, maintenance, and repair. Use the diagram alongside the catalog to order correct replacement parts efficiently.

9.2 Ordering Replacement Parts

To order replacement parts for your Echo CS-400, visit the official Echo website or contact an authorized Echo dealer. Ensure you provide the correct model number and part number from the parts diagram. Genuine Echo parts guarantee compatibility, safety, and optimal performance. Avoid non-genuine parts to maintain warranty validity and ensure reliable operation of your chainsaw.

Environmental and Regulatory Information

Echo CS-400 complies with environmental regulations and safety standards. Follow eco-friendly practices and proper disposal guidelines to minimize environmental impact while ensuring regulatory compliance and safe operation.

10.1 Eco-Friendly Practices

Adopting eco-friendly practices with the Echo CS-400 involves proper disposal of waste materials, such as used oil and filters, at designated facilities. Always recycle batteries and packaging materials when possible. Additionally, using biodegradable bar and chain oils can help reduce environmental impact. Regular maintenance ensures efficient fuel use, minimizing emissions and promoting sustainable operation. Follow local regulations for responsible equipment disposal and recycling.

10.2 Compliance with Safety Standards

The Echo CS-400 complies with rigorous safety standards, ensuring reliable and secure operation. The chainsaw adheres to ANSI B175.1-2012 standards for gas-powered chainsaws. Safety symbols and warnings are included to guide users in understanding potential hazards. Echo also ensures compliance with emissions regulations set by the U.S. Environmental Protection Agency (EPA) and the California Air Resources Board (CARB). Always follow the provided Safety Manual to maintain compliance and ensure safe operation.

The Echo CS-400 manual provides essential guidance for safe and effective chainsaw operation. For further support, visit the official Echo website or consult authorized Echo dealers.

11.1 Final Tips for Safe and Effective Use

Always wear protective gear, maintain a firm grip, and operate in well-ventilated areas. Regularly inspect and maintain the chainsaw to ensure optimal performance. Follow the manual’s guidelines for sharpening and lubricating the chain. Avoid cutting near obstacles and keep bystanders at a safe distance. Proper storage and transportation are crucial for longevity and safety.

11.2 Where to Find Additional Support

For further assistance, visit Echo’s official website or contact authorized dealers for parts and expert advice. The customer support team is available via phone or email for inquiries. Additional resources, such as FAQs and troubleshooting guides, are accessible online to help you maximize your chainsaw’s performance and resolve any issues efficiently.

PDF

way maker lyrics pdf

The “Way Maker Lyrics PDF” offers a convenient way to access and print the lyrics of Sinach’s global anthem, ideal for worship, reflection, and sharing.

Overview of the Song and Its Significance

“Way Maker” by Sinach is a powerful worship song that has become a global anthem, inspiring millions with its message of hope and faith. The song emphasizes God’s ability to create a path where none exists, offering comfort and assurance to believers. Its uplifting lyrics and melody have made it a cornerstone in Christian worship worldwide, transcending cultural boundaries and resonating deeply with diverse audiences. The song’s significance lies in its ability to evoke spiritual renewal and strengthen faith, making it a timeless piece in gospel music.

Importance of Having Lyrics in PDF Format

Having the lyrics of “Way Maker” in PDF format ensures easy access and readability, making it ideal for worship leaders, congregations, and personal devotion. PDFs are universally compatible and can be shared effortlessly across devices without formatting issues. This format allows for hassle-free printing, enabling users to create songbooks or handouts for community worship. Additionally, PDFs preserve the song’s structure and layout, making it simpler to follow along during worship sessions. This accessibility enhances the song’s reach and impact, fostering deeper engagement with its powerful message.

The Background of “Way Maker”

“Way Maker” is a globally acclaimed gospel anthem by Nigerian artist Sinach, released in 2015. Its inspiring message of God’s providence resonates worldwide, making it a modern classic.

Artist Overview: Sinach and Her Contribution to Gospel Music

Sinach, a Nigerian gospel singer, songwriter, and senior worship leader at Loveworld, has profoundly impacted the global gospel music scene. Her soulful voice and Spirit-inspired lyrics have made her a household name. With “Way Maker,” she crossed cultural boundaries, becoming the first Nigerian gospel artist to reach 100 million YouTube views. Her music ministers hope, faith, and healing, leaving a lasting legacy in the gospel music industry.

The Story Behind the Composition of “Way Maker”

“Way Maker” was born out of a deep desire to express God’s faithfulness and supernatural intervention in human lives. Sinach, inspired by personal experiences and biblical truths, crafted the song to resonate with believers worldwide. Its heartfelt lyrics reflect hope, trust, and the assurance of divine guidance. The composition process involved collaboration with other gifted musicians, blending powerful vocals with a soul-stirring melody. “Way Maker” has since become a global anthem, transcending cultures and touching millions of hearts.

Release and Reception of the Song

“Way Maker” was officially released in 2017 and quickly gained global recognition. It became a viral hit, resonating with millions worldwide. The song reached 100 million YouTube views, a historic milestone for Nigerian gospel music. Its powerful message and uplifting melody earned widespread acclaim. “Way Maker” won the 2020 GMA Dove Award for Song of the Year, further cementing its legacy. Its release marked a pivotal moment in gospel music, showcasing its universal appeal and spiritual impact. The song continues to inspire and uplift listeners globally.

Lyrics Breakdown

The lyrics explore God’s presence and divine intervention. Verses highlight His work in believers’ lives, while the chorus emphasizes His role as a Way Maker, Miracle Worker, and Promise Keeper.

Verse 1: “You Are Here, Moving in Our Midst”

Verse 1 of “Way Maker” opens with a declaration of God’s presence. The lyrics, “You are here, moving in our midst,” express His active involvement in believers’ lives. Repeating “I worship You, I worship You” emphasizes devotion and awe at His divine presence. This verse sets a tone of reverence, acknowledging God’s intimate and omnipresent nature, encouraging a deeper connection with Him through worship and adoration. The simple yet powerful words create an atmosphere of surrender and trust in His divine plan. The repetition underscores the certainty of His presence, offering comfort and assurance to all who listen.

Chorus: “Way Maker, Miracle Worker, Promise Keeper”

The chorus of “Way Maker” is a powerful declaration of God’s attributes. “Way Maker, Miracle Worker, Promise Keeper” highlights His ability to create solutions, perform miracles, and fulfill promises. The line “Light in the darkness, my God, that is who you are” underscores His role as a source of hope and guidance. This uplifting chorus resonates globally, inspiring faith and trust in God’s sovereignty. Its repetition emphasizes His unwavering nature, making it a cornerstone of worship and devotion for millions worldwide. The chorus encapsulates the essence of the song’s message, reinforcing hope and trust in divine providence.

Verse 2: “You Are Here, Working in This Place”

Verse 2 emphasizes God’s active presence and divine intervention. “You are here, working in this place” reflects His ongoing involvement in the lives of believers. The repetition of “I worship you, I worship you” expresses deep reverence and gratitude. This verse highlights the transformative power of God’s presence, inspiring hope and trust in His divine plan. It serves as a reminder of His faithfulness and continuous work in the hearts of His people, making it a vital part of the song’s worship experience. The verse underscores the theme of God’s omnipresence and His ability to bring light and life to all situations.

Downloading “Way Maker Lyrics PDF”

Easily download the “Way Maker Lyrics PDF” from popular platforms for personal use or sharing. Reliable and convenient accessing to easily enhance your worship experience.

Steps to Download the PDF Version

To download the Way Maker Lyrics PDF, visit a reliable platform like Boomplay or GospelDrop. Search for “Sinach Way Maker Lyrics PDF.” Select the desired link, click the download button, and save the file to your device. Ensure compatibility with your viewer. This straightforward process allows quick access for sharing, printing, or personal use. A stable internet connection is required for a seamless download experience, ensuring you have the lyrics ready whenever needed.

Popular Platforms for PDF Downloads

Popular platforms for downloading the Way Maker Lyrics PDF include Boomplay, GospelDrop, and 9jaly.com; These sites offer easy access to the lyrics in PDF format, ensuring quick downloads for sharing or printing. Additionally, platforms like LyricsFever and AmorDesignCo provide digital downloads, including JPG and PDF versions. These platforms are reliable sources, making it convenient for fans to access and enjoy Sinach’s inspiring lyrics offline.

Cultural and Spiritual Impact

Way Maker has become a global phenomenon, transcending cultural boundaries and inspiring millions with its powerful message of hope and faith in God’s divine intervention.

Global Reach and Popularity of the Song

Way Maker has achieved unprecedented global success, becoming the first Nigerian gospel song to reach 100 million YouTube views. Its inspiring lyrics and melody have transcended cultural and linguistic barriers, resonating with millions worldwide. The song has been covered by numerous artists globally, further amplifying its reach. Its multicultural appeal has made it a beloved anthem in many countries, symbolizing faith and hope. This widespread popularity underscores its enduring impact and ability to inspire trust in God’s divine intervention across the world.

Spiritual Significance in Christian Worship

Way Maker holds profound spiritual significance in Christian worship, serving as a powerful anthem of faith and trust in God’s divine intervention. Its lyrics emphasize God’s role as a miracle worker, promise keeper, and light in darkness, resonating deeply with believers seeking comfort and hope. The song is widely used in worship services and personal devotion, fostering a deeper connection with God. Its message of unwavering faith and divine provision has made it a cornerstone in modern Christian worship, inspiring millions to trust in God’s sovereignty and grace.

Covers and Adaptations by Other Artists

Way Maker has inspired countless covers and adaptations worldwide, showcasing its universal appeal. Artists from diverse genres and languages have reinterpreted the song, blending cultural flavors while retaining its spiritual essence. These renditions, from soulful vocals to instrumental arrangements, highlight the song’s versatility and global influence. The adaptability of Way Maker has made it a unifying hymn across cultures, further amplifying its message of hope and faith; Its widespread adoption underscores its enduring impact on Christian music and worship.

Awards and Recognition

Way Maker earned the 2020 Song of the Year at the GMA Dove Awards, solidifying its impact on gospel music and inspiring global recognition of its spiritual message.

Notable Awards Won by “Way Maker”

Way Maker received the prestigious 2020 Song of the Year award at the GMA Dove Awards, marking a historic milestone for Sinach as the first Nigerian to achieve this honor. This recognition underscores the song’s global influence and spiritual depth, celebrating its universal appeal and the hope it inspires. The award highlights Sinach’s contribution to gospel music and solidifies Way Maker’s legacy as a timeless worship anthem.

Impact on the Gospel Music Industry

Way Maker revolutionized gospel music by transcending cultural boundaries, becoming the first Nigerian song to achieve global recognition on such a scale. It inspired countless covers and translations, fostering unity among diverse worshippers. The song’s success paved the way for African gospel artists to gain international acclaim, proving the universal power of faith-based music. Its influence continues to resonate, motivating new generations of gospel musicians and shaping the future of worship music worldwide.

Legal Aspects and Copyright

Way Maker faced legal challenges, including a lawsuit by producer Michael Oluwole, claiming partial ownership and seeking compensation. Copyright disputes underscored the song’s global recognition and commercial value.

Copyright Information and Usage Rights

The lyrics of Way Maker are copyrighted, with ownership attributed to Sinach and her team. A lawsuit filed by producer Michael Oluwole claimed partial ownership, highlighting legal disputes over the song’s rights. Users must ensure they have proper licensing to reproduce or distribute the lyrics, especially in PDF formats. Unauthorized use may infringe on copyright laws, making it essential to verify permissions before sharing or printing the lyrics for public or commercial purposes.

Lawsuit Regarding Song Ownership


Nigerian music producer Michael Oluwole filed a N5 billion lawsuit against Sinach, claiming co-ownership of Way Maker. He alleged significant involvement in the song’s production and demanded compensation. The lawsuit highlights disputes over intellectual property rights and creative contributions. It underscores the importance of clear agreements in music collaborations to avoid legal conflicts over ownership and royalties.

Way Maker is a timeless anthem with a powerful message, inspiring millions globally. Its enduring legacy as a symbol of faith and hope remains unshaken.

Final Thoughts on the Song’s Legacy

Way Maker has left an indelible mark on gospel music, transcending cultural boundaries. Its impactful lyrics and uplifting melody continue to inspire millions, solidifying its place as a modern classic.

Encouragement to Explore More Gospel Music

Exploring more gospel music can deepen your spiritual journey and inspire your soul; After experiencing the powerful message of Way Maker, consider discovering other uplifting songs that share similar themes of hope and faith. Gospel music offers a rich tapestry of heartfelt melodies and meaningful lyrics, providing comfort and strength in everyday life. Let the legacy of Way Maker guide you to explore more works by Sinach and other talented gospel artists, enriching your worship experience.

Guide

sc cdl permit test study guide

Obtaining a South Carolina CDL permit requires passing a written exam covering essential topics like vehicle safety‚ driving laws‚ and endorsements. Preparation with study guides and practice tests ensures success.

Eligibility Requirements for the SC CDL Permit

To apply for the South Carolina CDL permit‚ you must meet specific eligibility criteria. You must be at least 18 years old‚ provide proof of residency‚ and hold a valid driver’s license. A vision test and medical certification are required to ensure you meet DOT standards. Additionally‚ you must pay the application fee and pass a background check for certain endorsements like Hazmat. The permit is valid for 12 months‚ allowing you to practice driving under supervision before taking the skills test. These requirements ensure safety and compliance with federal and state regulations.

Understanding the SC CDL Permit Test Structure

The South Carolina CDL permit test includes a general knowledge exam and specialized endorsement tests. The general knowledge section consists of 50 multiple-choice questions‚ requiring 80% to pass. Additional tests for endorsements like air brakes and combination vehicles are optional‚ based on your desired license class. The test is computer-based and available in English only. Proper preparation ensures a smooth process toward obtaining your CDL permit and advancing to the skills test.

3.1. Written Exam Format and Content

The South Carolina CDL written exam is computer-based‚ consisting of 50 multiple-choice questions. To pass‚ you must answer at least 40 correctly (80%). The exam covers topics from the SC CDL Manual‚ including vehicle safety‚ driving laws‚ and endorsements. The test is available in English only‚ and no notes or materials are permitted. Applicants must be well-prepared‚ as the exam assesses their understanding of critical commercial driving knowledge and regulations. Proper study of the manual and practice tests are essential for success.

3.2. Endorsements and Specialized Tests

Beyond the general knowledge test‚ South Carolina CDL applicants may need specialized endorsements‚ such as Air Brakes‚ Combination Vehicles‚ or Hazmat. Each endorsement requires a separate written test. The Air Brakes test covers braking systems‚ while Combination Vehicles focus on towing trailers safely. Hazmat and Tanker endorsements include handling dangerous materials. These tests ensure drivers are qualified for specific roles. Study materials and practice tests are available for each endorsement‚ helping applicants master the unique requirements and regulations of their chosen specialty. Proper preparation is crucial for passing these additional exams.

Essential Study Materials for the SC CDL Permit

The official South Carolina CDL Manual and online resources provide comprehensive study materials. These tools cover everything needed to understand regulations‚ safety protocols‚ and test formats effectively.

4.1. The Official South Carolina CDL Manual

The official South Carolina CDL Manual is the primary study resource for the permit test. It covers essential topics such as vehicle safety‚ driving laws‚ and endorsements. Updated annually‚ it reflects the latest regulations and exam formats. The manual is available online and at local DMV offices. It includes detailed sections on general knowledge‚ air brakes‚ combination vehicles‚ and specialized endorsements. By studying this guide‚ applicants gain a comprehensive understanding of the material covered on the test‚ ensuring they are well-prepared for both the written and practical exams.

4.2. Online Resources and Study Guides

Supplement your studies with online resources and study guides designed for the South Carolina CDL permit test. Websites like Zutobi offer free practice tests and interactive guides that mimic real exam conditions. Zutobi’s CDL study guide covers essential topics like vehicle safety‚ driving laws‚ and endorsements. EPermitTest provides additional practice tests with real questions from the official manual. These tools help track progress and identify areas needing improvement. Utilizing these resources ensures a comprehensive understanding of the material and boosts confidence for the actual test.

SC CDL Practice Tests and Their Importance

SC CDL practice tests are essential for familiarizing yourself with the exam format and content. They help identify weak areas‚ improve knowledge retention‚ and build confidence for the actual test.

5.1. Free Online Practice Tests

Free online practice tests are a valuable resource for SC CDL permit preparation. These tests mimic the real exam format‚ covering topics like general knowledge‚ air brakes‚ and combination vehicles. Featuring questions directly from the South Carolina CDL Manual‚ they provide realistic scenarios to gauge readiness. Many platforms offer unlimited attempts‚ allowing candidates to track progress and improve weak areas. With immediate feedback and explanations‚ these tests enhance learning efficiency. They are accessible anywhere‚ making them a convenient and effective study tool for achieving success on the actual permit test.

5.2. Simulating Real Test Conditions

Simulating real test conditions helps candidates prepare for the SC CDL permit exam by mirroring the actual testing environment. Online practice tests feature timers‚ question formats‚ and difficulty levels similar to the DMV exam. This approach allows candidates to familiarize themselves with the exam structure‚ reducing anxiety and improving time management. By replicating test conditions‚ candidates can assess their readiness and identify areas needing improvement. Regular practice under these conditions builds confidence and ensures a smoother experience on the actual test day‚ enhancing overall performance and success rates.

Key Topics to Focus On for the General Knowledge Test

The SC CDL general knowledge test covers vehicle safety‚ driving rules‚ and emergency procedures. Mastering these topics ensures a strong foundation for passing the exam successfully.


6.1. Vehicle Safety and Inspection

Vehicular safety and inspection are critical components of the SC CDL permit test. Candidates must understand pre-trip and post-trip inspection procedures‚ identifying defects‚ and ensuring compliance with safety regulations; Topics include checking brakes‚ tires‚ lights‚ and fluid levels. Familiarity with inspection techniques and understanding how to maintain vehicle safety is essential. Practice tests emphasize these areas‚ ensuring drivers can identify potential issues before operation. Regular inspection helps prevent accidents and ensures compliance with federal and state safety standards for commercial vehicles;

6.2. Driving Rules and Regulations

Understanding driving rules and regulations is vital for the SC CDL permit test. Topics include traffic laws‚ speed limits‚ right-of-way rules‚ and restrictions for commercial vehicles; Familiarity with hours of service‚ weight limits‚ and hazardous material transport regulations is also crucial. The South Carolina CDL manual provides detailed information on these topics. Practice tests help reinforce knowledge of specific traffic signs and safe driving practices. Compliance with these regulations ensures safety and avoids penalties‚ making them a key focus for successful test preparation and responsible driving.

6.3; Emergency Procedures and Safety Tips

Emergency preparedness is crucial for CDL holders. The test covers procedures for fires‚ brake failures‚ and skidding; Knowing how to handle emergencies‚ such as using fire extinguishers or securing cargo‚ is essential. Safe practices like maintaining a safe following distance and being aware of vehicle limits are also emphasized. Understanding proper first aid and accident reporting procedures ensures readiness. These safety tips and protocols are detailed in the SC CDL manual and practice tests‚ helping drivers respond confidently in critical situations and prioritize road safety effectively.

Endorsement-Specific Study Guide

The SC CDL permit test includes endorsement-specific sections like Air Brakes‚ Combination Vehicles‚ Hazmat‚ and Tanker. Each requires focused study using specialized resources and practice tests.

7.1. Air Brakes Endorsement

The Air Brakes endorsement is crucial for operating vehicles with air brake systems. The test covers components like compressors‚ brake chambers‚ and safety valves. Proper study includes understanding air pressure measurements‚ brake inspections‚ and emergency procedures. Utilize the official SC CDL manual and online practice tests to master these concepts. Focus on troubleshooting and real-world applications to ensure readiness for the endorsement exam‚ which is essential for certain commercial driving roles in South Carolina.

7.2. Combination Vehicles Endorsement

The Combination Vehicles endorsement is required for drivers operating vehicles with a trailer in tow‚ such as tractor-trailers. The test focuses on coupling and uncoupling procedures‚ handling longer vehicles‚ and safety practices. Key topics include understanding trailer brakes‚ weight distribution‚ and managing the extra length and weight of combination vehicles. Study the SC CDL manual and practice tests to master these concepts. This endorsement is essential for Class A CDLs and ensures drivers can safely operate complex vehicles on the road.

7.3. Hazmat and Tanker Endorsements

The Hazmat and Tanker endorsements require specialized knowledge to transport hazardous materials and liquids safely. The Hazmat endorsement involves understanding regulations‚ handling procedures‚ and emergency protocols for dangerous goods. The Tanker endorsement focuses on the unique challenges of hauling liquids‚ such as surge control and cargo securement. Both endorsements demand thorough preparation using the SC CDL manual and practice tests. These are critical for drivers seeking to transport hazardous materials or operate tanker vehicles‚ ensuring public safety and compliance with federal regulations.

Test-Taking Strategies for Success

Master time management and question-answering techniques to excel. Focus on understanding each query‚ eliminate wrong options‚ and maintain confidence throughout the exam for optimal performance.

8.1. Time Management During the Exam

Effective time management is crucial for success. The South Carolina CDL general knowledge test includes 50 questions‚ requiring at least 40 correct answers to pass (80%). Allocate time wisely‚ skimming through questions to identify easier ones first. Spend no more than 1-2 minutes per question to avoid wasting time. Budget extra minutes for reviewing unanswered or challenging questions. Practice with timed SC CDL practice tests to build speed and confidence. Avoid spending too long on a single question—move forward and revisit it later if time permits.

8.2. How to Approach Multiple-Choice Questions

When tackling multiple-choice questions on the SC CDL permit test‚ read each question carefully and thoroughly. Eliminate obviously incorrect answers first to narrow down your options. If unsure‚ use the process of elimination to make an educated guess. Pay attention to keywords like “always‚” “never‚” or “except‚” as they often indicate the correct answer. Use the practice tests to familiarize yourself with the format and common question patterns. Reviewing explanations for incorrect answers helps improve understanding and reduces errors. Stay calm and methodical to ensure accurate responses.

What Happens After Passing the SC CDL Permit Test

After passing the SC CDL permit test‚ schedule the skills test within 14 days. The permit remains valid for 12 months. Upon passing‚ you receive your full CDL license.

9.1. Scheduling the Skills Test

After passing the SC CDL permit test‚ candidates must wait 14 days before scheduling the skills test. The permit remains valid for 12 months‚ allowing ample time to prepare. The application fee is $15‚ and the 8-year license costs $25. Additional fees apply for endorsements like Hazmat‚ which require TSA clearance. If you fail‚ you can retake the test the next business day. It’s important to review the South Carolina CDL Manual and practice thoroughly before your appointment to ensure success.

9.2. Obtaining the Full CDL License

After passing the skills test‚ applicants must pay the $25 fee for an 8-year CDL license. Endorsement fees are included‚ except Hazmat‚ which requires additional TSA clearance. Ensure all required documents are submitted. The full CDL license is issued upon successful completion of all tests and payment. Carry your CDL while operating a commercial vehicle to comply with South Carolina DMV regulations. This final step completes the process‚ granting legal authorization to drive commercially in the state.

Passing the SC CDL permit test requires consistent study and practice. Use the official South Carolina CDL manual and online resources to master the material. Take advantage of free practice tests to familiarize yourself with the exam format. Focus on understanding key topics like vehicle safety‚ driving laws‚ and endorsements. Manage your time effectively during the test‚ and read each question carefully. Stay calm and confident‚ and review any areas of weakness. By following these tips‚ you’ll be well-prepared to succeed and obtain your CDL permit.

PreviousNext

You Want To Have Your Favorite Car?

We have a big list of modern & classic cars in both used and new categories.