rivets size guide
Rivet Size Guide: A Comprehensive Overview (Updated 05/05/2026)

This guide details rivet specifications‚ including material types‚ head styles‚ and identification codes‚ aiding in proper selection for various applications.
Contact 855-800-8878 for distributor information.

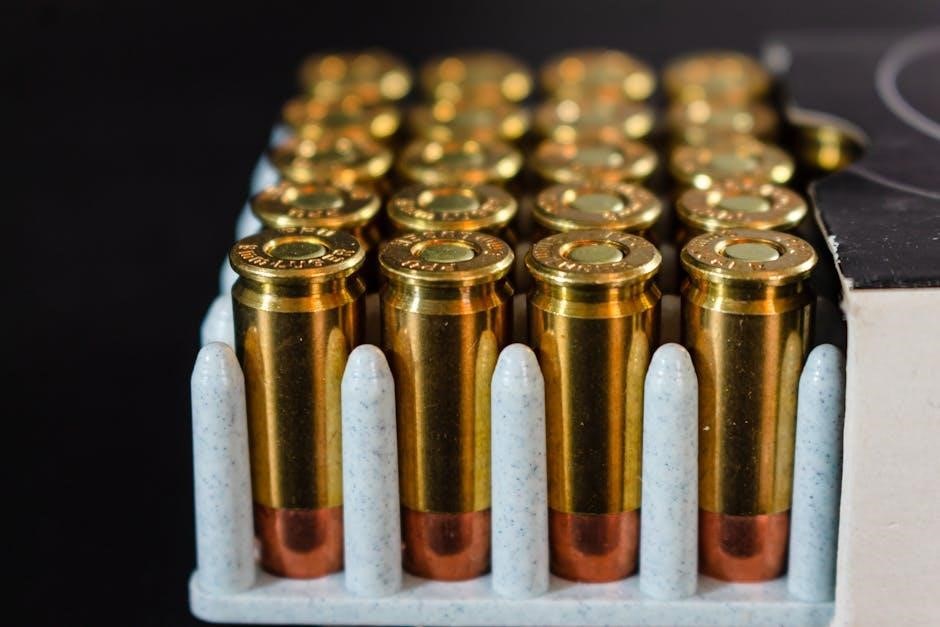
Selecting the correct rivet size is crucial for ensuring a strong‚ reliable‚ and durable joint. Rivets are categorized by diameter‚ length (grip length)‚ and head style‚ each impacting performance. Understanding these parameters prevents failures and maintains structural integrity.
Rivet identification relies on alphanumeric codes specifying material‚ head type‚ diameter‚ and length – for example‚ AN-470-AD-4-8. Proper sizing considers material compatibility‚ load requirements‚ and hole preparation.
Consulting rivet size selection charts and distributor resources (855-800-8878) is recommended for optimal results. Incorrect sizing can lead to loosening‚ shearing‚ or material deformation.
Understanding Rivet Identification Codes
Rivet codes are standardized to communicate critical specifications efficiently. These alphanumeric sequences detail material type‚ head style‚ diameter‚ and length‚ ensuring correct part selection. For instance‚ an “AN” prefix denotes Air Force-Navy specification. The code following‚ like “470‚” identifies the rivet series.
Letters such as “AD” specify the head style (e.g.‚ universal head). Numbers indicate diameter (e.g.‚ 4 for 4/32 inch) and length (e.g.‚ 8 for 8/32 inch).
Decoding these codes‚ as outlined by Jay-Cee Sales and Rivet‚ Inc.‚ is vital for accurate ordering and installation. Contact 855-800-8878 for assistance.
AN Rivet Standards
AN rivets represent a foundational standard developed collaboratively by the Air Force and Navy. These rivets adhere to stringent military specifications‚ ensuring reliability and performance in critical applications. The “AN” designation signifies compliance with these rigorous standards‚ covering material composition‚ dimensional tolerances‚ and mechanical properties.
AN rivets are commonly used in aerospace and defense industries where consistent quality is paramount.
Understanding the specific AN standard applicable to a given application is crucial for proper selection and installation. Refer to detailed specifications and consult with a rivet distributor at 855-800-8878 for guidance.

MS Rivet Standards
MS rivets represent a standard established by the Manufacturers Standardization Scheme‚ focusing on commercial and industrial applications; While often similar to AN rivets‚ MS standards typically offer broader material and dimensional options‚ catering to diverse engineering needs. These rivets prioritize interchangeability and cost-effectiveness without compromising essential performance characteristics.
MS specifications are widely adopted across various sectors‚ including automotive‚ electronics‚ and general manufacturing.
Selecting the appropriate MS rivet involves considering factors like load requirements‚ environmental conditions‚ and compatibility with surrounding materials. For distributor information‚ call 855-800-8878.
NAS Rivet Standards

NAS (National Aerospace Standards) rivets are engineered for demanding aerospace applications‚ prioritizing high strength‚ reliability‚ and fatigue resistance. These standards surpass AN and MS specifications‚ employing stringent quality control measures and specialized materials like high-strength alloys.
NAS rivets are crucial in aircraft construction‚ ensuring structural integrity under extreme conditions. They feature precise dimensional tolerances and consistent performance characteristics.
Selecting NAS rivets requires careful consideration of aircraft specifications and load requirements. Proper installation is paramount for maintaining safety and performance. For distributor details‚ contact 855-800-8878.
Rivet Material Types and Designations
Rivet materials are selected based on strength‚ corrosion resistance‚ and compatibility with joined materials. Common types include aluminum alloys‚ steel‚ and titanium‚ each designated by specific alphanumeric codes.
Aluminum alloy rivets offer a good strength-to-weight ratio and corrosion resistance‚ ideal for many applications. Steel rivets provide high strength and durability‚ suitable for heavier loads. Titanium rivets excel in high-temperature and corrosive environments.
Understanding these designations is crucial for proper rivet selection. Contact 855-800-8878 to find a distributor with the right material for your needs.
Aluminum Alloy Rivets
Aluminum alloy rivets are widely used due to their excellent strength-to-weight ratio and inherent corrosion resistance. These rivets are particularly suitable for applications where minimizing weight is critical‚ such as in aerospace and automotive industries.
Common alloys include 2024‚ 5056‚ and 7075‚ each offering varying levels of strength and corrosion protection. They are generally less expensive than steel or titanium options‚ making them a cost-effective choice for many projects.
For sourcing‚ contact 855-800-8878 to connect with a distributor specializing in aluminum alloy rivets.
Steel Rivets
Steel rivets offer superior strength and durability‚ making them ideal for heavy-duty applications where high load-bearing capacity is essential. Commonly used in structural steelwork‚ shipbuilding‚ and applications requiring exceptional shear strength‚ these rivets provide a robust fastening solution.
Various steel alloys are available‚ including carbon steel and alloy steel‚ each tailored to specific performance requirements. While heavier than aluminum‚ steel rivets excel in demanding environments.

To locate a steel rivet distributor‚ call 855-800-8878 for assistance and product information.
Titanium Rivets
Titanium rivets represent a premium fastening solution‚ combining exceptional strength-to-weight ratio with outstanding corrosion resistance. These rivets are frequently employed in aerospace‚ marine‚ and medical applications where performance and longevity are paramount. Their lightweight nature contributes to overall system efficiency.
Titanium alloys offer excellent resistance to harsh chemicals and extreme temperatures‚ ensuring reliable performance in challenging environments. While more expensive than steel or aluminum‚ the benefits often justify the cost.
For distributor details‚ contact 855-800-8878 to discuss titanium rivet options.
Rivet Head Styles
Rivet head styles are crucial for both functionality and aesthetics‚ influencing the finished appearance and load distribution of a joint. Common styles include Universal‚ Countersunk‚ and Button heads‚ each suited for specific applications.
Universal head rivets offer a broad bearing surface‚ ideal for general-purpose fastening. Countersunk heads create a flush finish‚ minimizing aerodynamic drag or snagging hazards. Button heads provide a low-profile‚ decorative appearance.
Selecting the correct head style ensures optimal performance and a professional result. For further assistance‚ call 855-800-8878.

Universal Head Rivets
Universal head rivets are a versatile fastening solution‚ characterized by their slightly rounded‚ protruding head shape. This design provides a large bearing surface‚ distributing load effectively across the joined materials. They are widely used in general assembly applications where a flush finish isn’t critical.
These rivets are known for their ease of installation and reliability‚ making them a popular choice across various industries. Their robust construction ensures a strong and durable joint. For distributor information‚ contact 855-800-8878.
Countersunk Head Rivets
Countersunk head rivets‚ also known as flush rivets‚ are designed with a conical head that sits flush with the surface of the joined materials. This creates a smooth‚ aerodynamic finish‚ crucial in applications where minimizing drag or maintaining a clean aesthetic is paramount. They are frequently used in aircraft construction and sheet metal work.
Installation requires precise countersinking of the hole to ensure a proper fit. These rivets offer a strong‚ reliable fastening solution when a flush profile is required. For distributor details‚ call 855-800-8878.
Button Head Rivets

Button head rivets feature a large‚ rounded head that provides a distinctive and often decorative appearance. While not flush‚ their broad bearing surface distributes load effectively‚ making them suitable for applications where a strong‚ visible fastener is acceptable. They are commonly found in upholstery‚ leatherwork‚ and general fabrication.

These rivets are relatively easy to install and offer good resistance to loosening. The prominent head can also serve as a visual indicator of a properly installed fastener. For distributor information and size selection‚ contact 855-800-8878.
Rivet Diameter Measurement
Accurate rivet diameter measurement is crucial for ensuring a secure and properly fitted joint. Rivet diameter directly impacts shear strength and the required hole size. Measurements are typically specified in fractions of an inch or millimeters‚ and are a key component of the alphanumeric rivet code.
Selecting the correct diameter prevents issues like loose fits or excessive stress on the material. Determining the appropriate hole size is directly related to the rivet diameter; a precise match is essential for optimal performance. For assistance with size selection‚ call 855-800-8878.
Determining Rivet Hole Size
Proper rivet hole size is paramount for a strong‚ reliable fastening solution. The hole diameter must accommodate the rivet shank while allowing for sufficient interference to create a secure clamp. Generally‚ the hole size is slightly larger than the rivet’s solid shank diameter‚ enabling proper upset and forming of the rivet head.
Incorrect hole sizing – too small‚ and the rivet won’t install; too large‚ and the joint will be weak. Refer to rivet specification charts for precise hole size recommendations. For distributor information and assistance‚ contact 855-800-8878.
Diameter and Shear Strength Correlation
Rivet diameter directly impacts shear strength‚ a critical factor in joint reliability. Larger diameter rivets inherently possess greater shear strength due to increased material cross-section resisting shear forces. Selecting the appropriate diameter requires careful consideration of the anticipated loads and stresses the joint will endure during service.
Consult rivet size selection charts to determine the shear strength values for specific rivet types and diameters. Proper diameter selection ensures the joint can withstand operational demands. For distributor details‚ call 855-800-8878.
Rivet Length Determination
Accurate rivet length is crucial for a secure and properly formed joint. Determining the correct length involves calculating the ‘grip length’ – the combined thickness of the materials being joined‚ plus allowances for rivet head height and proper upset (forming) during installation. Insufficient length results in a weak joint‚ while excessive length can lead to improper forming and reduced strength.
Factors like material ductility and rivet head style influence length selection. For distributor information and size selection charts‚ contact 855-800-8878 to ensure optimal performance.
Calculating Grip Length
Grip length calculation begins by precisely measuring the total thickness of all materials intended for joining. This measurement represents the minimum rivet length required. However‚ a crucial addition must be made to accommodate the rivet head and the necessary upset during installation‚ ensuring a strong‚ mechanically locked joint.
Typically‚ an allowance of approximately 1.5 to 2 times the rivet diameter is added to the material thickness. For precise specifications and distributor details‚ reach out to 855-800-8878.
Factors Affecting Length Selection
Several factors influence optimal rivet length‚ beyond simply material thickness. The chosen rivet head style – universal‚ countersunk‚ or button – impacts the required length due to differing head heights. Material properties also play a role; softer materials necessitate longer rivets for adequate upset.
Furthermore‚ consider the application’s shear load requirements. Higher loads demand increased rivet length for enhanced strength. For detailed guidance and distributor information‚ contact 855-800-8878 to ensure proper selection and a secure‚ lasting joint.

Rivet Markings and Codes Explained
Rivet codes are crucial for identification‚ specifying material‚ head type‚ diameter‚ and industry standards. An example‚ AN-470-AD-4-8‚ reveals key details. These alphanumeric codes ensure correct part selection and compatibility. Understanding these markings is vital for maintaining structural integrity and adhering to specifications.
Manufacturer-specific markings may supplement standard codes‚ providing additional traceability. For a comprehensive Rivet Identification Chart and distributor information‚ call 855-800-8878. Proper decoding guarantees the right rivet for your application.
Decoding Alphanumeric Rivet Codes
Alphanumeric rivet codes offer a structured system for identifying rivet characteristics. The code‚ like AN-470-AD-4-8‚ breaks down into segments. “AN” denotes the standard‚ “470” the head style and material‚ “AD” the finish‚ “4” the diameter (in eighths of an inch)‚ and “8” the length.
Accurate interpretation is essential for selecting the correct rivet. Referencing a Rivet Identification Chart is highly recommended. For assistance and distributor details‚ contact 855-800-8878. Mastering this code system ensures proper component matching and reliable performance.
Manufacturer Specific Markings
Beyond standardized codes‚ manufacturers often add unique markings to rivets for traceability and quality control. These markings can indicate batch numbers‚ specific alloy compositions‚ or internal inspection data. While not universally defined‚ these additions provide valuable information for verifying rivet origin and adherence to specific production standards.
Consulting the manufacturer’s documentation is crucial for understanding these specific codes. For assistance locating a distributor or further clarification on rivet specifications‚ please call 855-800-8878. Proper identification ensures component integrity.
Rivet Size Selection Charts
Accurate rivet size selection is paramount for joint strength and reliability. Charts correlate rivet diameter‚ grip length‚ and shear strength based on material type and application requirements. These resources simplify the process of choosing the appropriate rivet for specific load-bearing scenarios‚ ensuring optimal performance and preventing premature failure.
For detailed charts and assistance in finding a distributor‚ contact us at 855-800-8878. Utilizing these charts guarantees a secure and durable fastening solution‚ tailored to your project’s unique demands.
Rivet Shear Strength and Load Capacity
Rivet shear strength is a critical factor in structural integrity‚ defining the maximum force a rivet can withstand before failure. Load capacity varies significantly based on rivet material (aluminum‚ steel‚ titanium)‚ diameter‚ and head style. Understanding these parameters is essential for engineers and technicians.
Proper rivet selection ensures joints can reliably bear anticipated loads. Charts and specifications detail these values; for distributor information and assistance‚ call 855-800-8878. Accurate assessment prevents catastrophic failures and maintains safety.
Industry Specifications and Standards
Adhering to industry standards is paramount for rivet quality and performance. Key specifications include AMS (Aerospace Material Specification) and MIL-SPEC (Military Specification) standards‚ ensuring rivets meet rigorous testing and material requirements. These standards dictate material composition‚ manufacturing processes‚ and quality control measures.
Compliance guarantees reliability and interchangeability. Understanding these specifications is crucial for aerospace‚ defense‚ and other critical applications. For detailed information and distributor access‚ contact 855-800-8878. Proper specification selection ensures structural integrity and safety.
AMS (Aerospace Material Specification) Standards
AMS standards define the characteristics of aerospace materials‚ including rivets‚ ensuring consistent quality and performance. These specifications cover chemical composition‚ mechanical properties‚ and manufacturing processes. Compliance with AMS standards is vital for components used in aircraft and spacecraft construction‚ guaranteeing reliability in demanding environments.
Specific AMS documents detail requirements for various rivet materials and types. Utilizing AMS-compliant rivets is crucial for maintaining airworthiness and safety. For detailed information regarding specific AMS standards and distributor access‚ contact 855-800-8878.
MIL-SPEC (Military Specification) Standards
MIL-SPEC standards‚ developed by the U.S. Department of Defense‚ establish rigorous requirements for materials and components used in military applications‚ including rivets. These specifications ensure durability‚ reliability‚ and performance under extreme conditions. Adherence to MIL-SPEC is critical for defense contractors and suppliers.
Rivets meeting MIL-SPEC standards undergo extensive testing and quality control. Utilizing these rivets guarantees suitability for demanding military environments. For detailed information regarding specific MIL-SPEC standards and distributor access‚ contact 855-800-8878 to find a reliable supplier.
Finding a Rivet Distributor
Locating a reputable rivet distributor is crucial for sourcing high-quality fasteners and receiving expert guidance. A reliable distributor offers a wide selection of rivet types‚ materials‚ and sizes to meet diverse application needs. They also provide technical support and assistance with rivet selection.
To connect with a distributor specializing in rivets‚ a convenient option is to call 855-800-8878. Alternatively‚ visiting their website can provide access to comprehensive product catalogs and detailed specifications. Ensure the distributor carries certifications and adheres to industry standards.
Troubleshooting Rivet Installation Issues
Common installation problems include improper hole preparation‚ insufficient clamping force‚ and incorrect rivet selection. Issues like sticking‚ spinning‚ or incomplete setting can indicate these errors. Verify the hole diameter matches the rivet size‚ and ensure proper tool functionality.
If encountering email issues – sending or receiving failures – attempt recovery from a known device. Utilize a connected Microsoft account email for assistance. For rivet concerns‚ double-check material compatibility and follow manufacturer guidelines. Consistent issues may require professional evaluation.